TL;DR:
Scripted away Clonezilla interactions to blindly backup and then restore Proxmox VE disk image, as wanted to move Ryzen 5850X PVE node onto faster NVMe SSD in an automated way.
I can finally get to compiling that KVM-enabled LineageOS kernel for the coming post.
There will be plenty of screenshots, but they are stashed at the end.
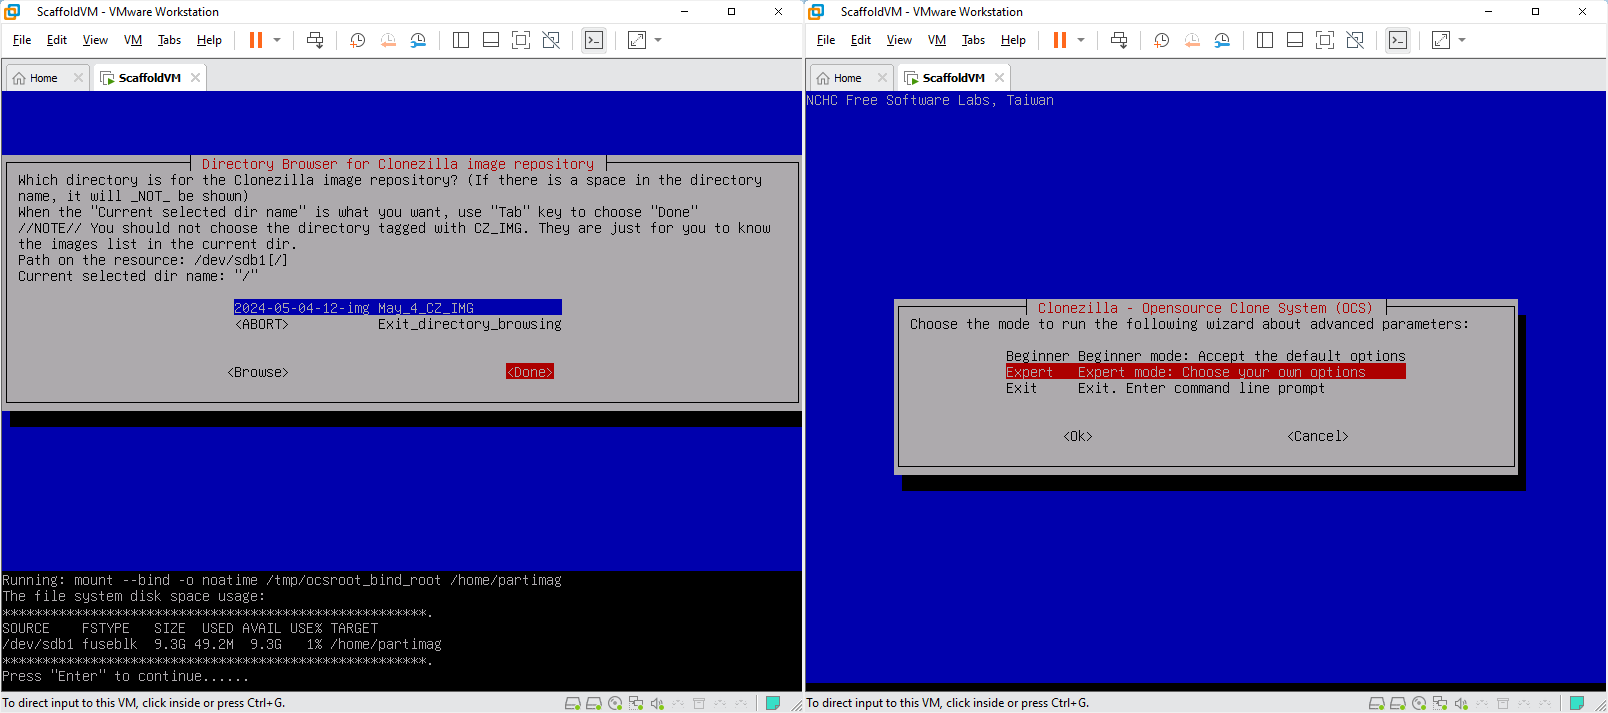
Acquiring ocs-sr commands
Clonezilla has ocs-sr programme to do its bidding. By default users
interact with the Clonezilla TUI to provide their desired operation.
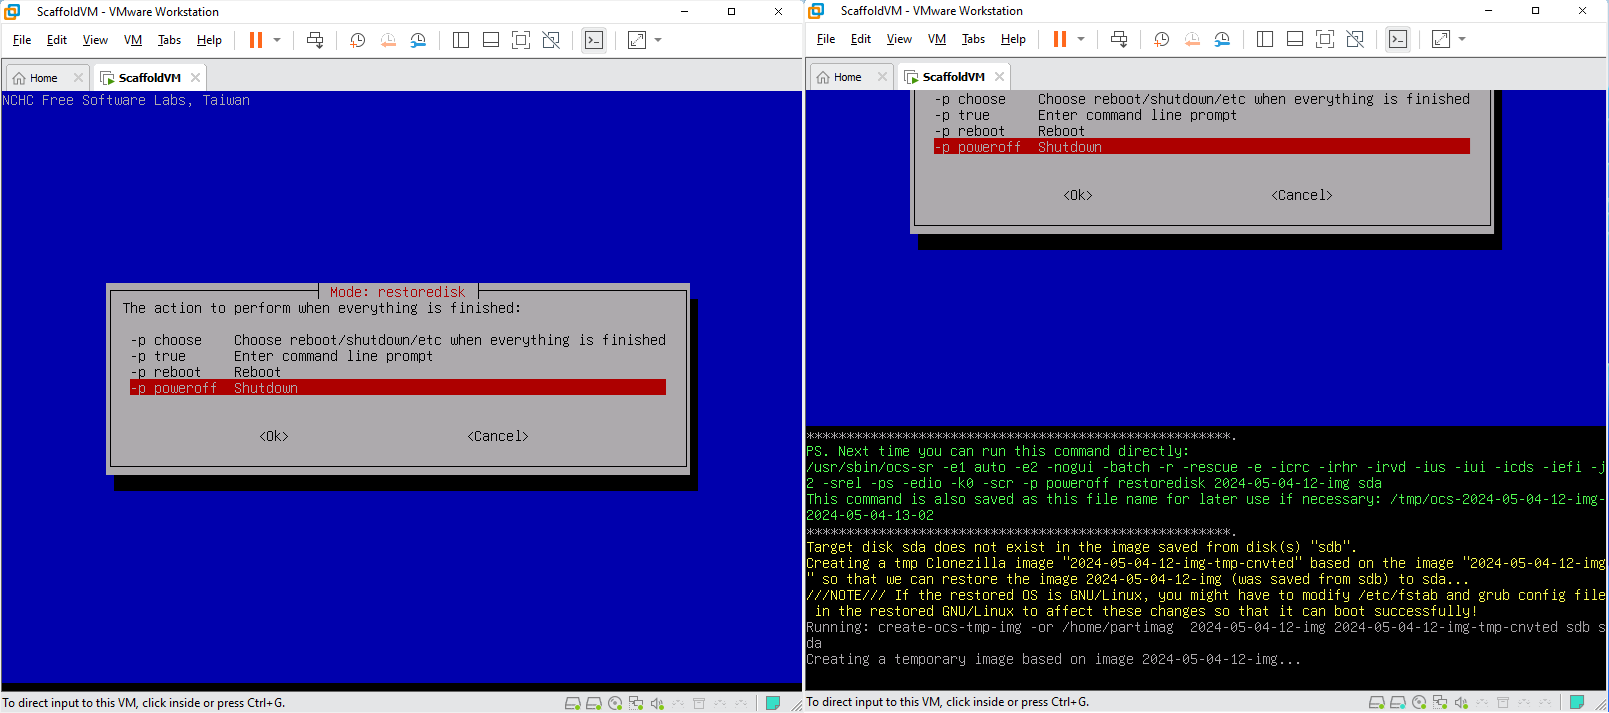
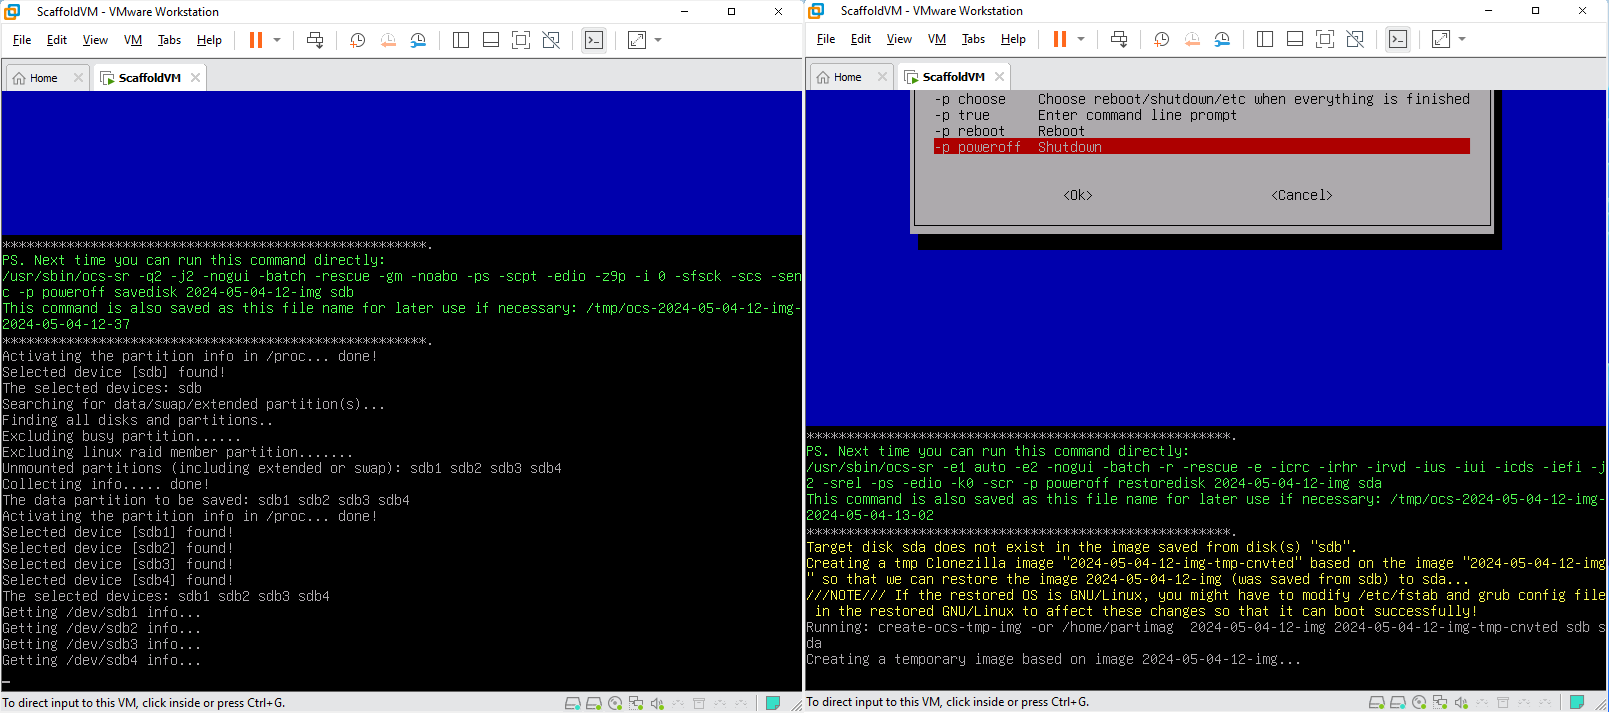
However, with the correct set of arguments, it can be automated (batch mode). Parameters are listed online, moreover, the programme prints them out prior to starting the provided task in green, such that it can be excracted by TUI. Take a recording though, it scrolls up pretty fast.
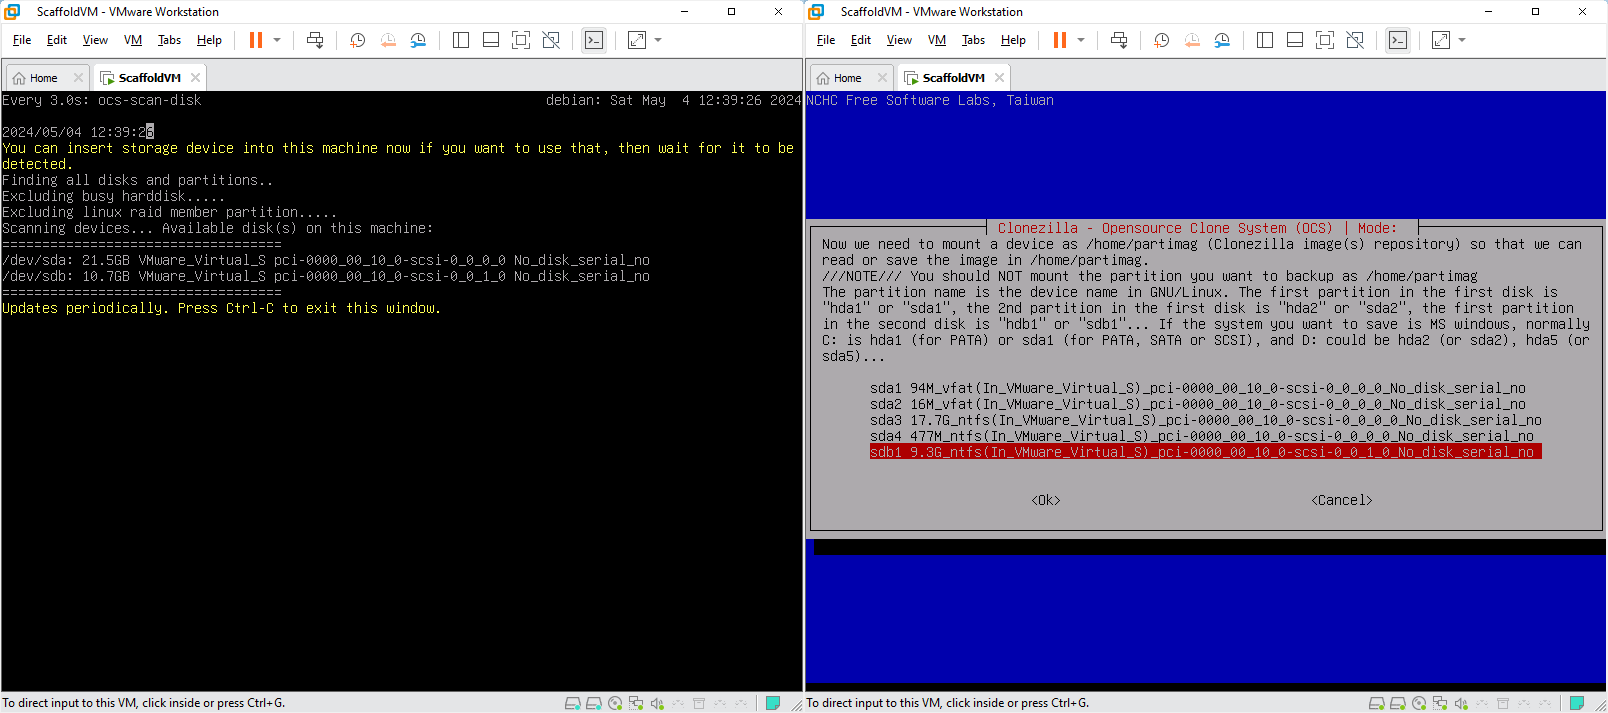
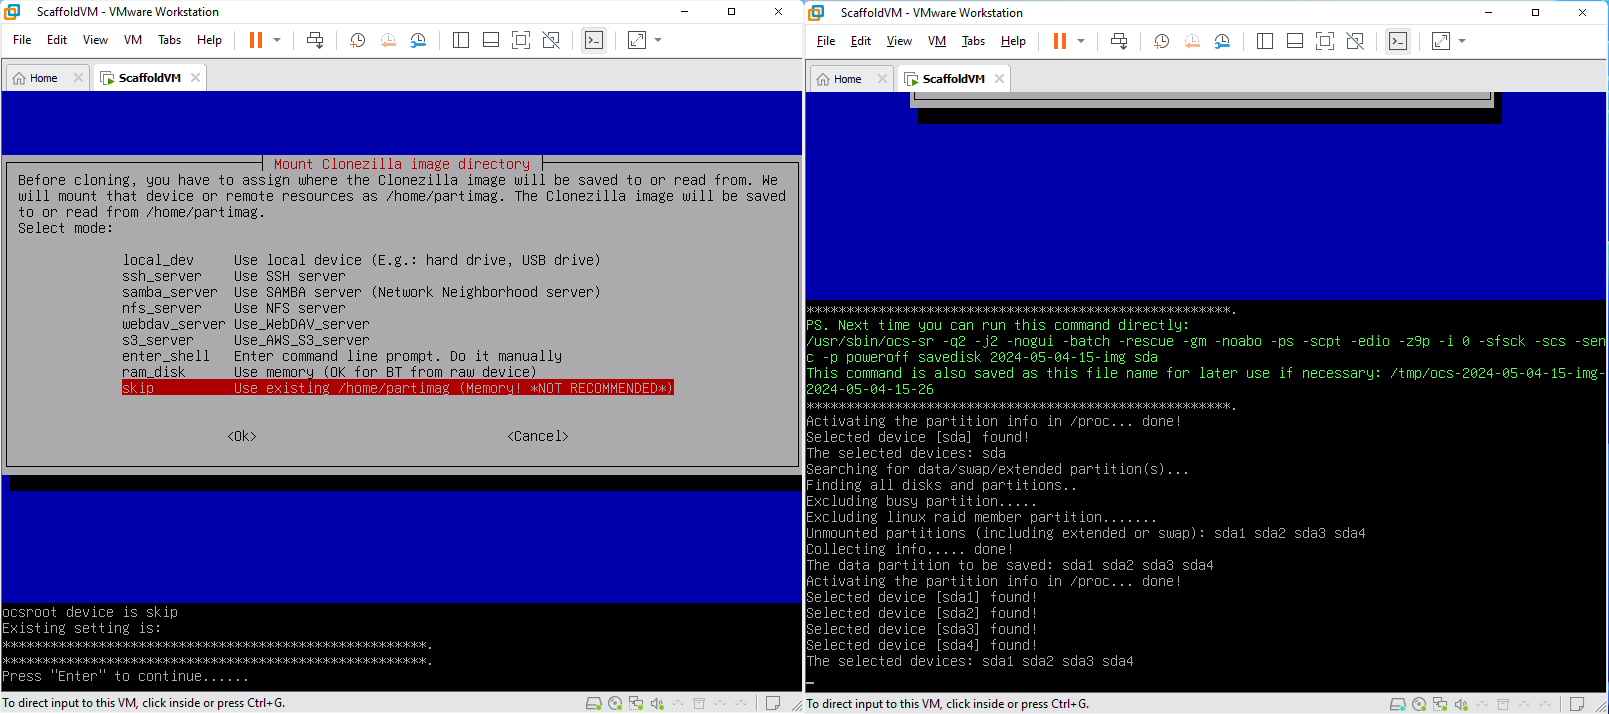
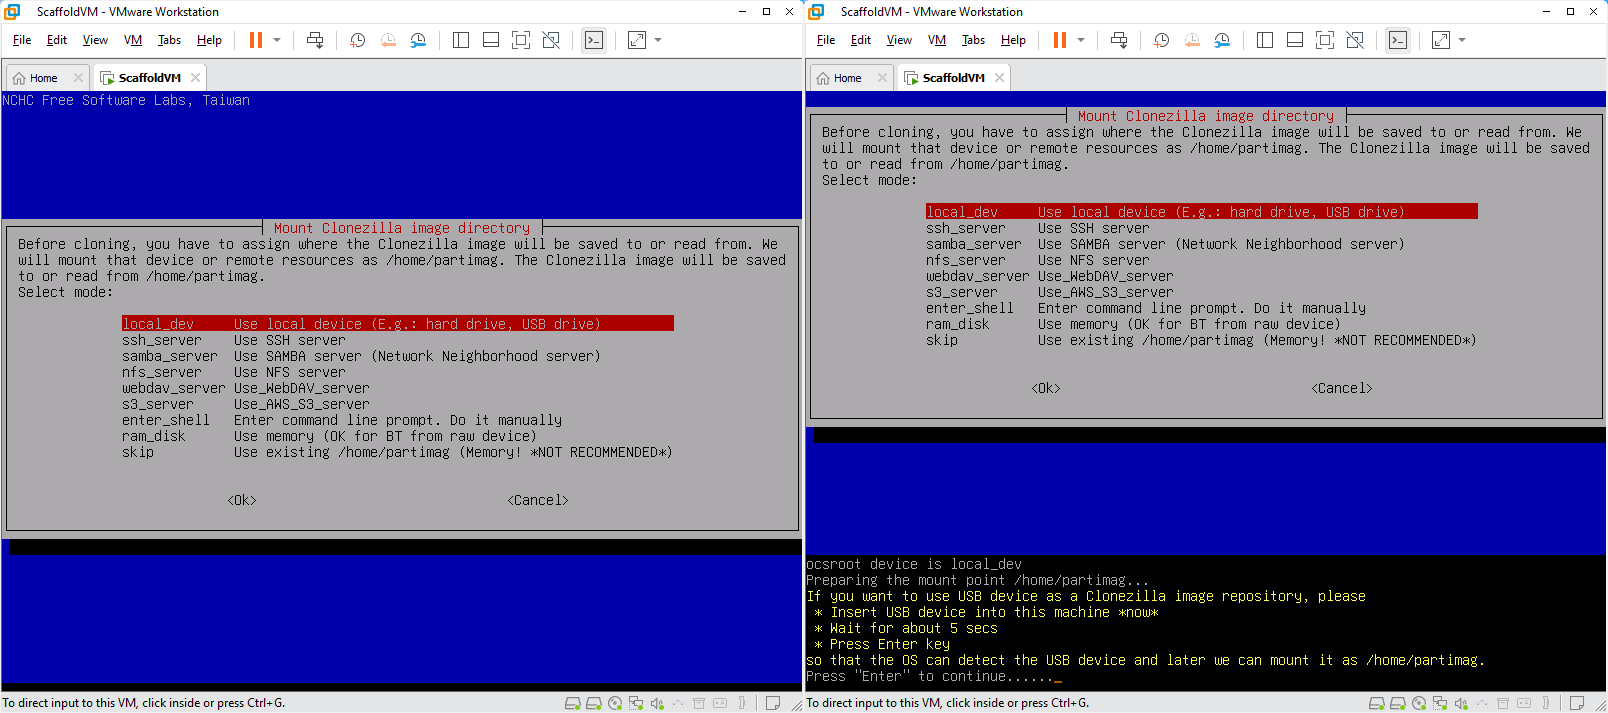
Below is a manual disk mount example, which ends up producing the same
arguments. So disk mount can be integrated to prerun.
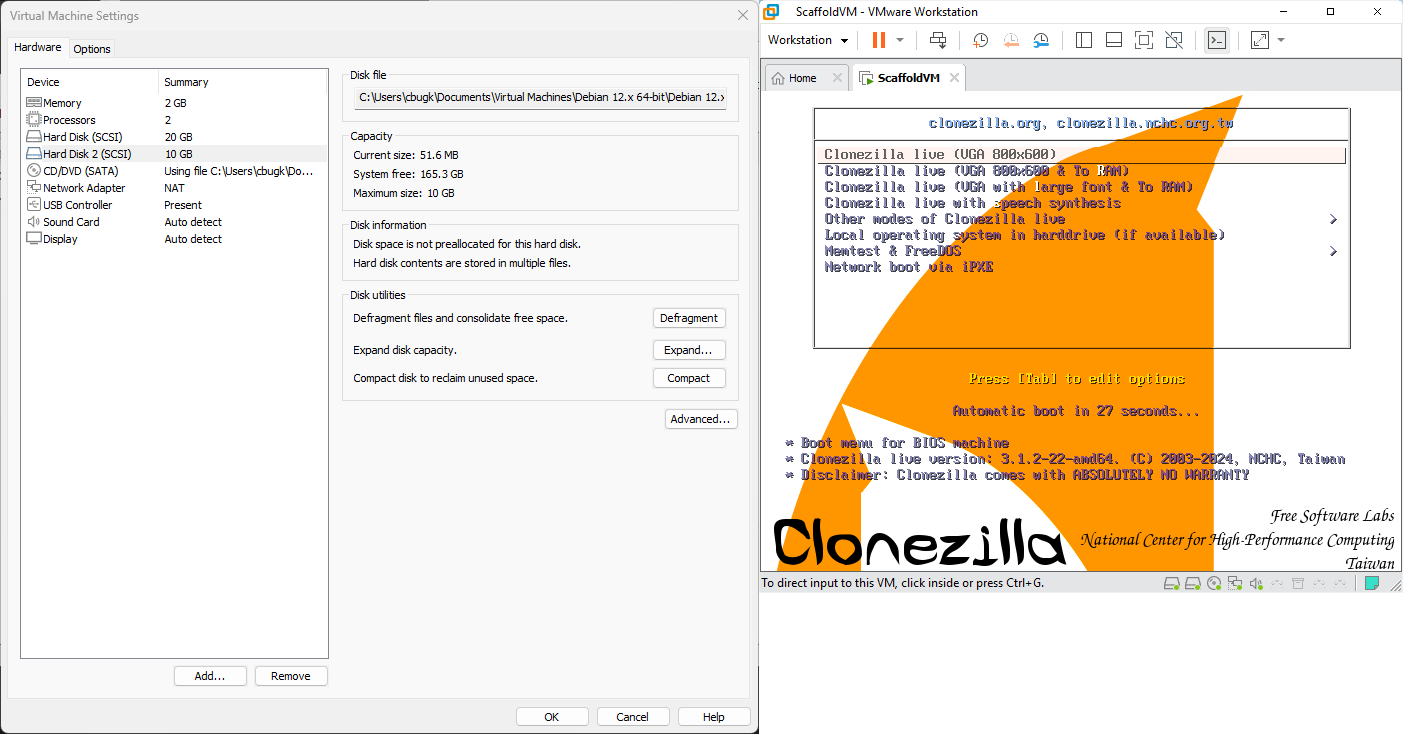
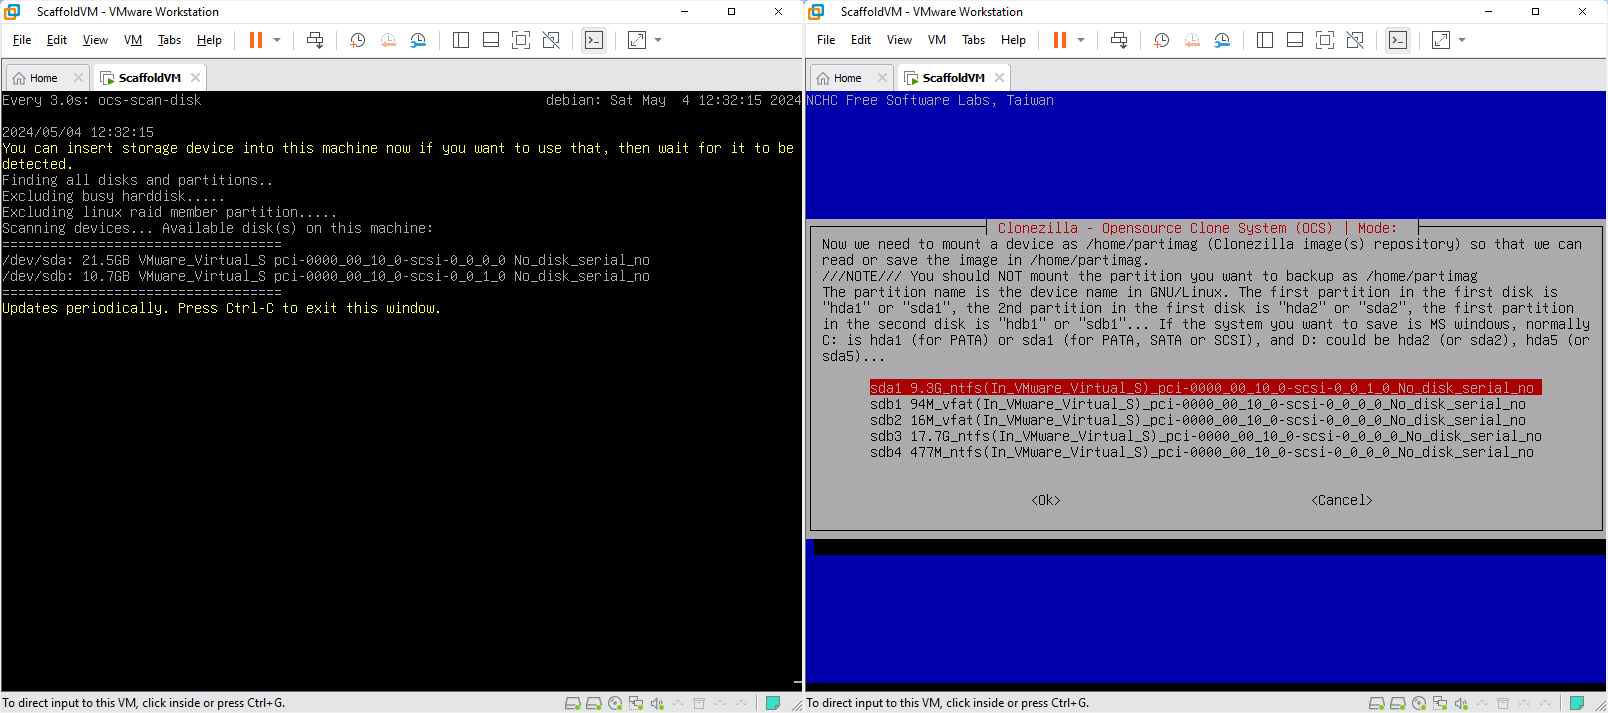
For the above exracts, I created a dummy VM in Workstation Pro 17. Any
virtual or bare-metal machine would do. Populated the VM with 2 disks and
then formatted the fresh disks with parted, mkfs.vfat, and
mkfs.ntfs. The second disk is necessary to be able to run restore scenario.
Normally the USB thumbdrive would be at /dev/sdX most likely sda, since
system disk is an NVMe SSD at /dev/nvme0n1 for my case.
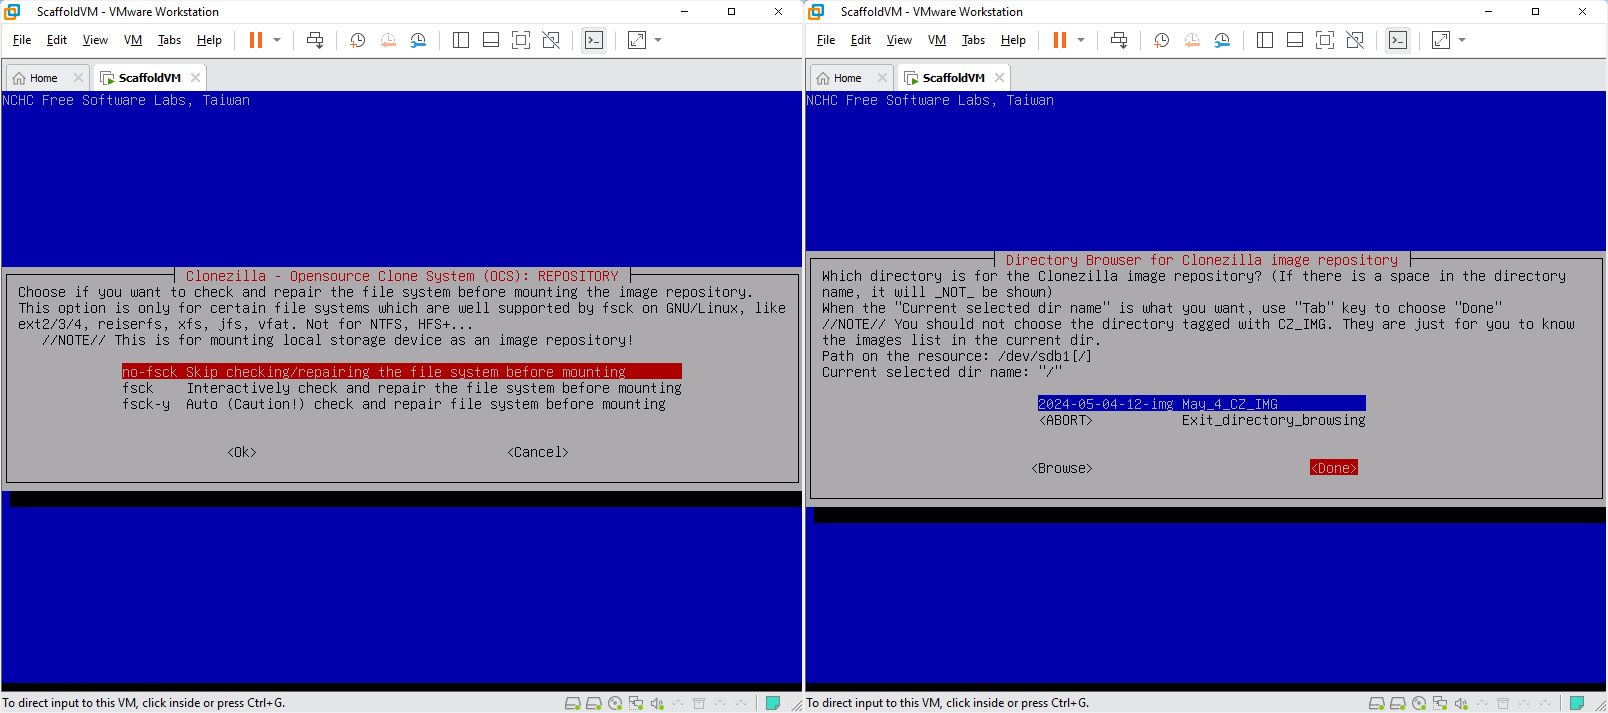
However, since I have varying number of CEPH disks on different nodes,
I decided on using mount /dev/disk/by-id/CZDATA <dest_path>. That way, any
partition with proper label can flexibly be used without config change or
strange assumptions. I know it is daring to assume partition labels, but
my case is a controlled environment anyway.
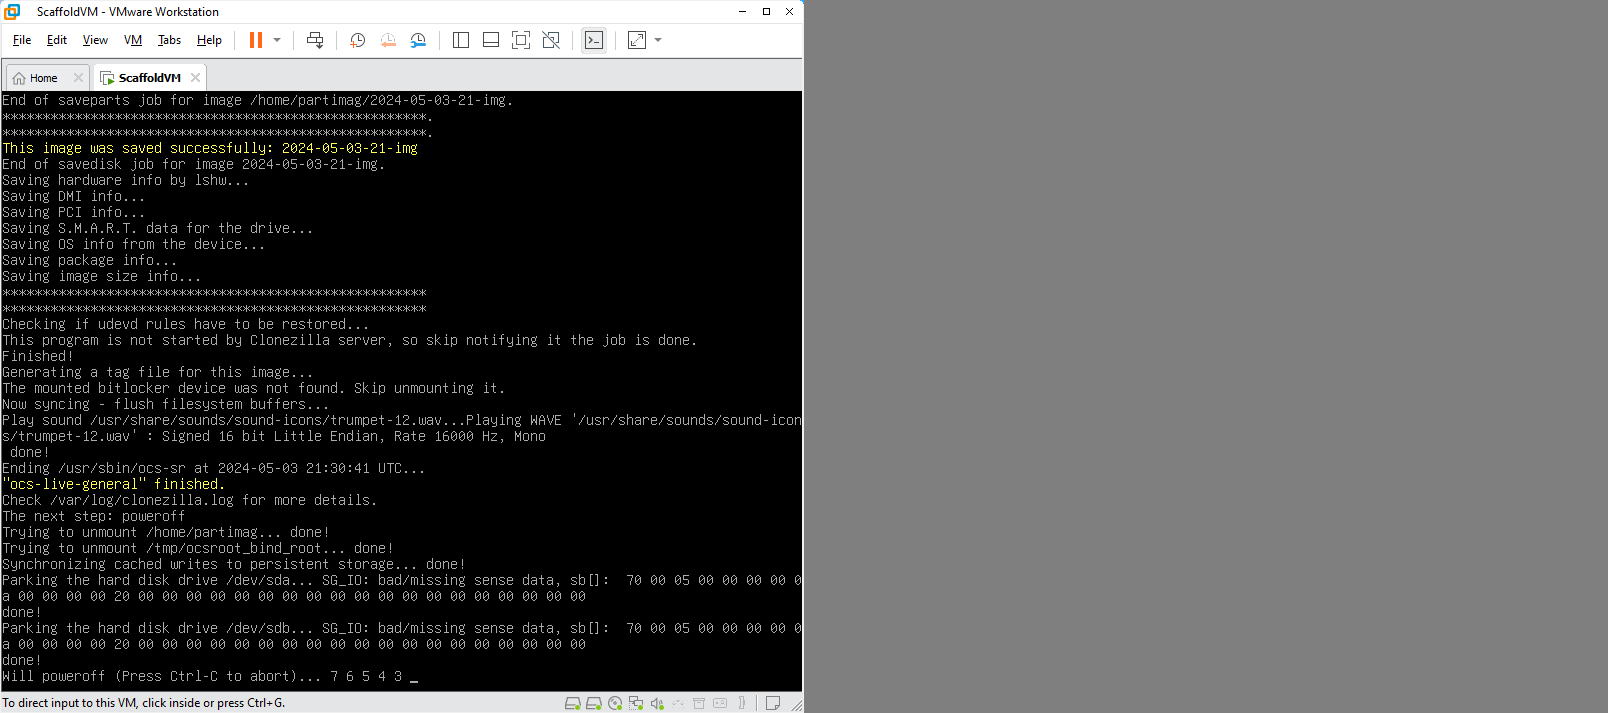
Mind that renaming timestamped images meaningfully before long and checking their integrity is a must. I excluded checks to incur less outage on the hypervisor. Clonezilla can be installed on desktop Linuxes, so WSL2 as well.
This approach might be converted to a headless machine cloner even, by setting a timeout period based on ordinary imaging operation observations. Too much speculation, let’s get going.
Clonezilla Bootable USB Drive
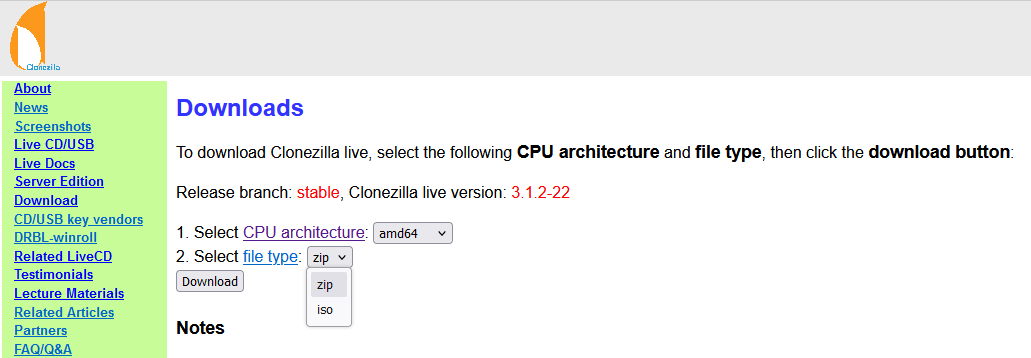
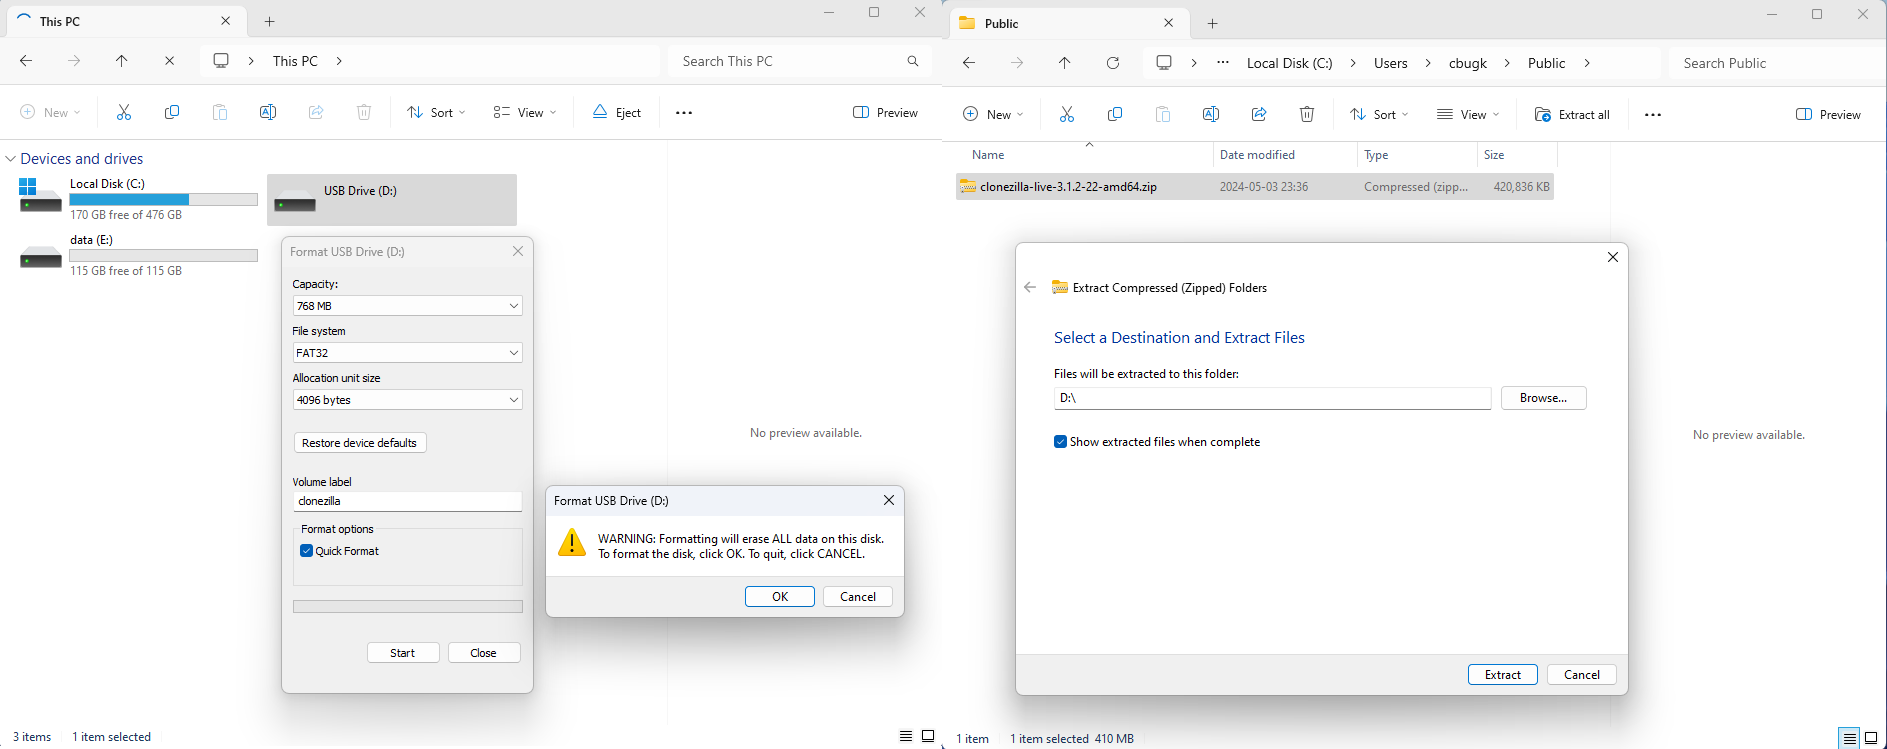
Download zip file, extract onto bootable partition and customize. ISO file is
optional for exracting ocs-sr commands from a manual run first.
Next, create a bootable FAT32 partition. This is frankly an ESP (EFI System Partition), where zip’s content will be extracted. 768 MB is spacious enough. Fill the rest of USB thumbdrive with a NTFS partition named data.
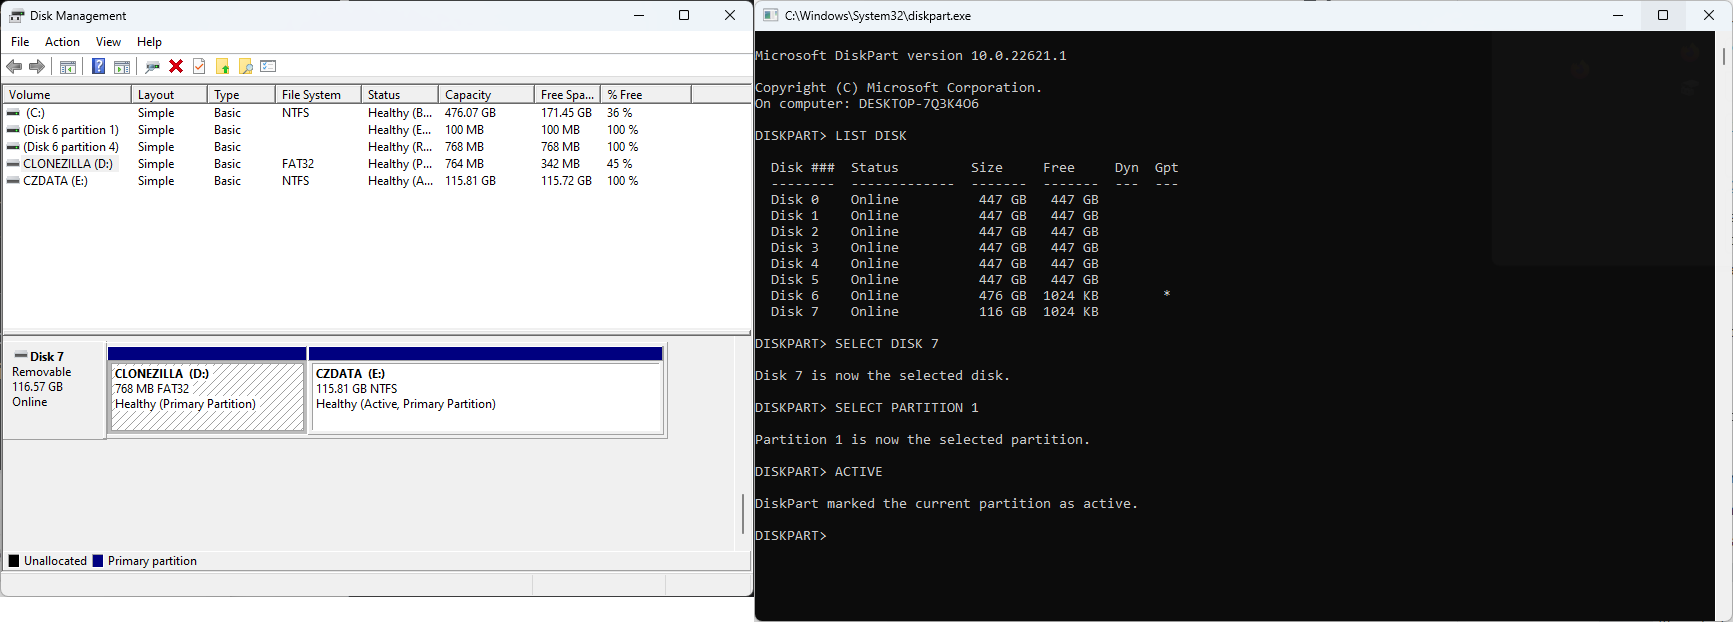
Instead of making partition active with diskpart, parted/Gparted can be used on Linux to enable partition’s bootable flag.
After the operation, first partition needs to be reformatted. Then extract zip into first partition:
Or alternatively utils/win64/makeboot64.bat or utils/linux/makeboot.sh can
be used on the USB drive itself. These scripts are provided by Clonezilla zip
itself. This is less invasive as no remormat is required.
##Unattended Savedisk/Restoredisk Entries
I HIGHLY RECOMMEND that you get accustomed to the tool before trying anything risky. BE WARNED, this may cause DATA LOSS. Just perform a test run with every hardware change with proper backups. While at it let me throw Apache-2.0 as the license.
For my homelab, I am looking for an excuse to redo the whole thing anyway, off I go!
Clonezilla makes use of syslinux on Legacy/CSM/‘BIOS’ boot and of GNU on EFI/‘UEFI’ boot. My setup is BIOS currently, however, both have been applied.
My sources for: ocs boot parameters, mounting disk by label, ocs-sr.
Having acquired the full command to run, I simply edited
syslinux/syslinux.cfg to set following as kernel arameters under respective
menu entries:
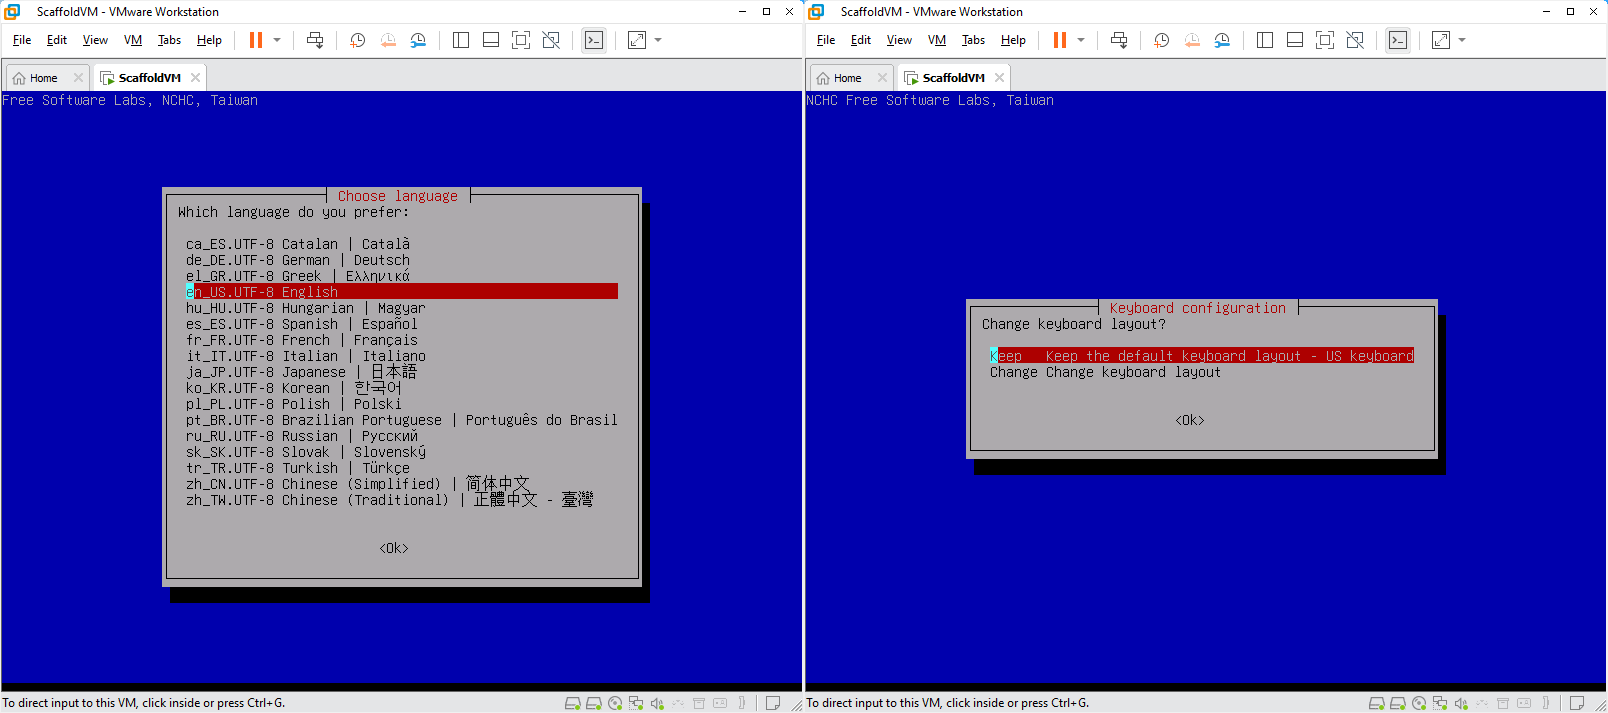
- language
- keyboard layout
- command to execute (refers to scripts below)
- batch mode enabled
- changed timeout to 5 seconds
- ensured savedisk was the default behaviour
locales=en_US.UTF-8 keyboard-layouts=us ocs_prerun="sudo bash < <(tr -d '\r' < /run/live/medium/cbugk/prerun.sh)" ocs_live_run="sudo bash < <(tr -d '\r' < /run/live/medium/cbugk/savedisk.sh)" ocs_live_extra_param="" ocs_postrun="sudo bash < <(tr -d '\r' < /run/live/medium/cbugk/postrun.sh)" ocs_live_batch="yes"
/run/live/mediumis where ESP is mounted (read-only) on the system
Trivia on above redirections:
- first
<is file redirection to commandsudo bash <( )is process substitution, redirects stdout of command it contains into a file descriptor (read: a temporary file)tr -d '\r' < some_filesubstitudes$'\r'with empty space, so removes return carriages on the output. Does not affect original file. This is necessary as I edited files on Windows Notepad.
So a file is streamed with modifications into an intermediary file, which then is passed to a command. Piping a file, cool!
Syslinux syslinux/syslinux.cfg
Set a shorter timeout:
timeout 50
Prepend custom entries to the top of entries:
label CBUGK Savedisk nvme0n1 Timestamped
  MENU DEFAULT
  # MENU HIDE
  MENU LABEL CBUGK Savedisk nvme0n1 Timestamped (VGA 800x600)
  # MENU PASSWD
  kernel /live/vmlinuz
  append initrd=/live/initrd.img boot=live union=overlay username=user config components quiet loglevel=0 noswap edd=on nomodeset enforcing=0 noeject locales=en_US.UTF-8 keyboard-layouts=us ocs_prerun="sudo bash < <(tr -d '\r' < /run/live/medium/cbugk/prerun.sh)" ocs_live_run="sudo bash < <(tr -d '\r' < /run/live/medium/cbugk/savedisk.sh)" ocs_live_extra_param="" ocs_postrun="sudo bash < <(tr -d '\r' < /run/live/medium/cbugk/postrun.sh)" ocs_live_batch="yes" vga=788 net.ifnames=0  nosplash i915.blacklist=yes radeonhd.blacklist=yes nouveau.blacklist=yes vmwgfx.enable_fbdev=1
  TEXT HELP
  * Boot menu for BIOS machine
  * Clonezilla live version: 3.1.2-22-amd64. (C) 2003-2024, NCHC, Taiwan
  * Disclaimer: Clonezilla comes with ABSOLUTELY NO WARRANTY
  ENDTEXT

label CBUGK Restoredisk nvme0n1 Latest
  # MENU DEFAULT
  # MENU HIDE
  MENU LABEL CBUGK Restoredisk nvme0n1 Latest (VGA 800x600)
  # MENU PASSWD
  kernel /live/vmlinuz
  append initrd=/live/initrd.img boot=live union=overlay username=user config components quiet loglevel=0 noswap edd=on nomodeset enforcing=0 noeject locales=en_US.UTF-8 keyboard-layouts=us ocs_prerun="sudo bash < <(tr -d '\r' < /run/live/medium/cbugk/prerun.sh)" ocs_live_run="sudo bash < <(tr -d '\r' < /run/live/medium/cbugk/restoredisk.sh)" ocs_live_extra_param="" ocs_postrun="sudo bash < <(tr -d '\r' < /run/live/medium/cbugk/postrun.sh)" ocs_live_batch="yes" vga=788 net.ifnames=0  nosplash i915.blacklist=yes radeonhd.blacklist=yes nouveau.blacklist=yes vmwgfx.enable_fbdev=1
  TEXT HELP
  * Boot menu for BIOS machine
  * Clonezilla live version: 3.1.2-22-amd64. (C) 2003-2024, NCHC, Taiwan
  * Disclaimer: Clonezilla comes with ABSOLUTELY NO WARRANTY
  ENDTEXT
Comment out previous default entry:
label Clonezilla live
  # MENU DEFAULT
Notice the
MENU DEFAULTselection to custom savedisk. Unless it is a dedicated USB drive, do not set restoredisk as default. Otherwise it is a ticking data bomb.
GRUB boot/grub/grub.cfg
-
Set a shorter timeout:
set timeout="5" -
Prepend custom entries to the top of entries:
menuentry "CBUGK Savedisk nvme0n1 Timestamped (VGA 800x600)" --id live-default { search --set -f /live/vmlinuz $linux_cmd /live/vmlinuz boot=live union=overlay username=user config components quiet loglevel=0 noswap edd=on nomodeset enforcing=0 noeject locales=en_US.UTF-8 keyboard-layouts=us ocs_prerun="sudo bash < <(tr -d '\r' < /run/live/medium/cbugk/prerun.sh)" ocs_live_run="sudo bash < <(tr -d '\r' < /run/live/medium/cbugk/savedisk.sh)" ocs_live_extra_param="" ocs_postrun="sudo bash < <(tr -d '\r' < /run/live/medium/cbugk/postrun.sh)" ocs_live_batch="yes" vga=788 net.ifnames=0 nosplash i915.blacklist=yes radeonhd.blacklist=yes nouveau.blacklist=yes vmwgfx.enable_fbdev=1 $initrd_cmd /live/initrd.img } menuentry "CBUGK Restoredisk nvme0n1 Latest (VGA 800x600)" { search --set -f /live/vmlinuz $linux_cmd /live/vmlinuz boot=live union=overlay username=user config components quiet loglevel=0 noswap edd=on nomodeset enforcing=0 noeject locales=en_US.UTF-8 keyboard-layouts=us ocs_prerun="sudo bash < <(tr -d '\r' < /run/live/medium/cbugk/prerun.sh)" ocs_live_run="sudo bash < <(tr -d '\r' < /run/live/medium/cbugk/restoredisk.sh)" ocs_live_extra_param="" ocs_postrun="sudo bash < <(tr -d '\r' < /run/live/medium/cbugk/postrun.sh)" ocs_live_batch="yes" vga=788 net.ifnames=0 nosplash i915.blacklist=yes radeonhd.blacklist=yes nouveau.blacklist=yes vmwgfx.enable_fbdev=1 $initrd_cmd /live/initrd.img } -
Delete previous defaults id (
--id live-default):menuentry "Clonezilla live (VGA 800x600)" {
Due
set default="0"at the top, custom savedisk is default entry. Unless it is a dedicated USB drive, do not set restoredisk as default. Otherwise it is a ticking data bomb.
Script directory cbugk/
Scripts are to be run privileged.
prerun.sh:
|
|
postrun.sh:
|
|
savedisk.sh:
|
|
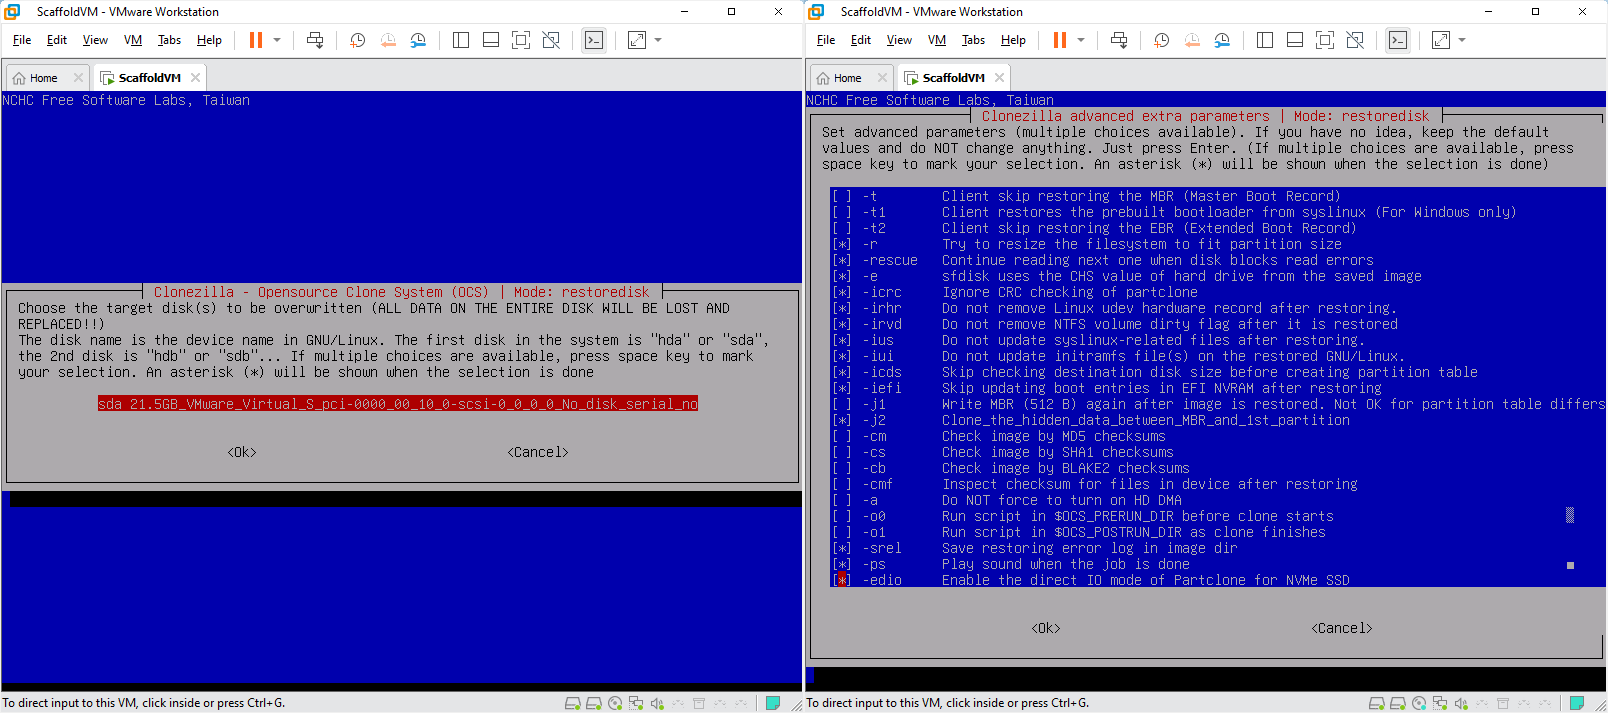
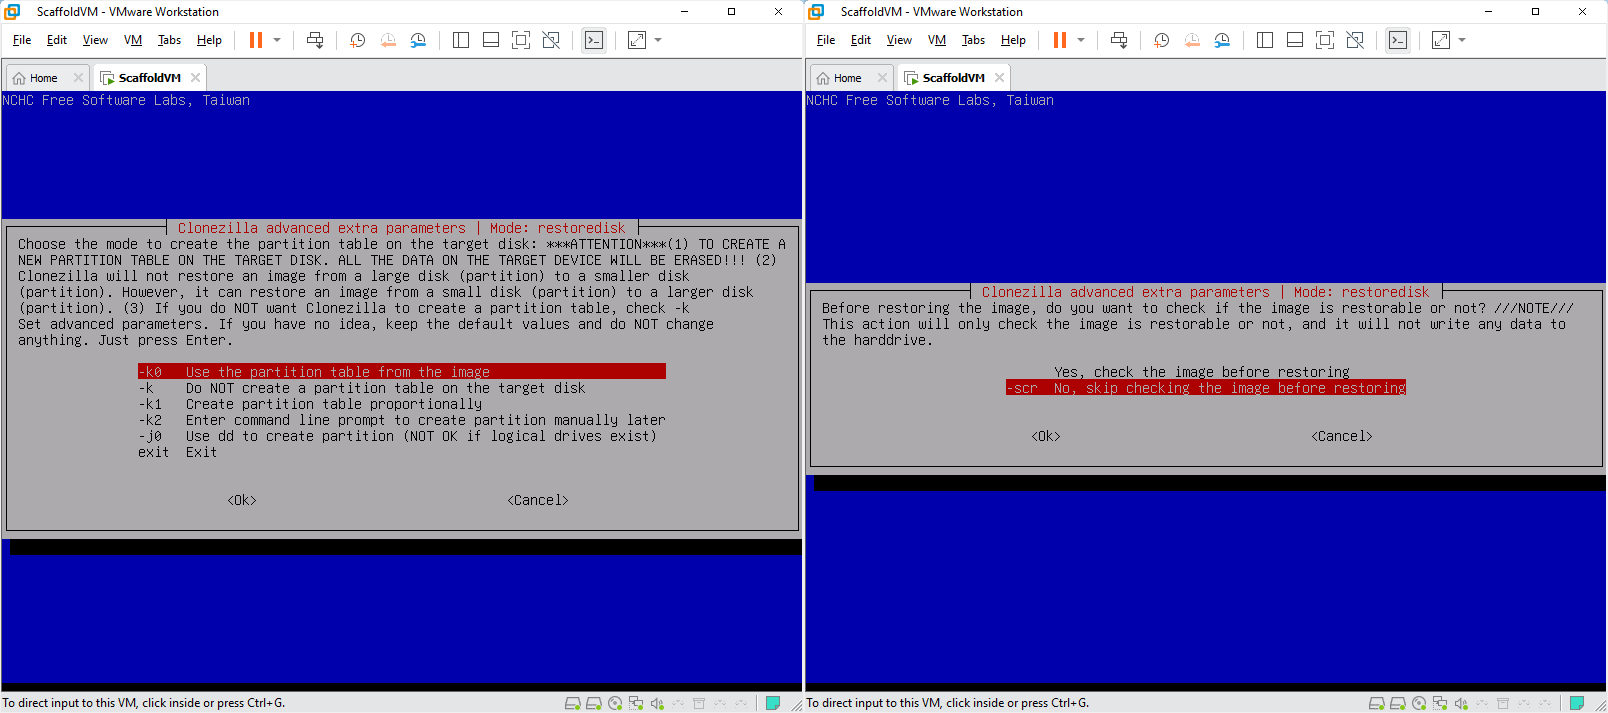
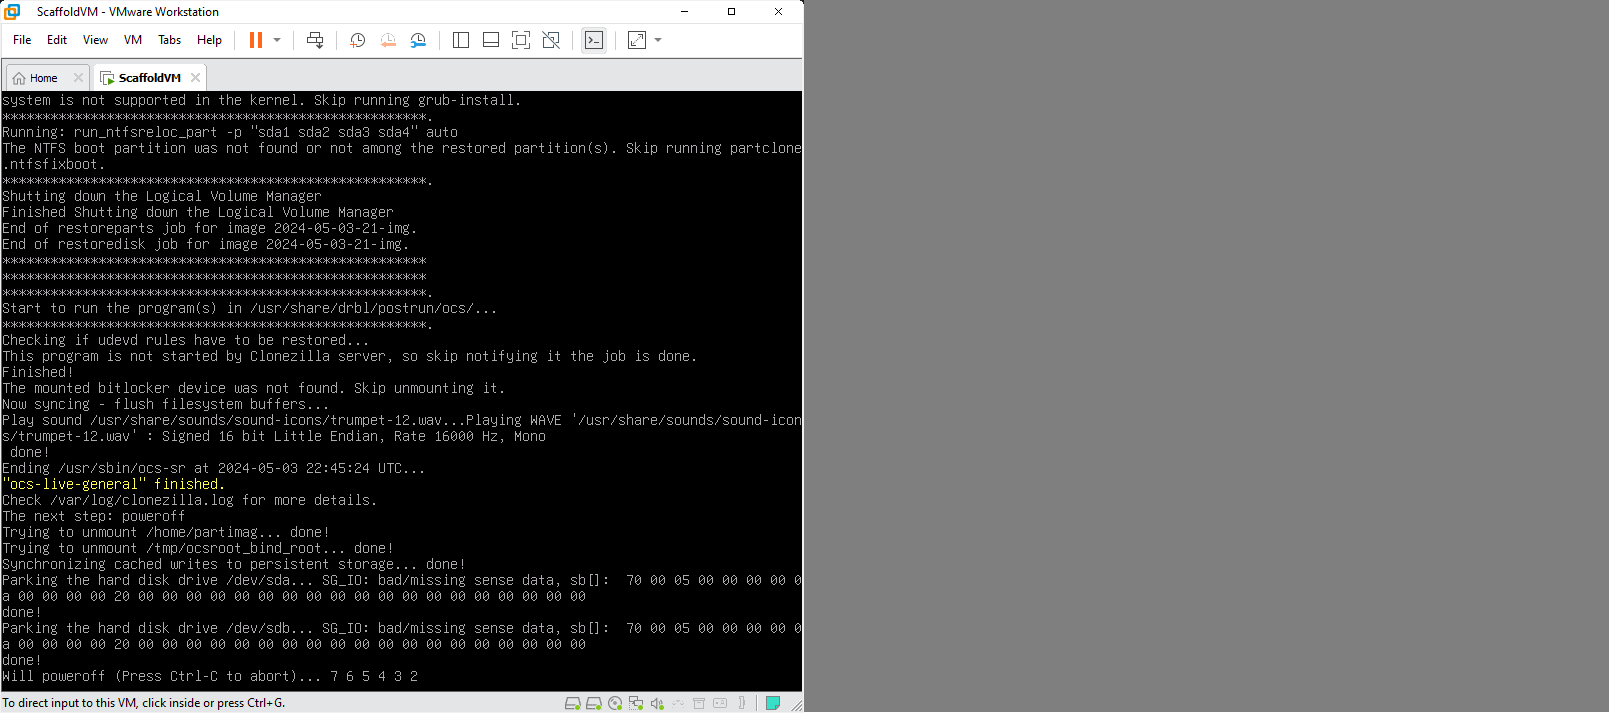
restoredisk.sh:
|
|
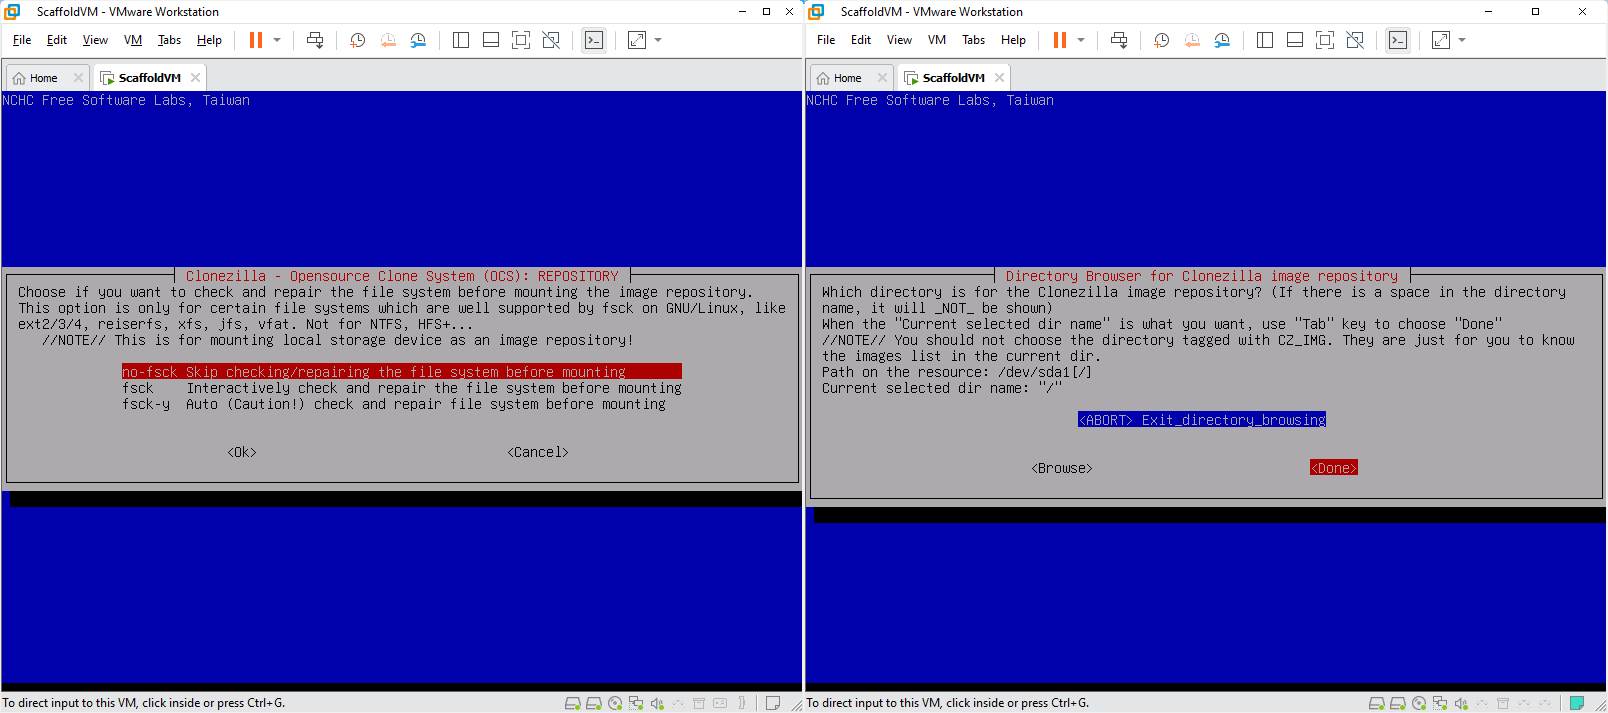
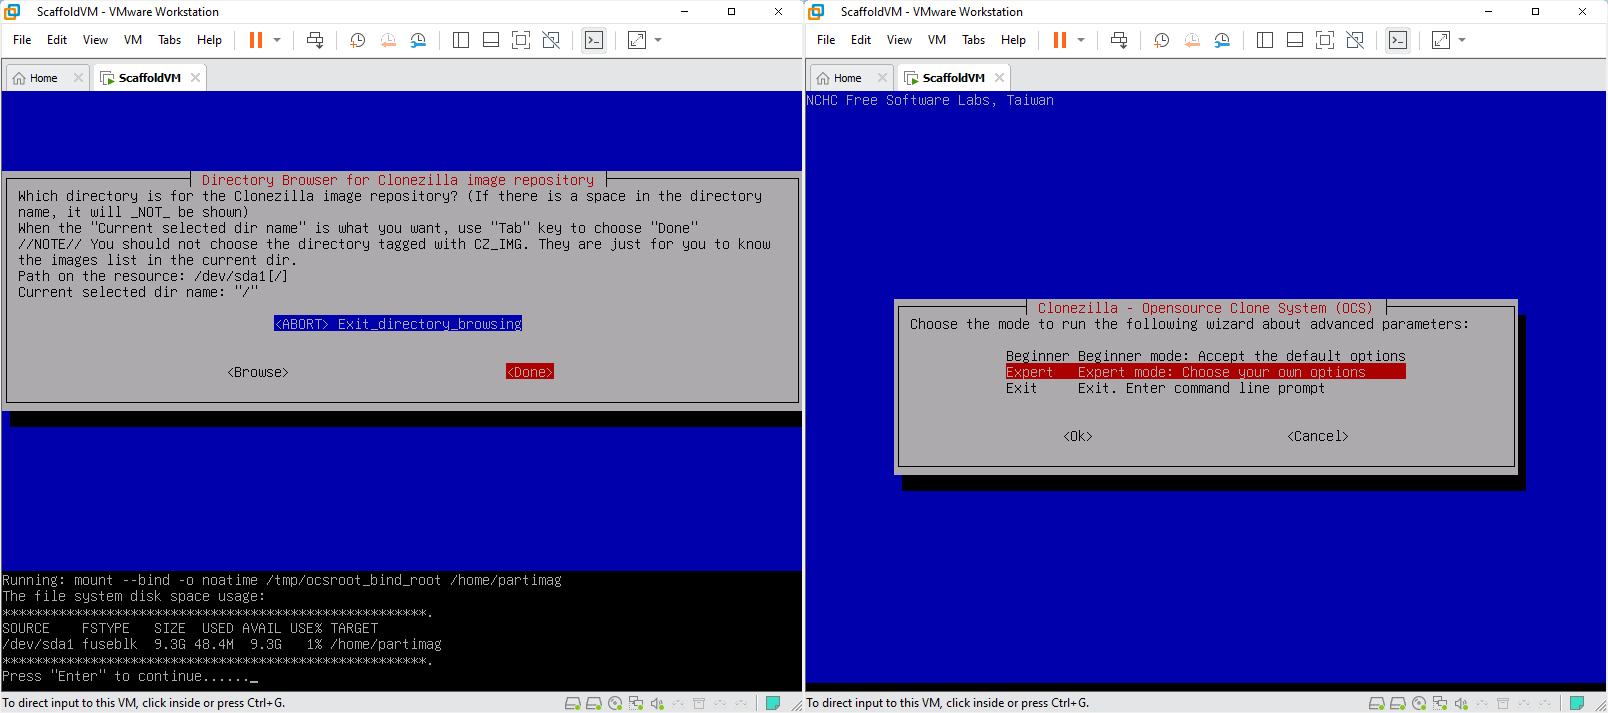
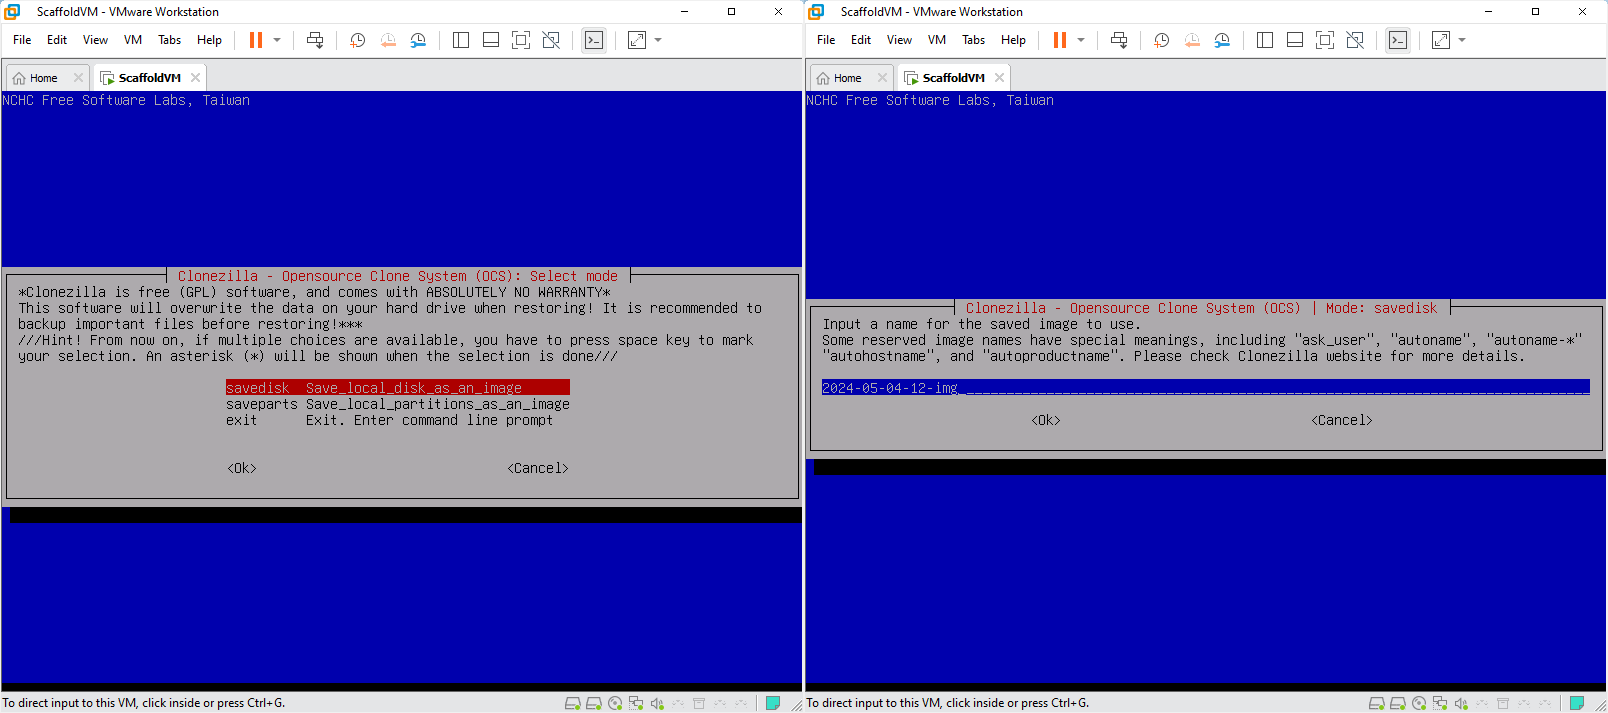
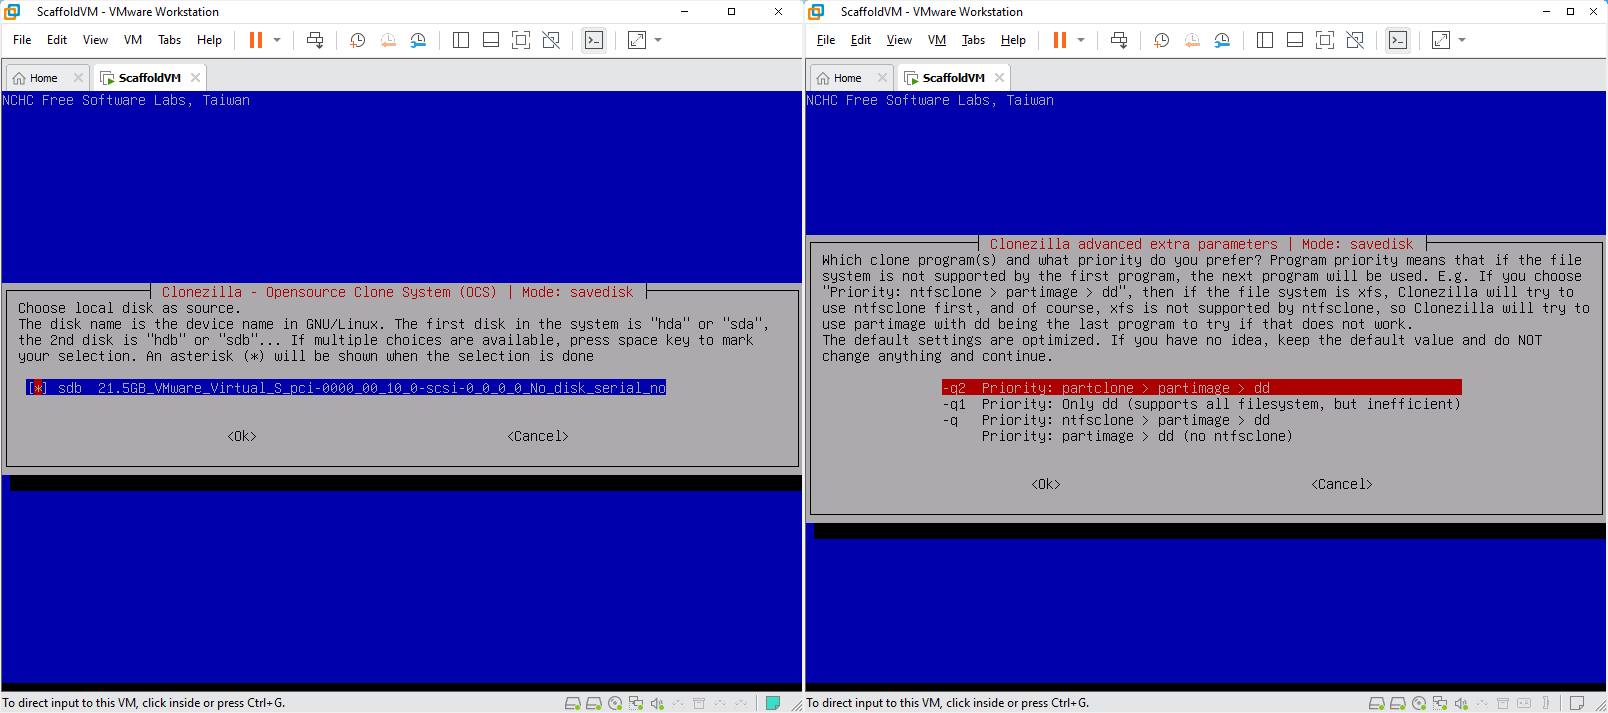
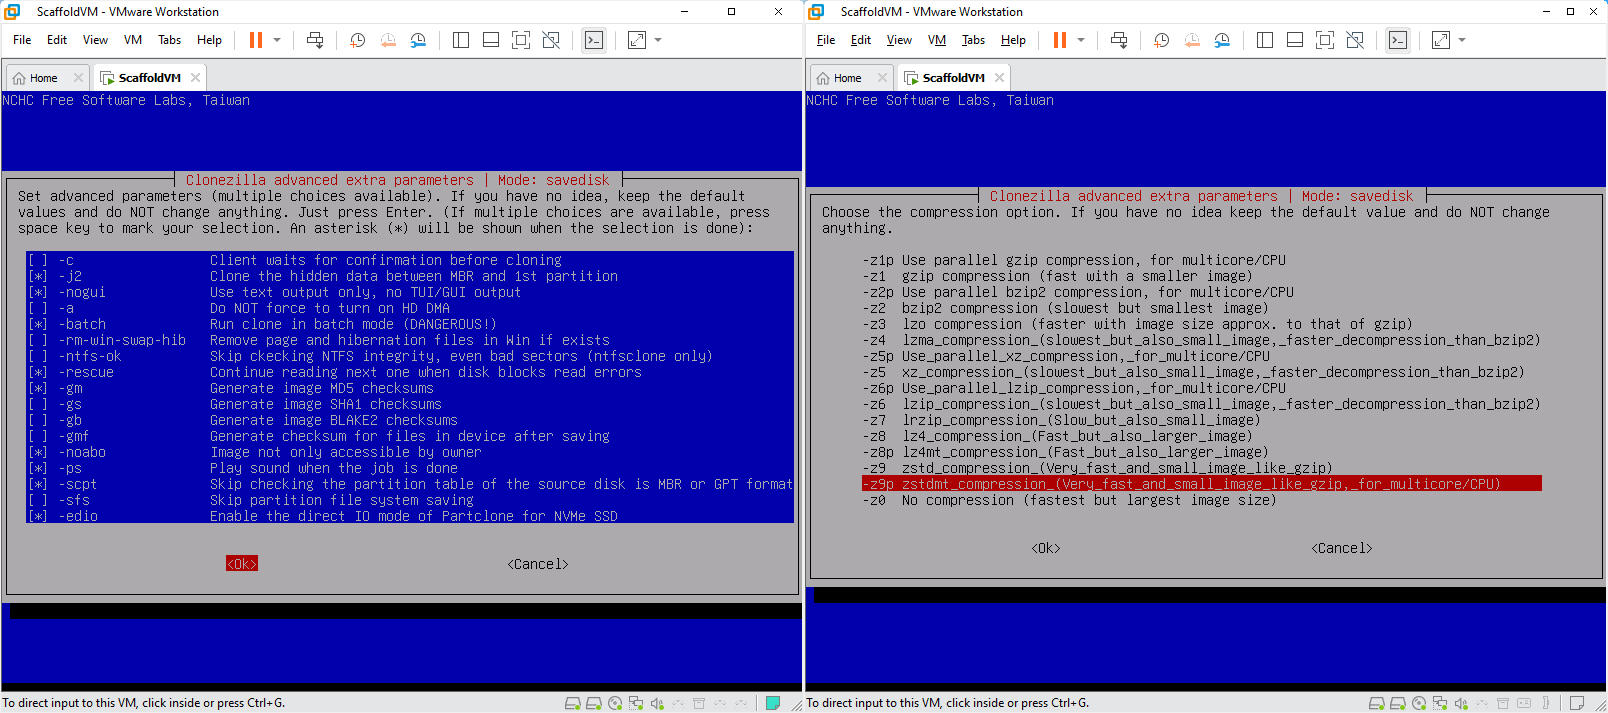
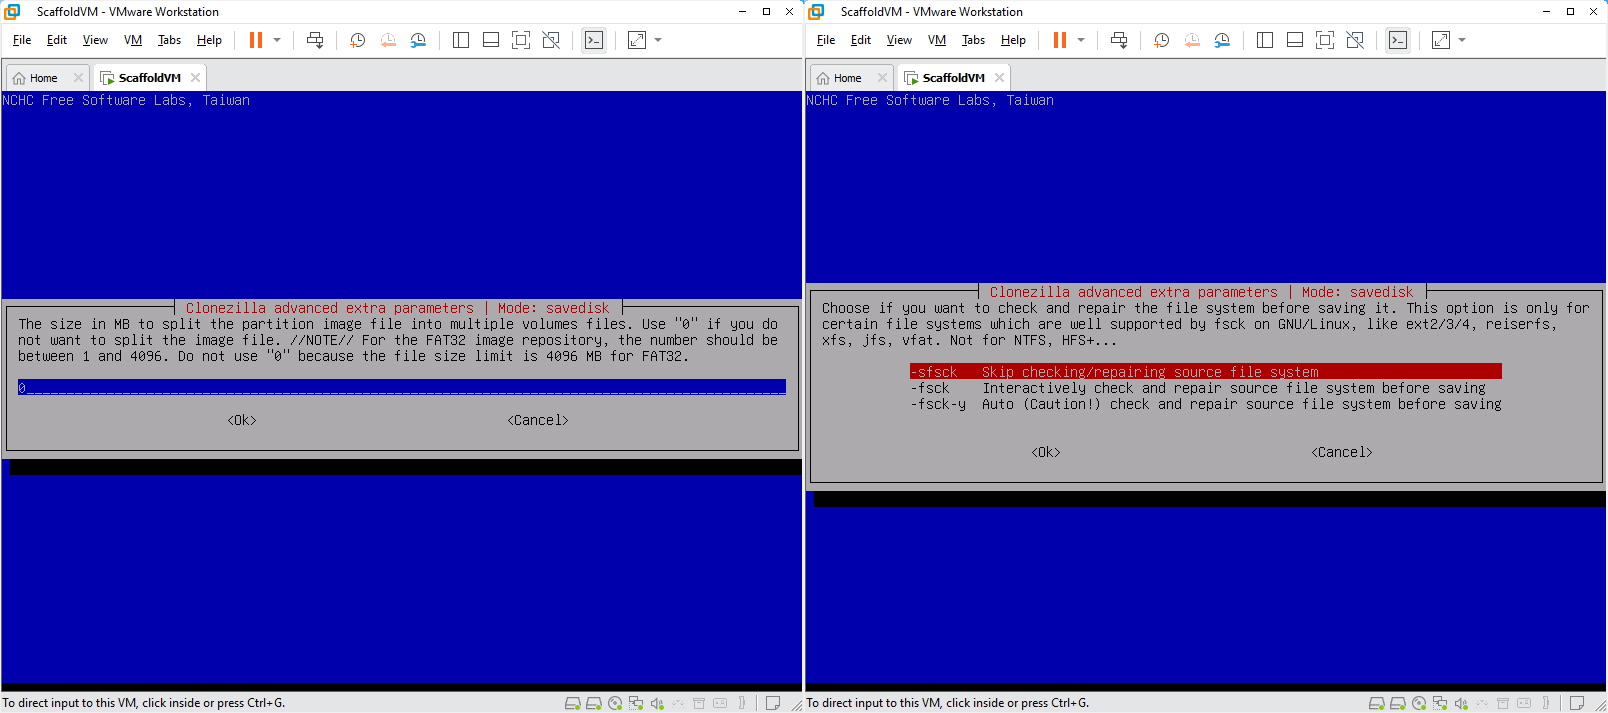
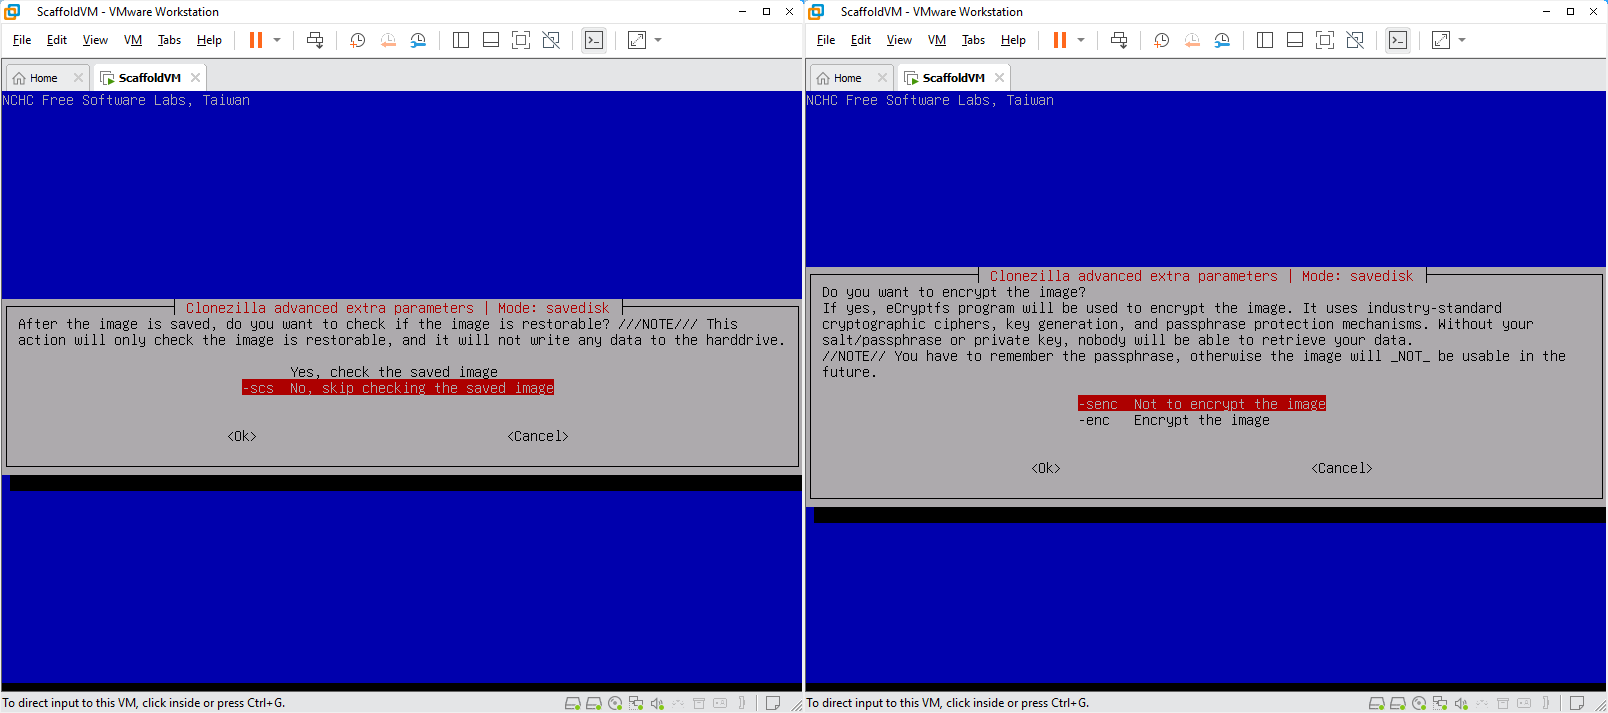
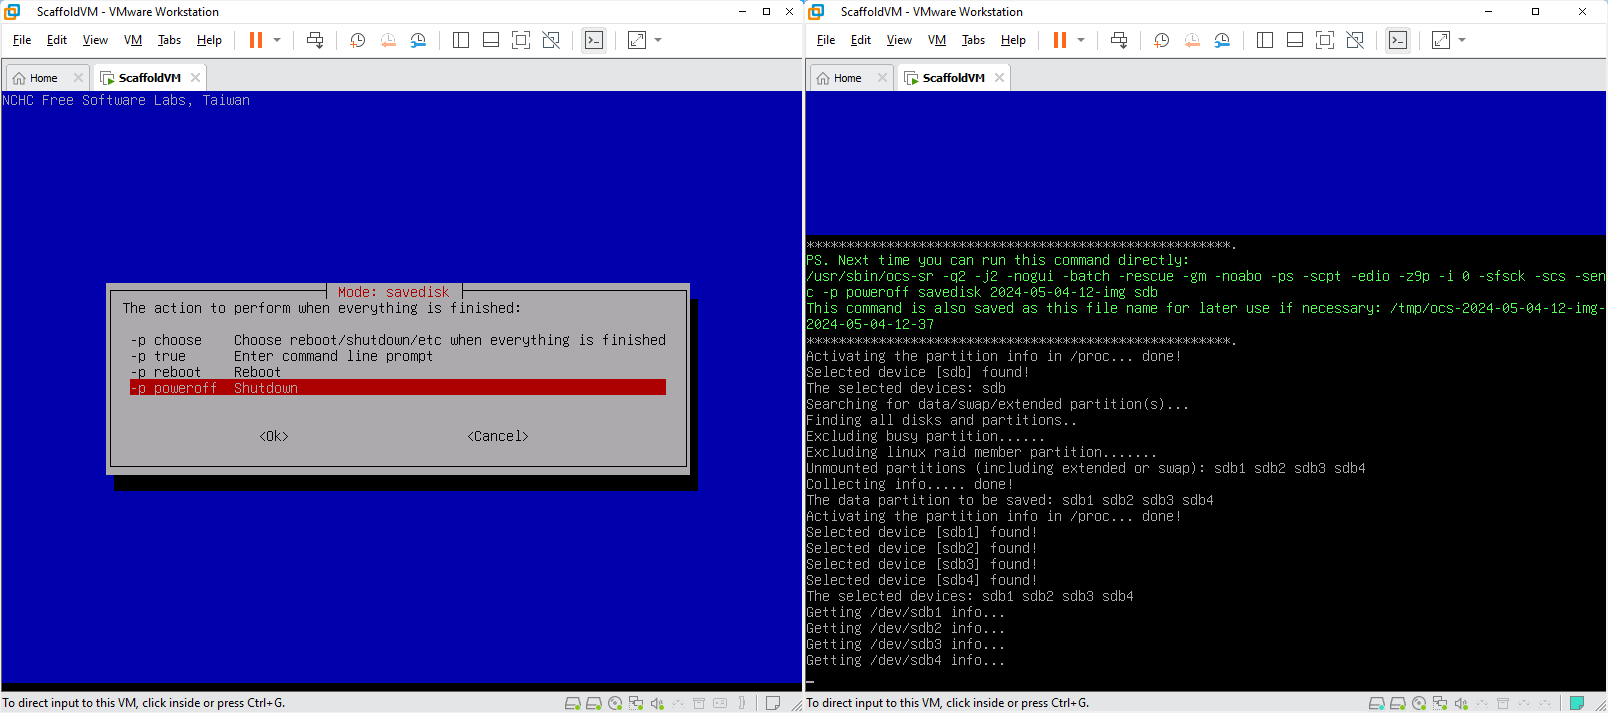
Screenshots of manual runs
1) Common
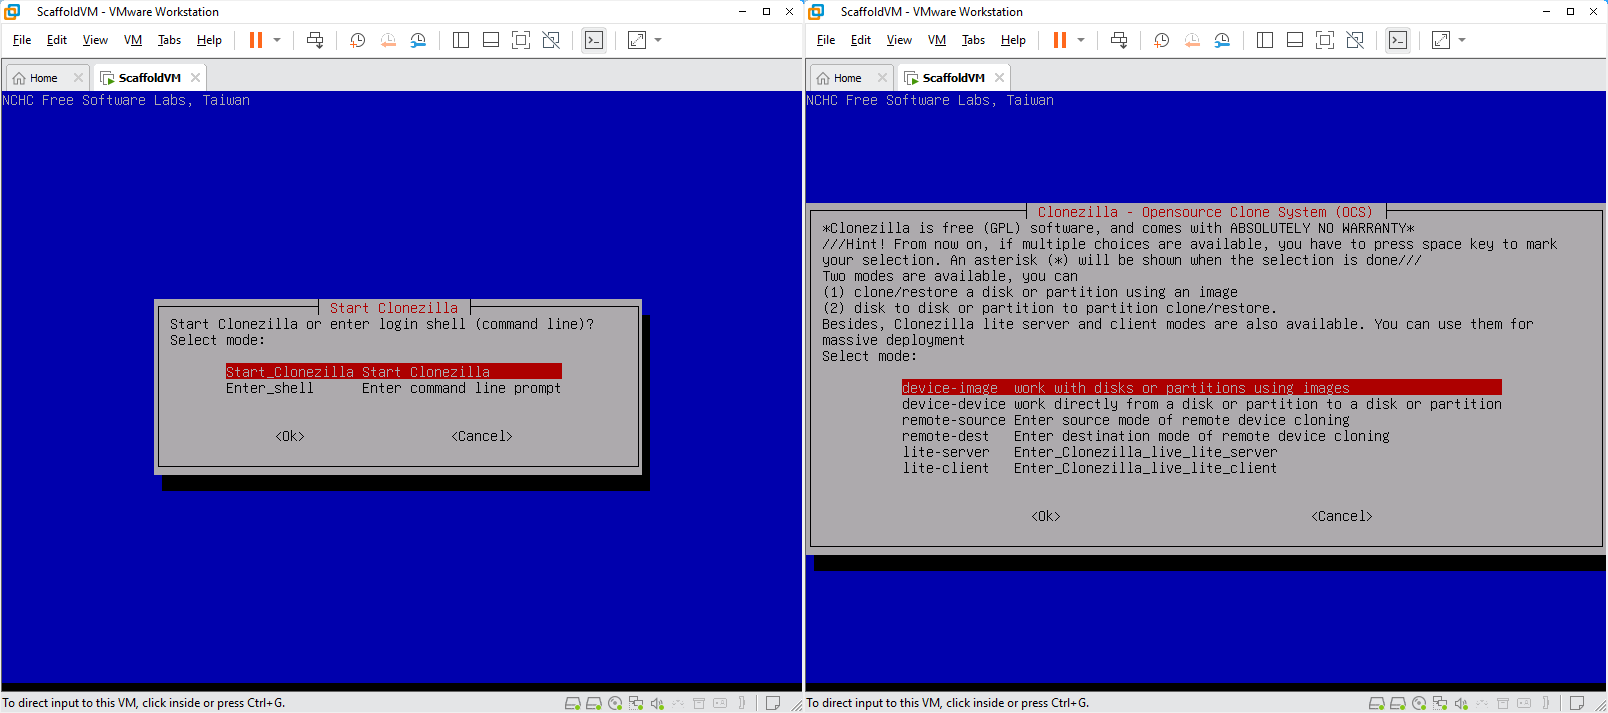
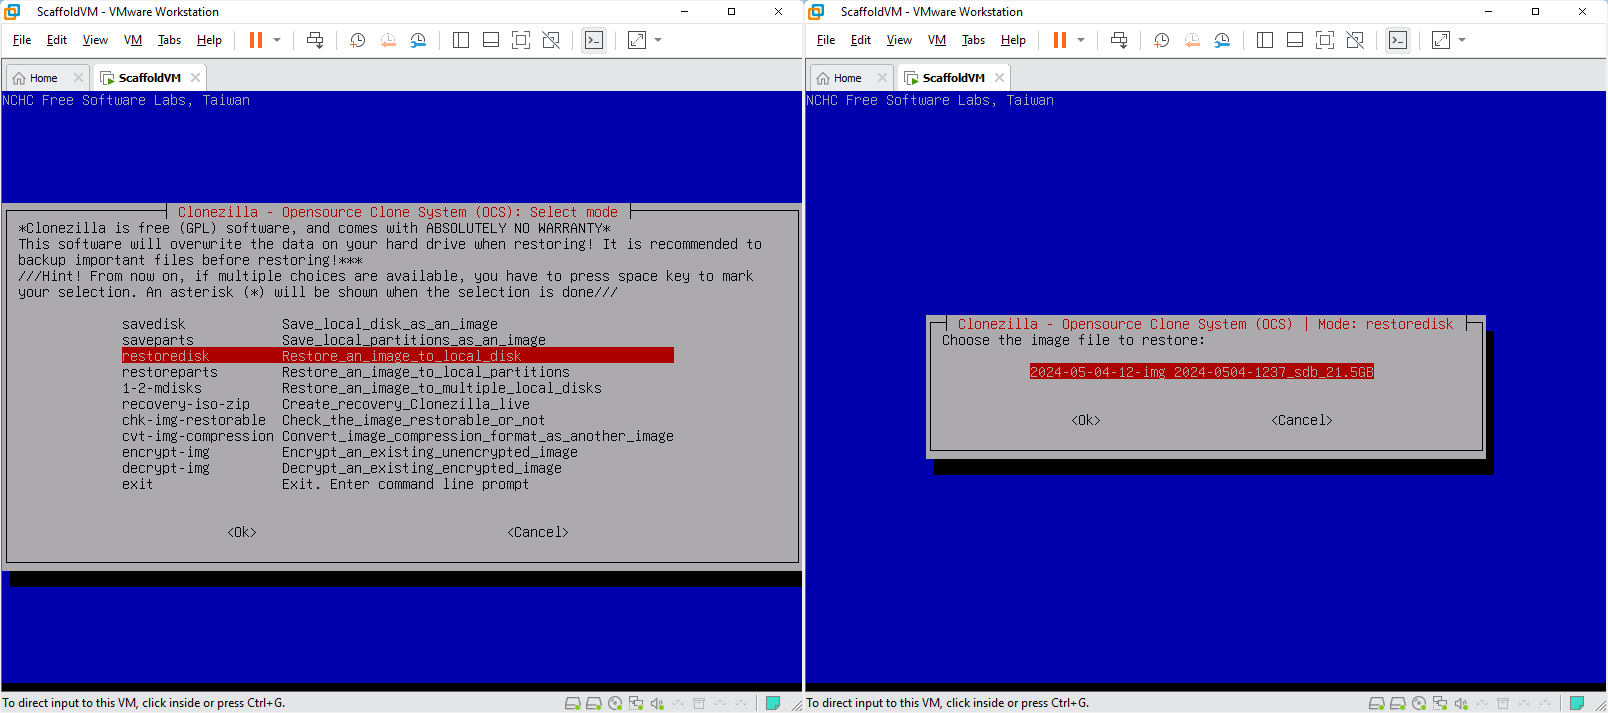
2.a) Savedisk Steps
2.b) Restoredisk Steps