Preface
It is apt that this very first post is about the first geeky hardware I bought, good ol’ Raspberry Pi 3B (rpi3 from now on).
More about the project can be found at Pi-KVM’s site. In summary it let’s one to interface a computer as if it was physically in front of them, as any other IP KVM solution. I will be reproducing steps for when my Clonezilla image of the SD card fails. Feel free to ride along.
It took me around a 10 days from decision to prototype. It helped that I didn’t have to wait for parts abroad. Thanks to ISSD (where I work as of writing) for donating Omron relays.
The Version and the links
I chose the v0 route due to availability and pricing. I already had a rpi3 laying around, other parts were around $20-$25 (did not pay for relays). If one has spare parts around and do not need instalation media intertion through KVM itself, then v0 is hard to beat in price. I might try v2 if rpi4 (4GB) ever becomes available for a reasonable price here in Turkey (a little shy of $200 as of writing).
I used a mix of the official and Kaydron1000’s documentation. Kaydron’s made it easier to grasp the steps, but is a fork of PiKVM’s.
For part’s list see there. Basically bought a generic USB 2.0 HDMI capture card (black bricky ones without any cable), and an Arduino Pro Micro clone. For the Omron relay I used G3VM-61VY2 which is the supported GMVM-61A in surface mount form factor.
Steps
Downloading or compiling an OS image?
I will probably host a ready-made image on Github some time in the future, until then and/or you want a piece of the compile fun follow on.
Project provides images for Raspberry Pi 4 and Zero 2 W models, however one needs to compile them for other hardware.
- Follow building os upto
make oscommand at step 5.
Burning to SD card and Booting
- Then burn image to an SD card via balenaEtcher.
- Boot the device up, find out its IP (docs suggest running
make scan, router web interface works too).
Video capture
- SSH as root. Install uStreamer and increase GPU memory as per this. Reboot.
|
|
|
|
|
|
- Login as admin at
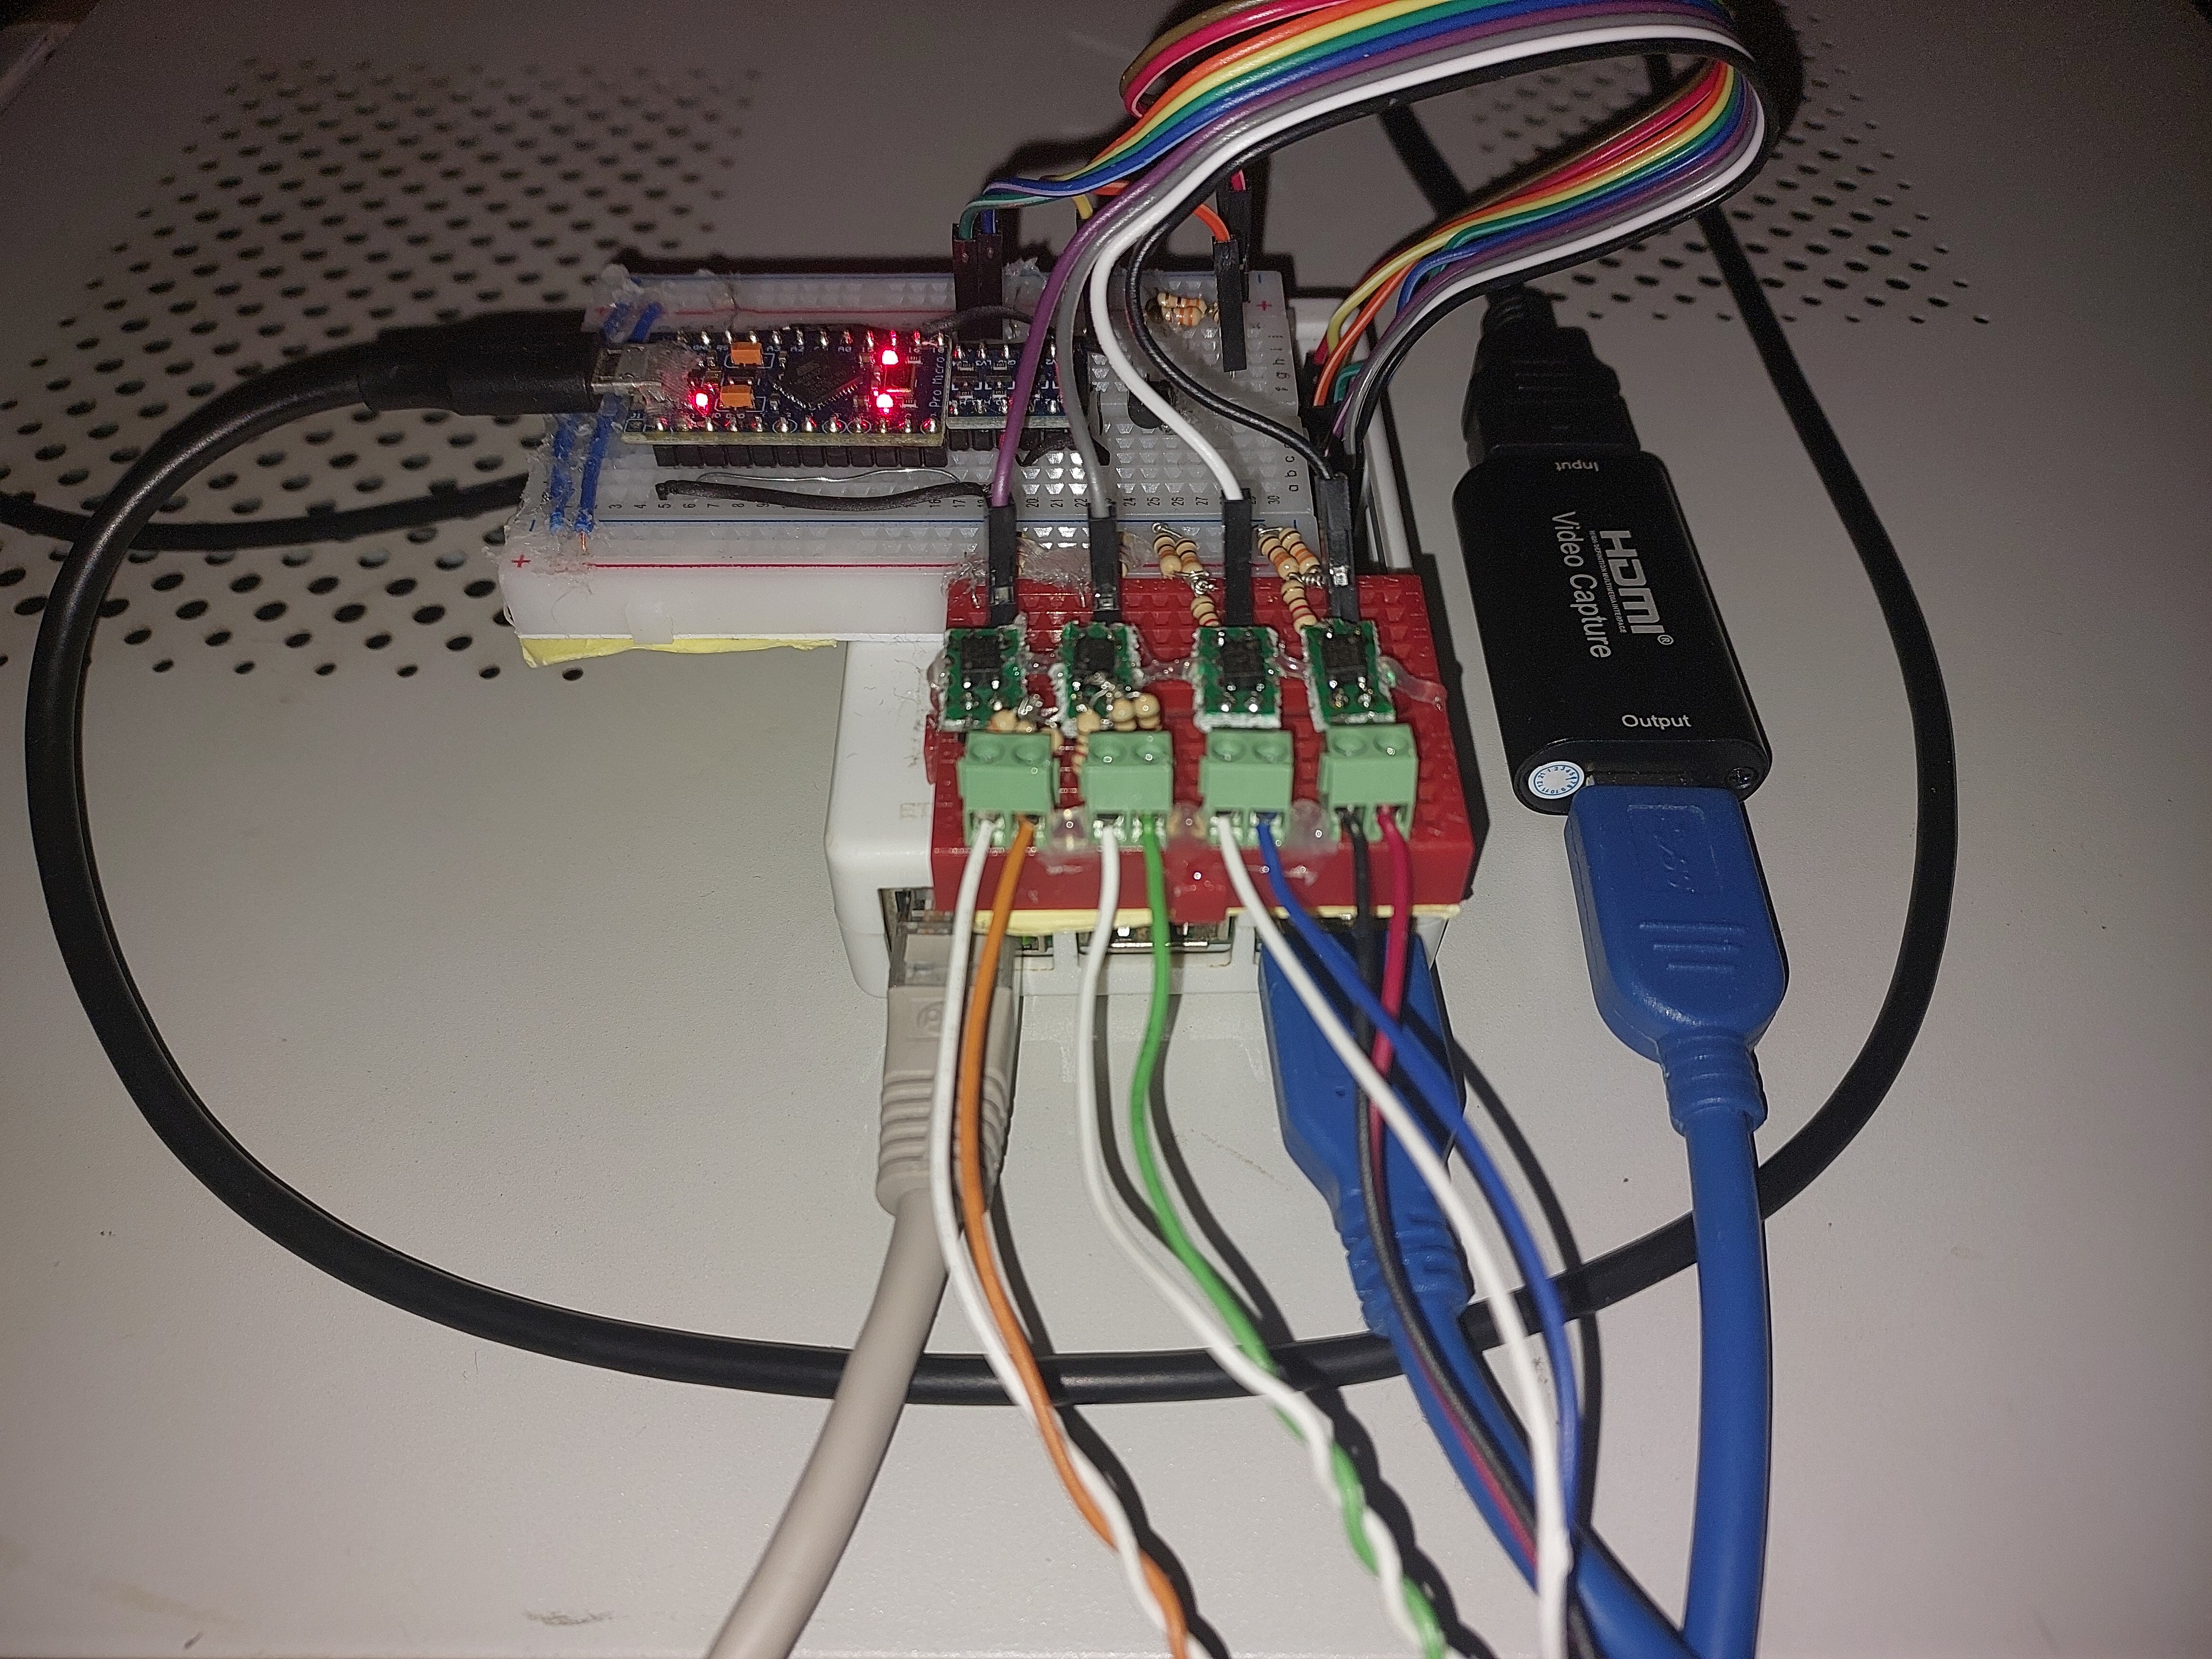
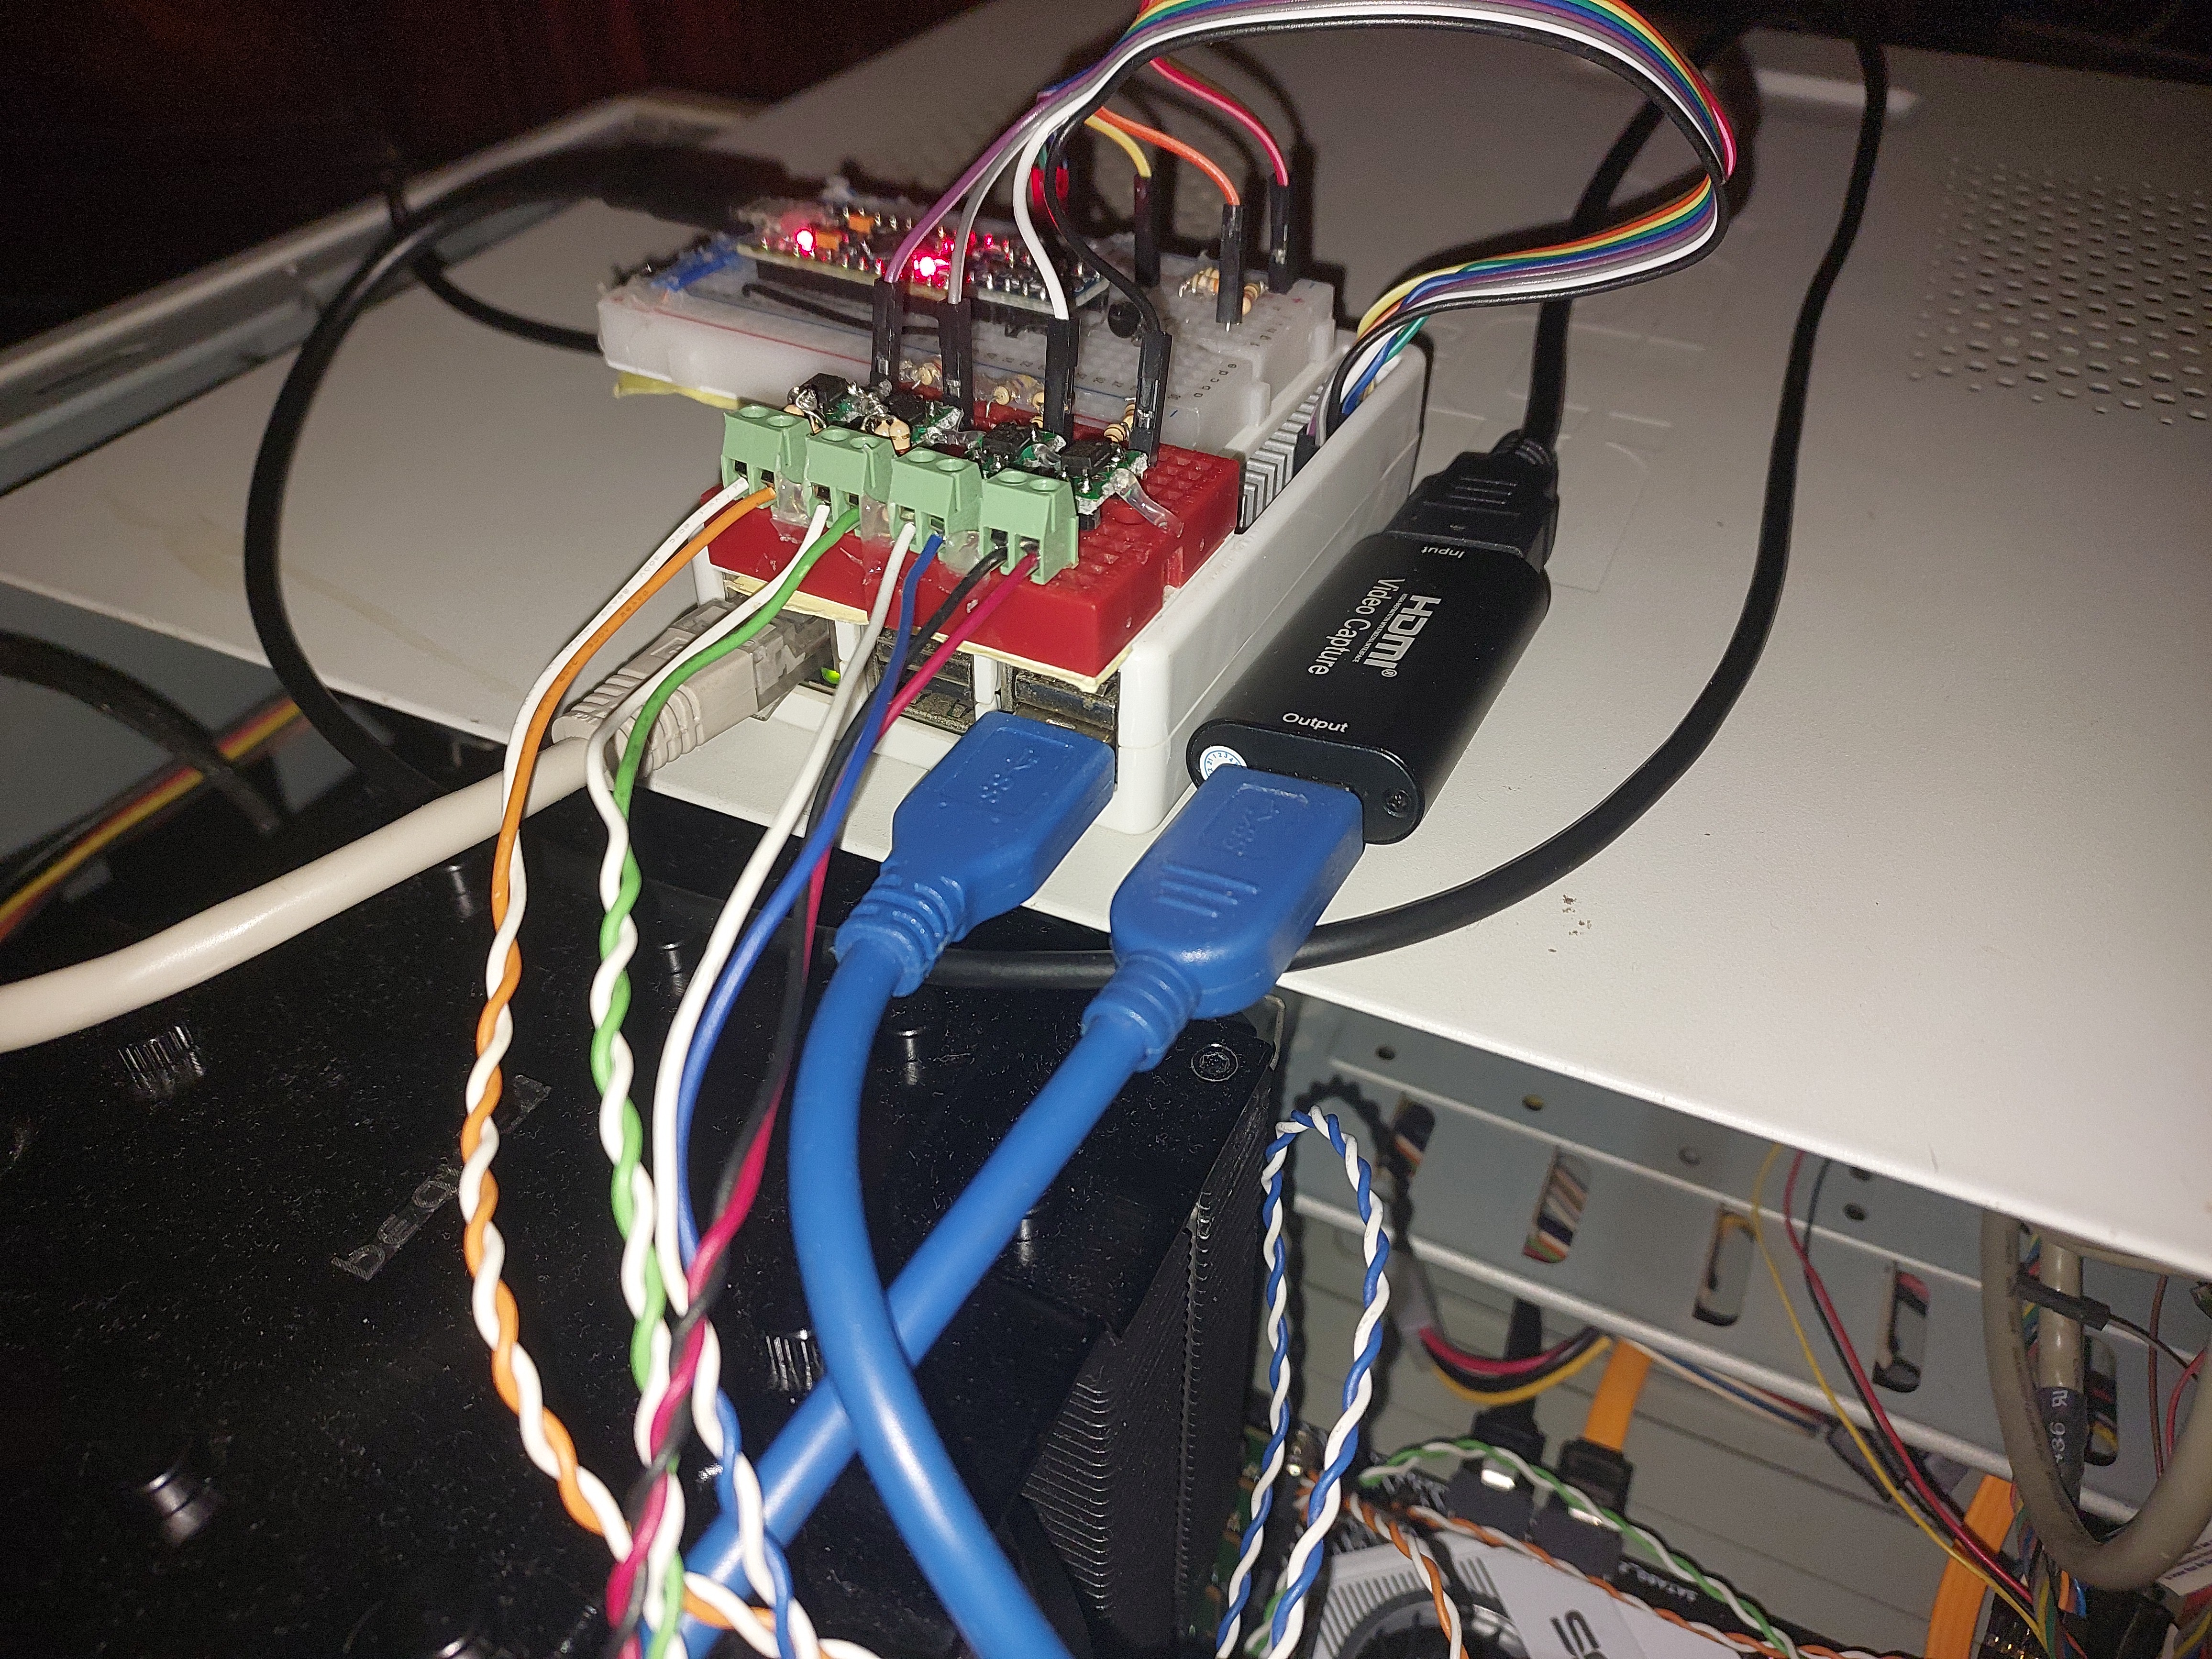
https://<ip_address_pikvm>(password was set at step 1). Head to KVM page and read “NO SIGNAL” - Connect USB HDMI capture card to bottom outer-most USB port (see photo: For the HDMI-USB dongle). Now a rainbow must appear. Connect HDMI cable and hopefully viola, there is the screen.
Now what I have experienced on my laptop (YMMV) was that it is best to leave resolution at 1080p as it KDE was defaulting back to it anyway. But if you want to change it, do not change it in web interface.
Changing the setting on the managed system’s desktop environment was enough and I had seen a broken image logo instead of the video stream sometimes if the resolutions were incompatible (what causes it is beyond me).
Keyboard and mouse
Now this was a thougher part, because I had to overcome an error altough there being no mention of it in either of the docs.
Error: Unknown development platform atmelavr
The above PlatformIO error when trying to run make got almost two hours to figure that pip needed to be installed on the system.This and similar Github issues were top in search engine results with no help, and suddenly it struct me as I learned what PlatformIO was and how it was updated (through pip) even when an update is triggered by pio update.
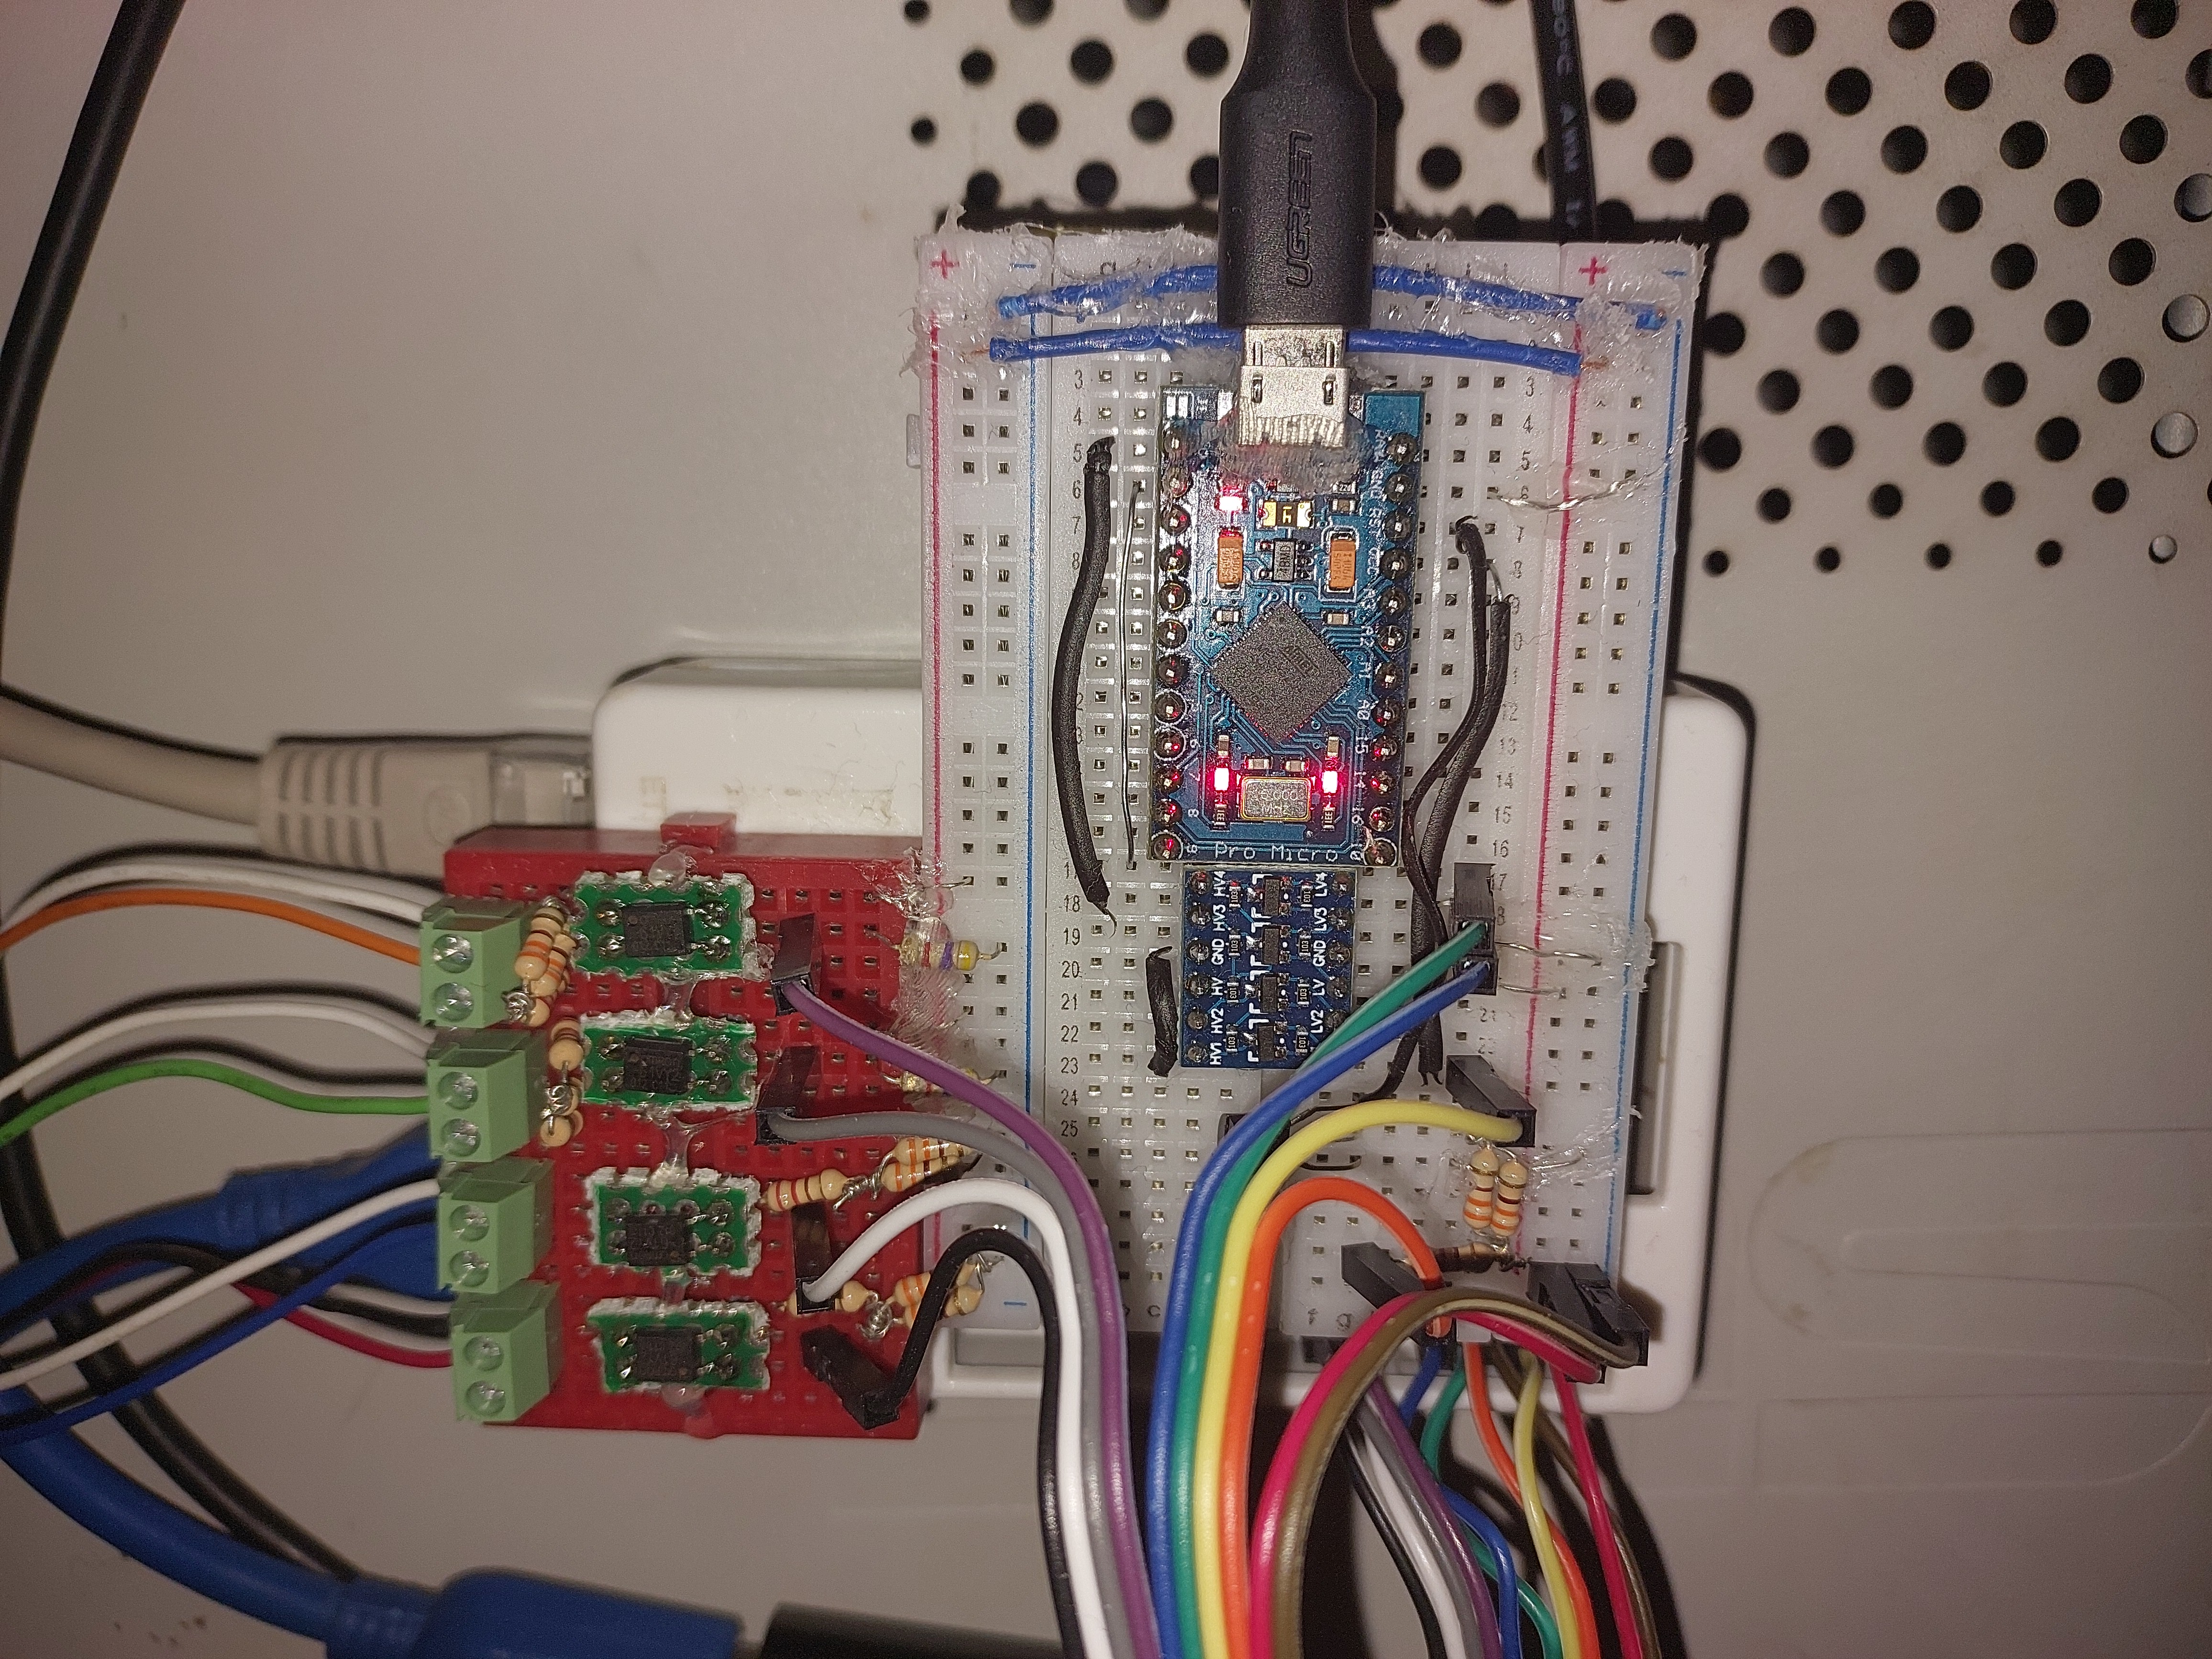
- Set the circuit up on a breadboard or cupper plate. ATX is shown there as well, which is precisely what I wanted so I set it up as a whole.
- Make sure pip is installed
|
|
- Follow the steps at there. Connection is serial (via USB cable), and board is Pro Micro.
If it goes well you should have Pro Micro board programmed. Remember to connect/disconnect RST pin before/after the programming phase, as it is told in the doc.
- Disconnect the USB cable used for programming Pro micro out of the rpi3 and connect to the host to be managed.
The breadboard schematic
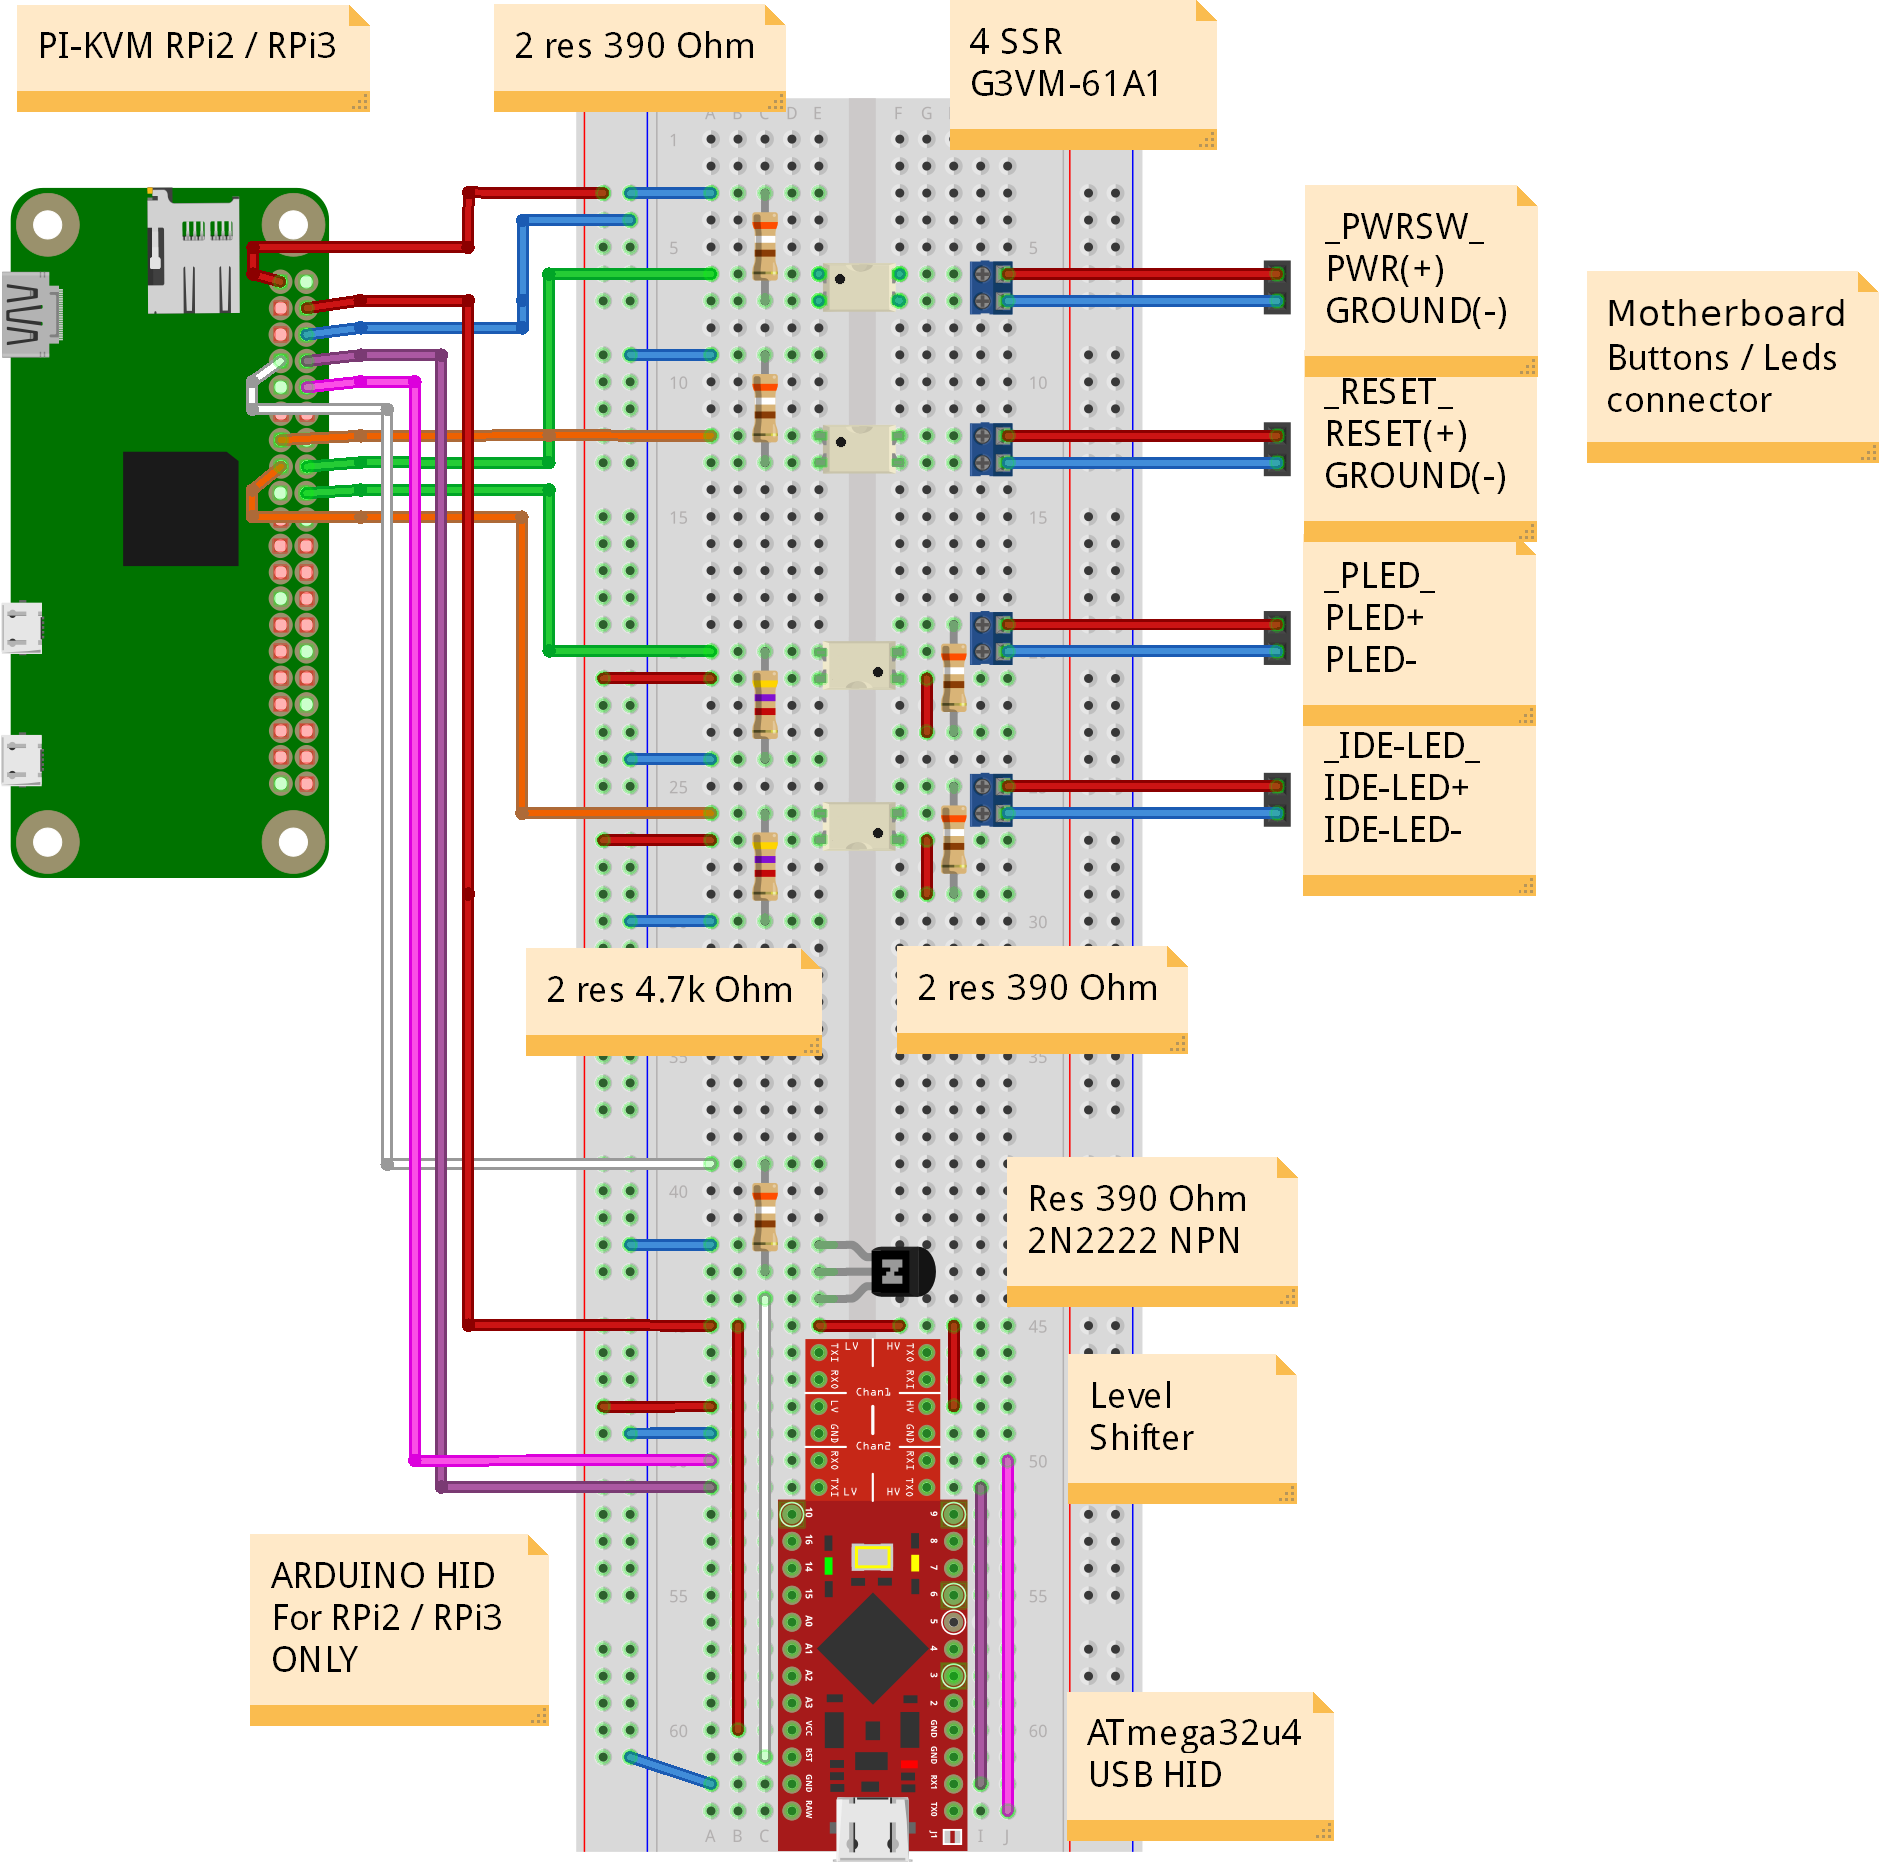
Implemented using two breadboards:
ATX Pin Control (unlimited power)
Make sure the circuit is to the spec.
If I were an electronics enthusiats, I could suggest an informed way of testing it, I don’t know how a multimeter would have helped here. Maybe use an old motherboard, it gets fried rather than your beloved PC. But I had gone bareback and just tested on my homelab server. Luckily no hardware nor animal were injured in the process, thanks benign internet strangers!
- So far one should already have the circuit ready. If not go and set it up as in circuitry.
Try it!
Now head to the Pi-KVM web interface at the <ip_address_pikvm> and click the KVM page.
At the right-most corner, there are information icons and an action menu for:
- Ethernet
- Video capture
- Keyboard
- Mouse
To its left there is ATX information icons and actions.
Check if you can enter the BIOS/UEFI of the managed computer. If things did not change in the future all should work out in these 10 steps.
Backup!!!
No man ever steps in the same river twice.
- As soon as you get it working, power Pi-KVM off and get a backup of the SD card on your workstation/ laptop:
|
|
or even better use a tool like Clonezilla to have a much smaller and faster image of the card.
Pro tip: use a virtual machine to save onto an external hdd if you don’t want to reboot your workstation for whatever reason or do not have an other machine laying around.
What next? (Update: 2022-06-11)
-
Having it PoC’ed, next step is to miniaturize it into a hat. Parts have been almost sourced.
-
I have quite unused space due to empty 5.25" and 3.5" rails.
- After the hat is done, it can be placed into a dead 3.5" HDD case and mounted securely.
- An internal USB header can be used to connect Arduino Pro Micro to motherboard.
- I have a serial port (D9) cut-out on my ATX case. It is ideal size to mount USB HDMI capture dongle.
- In same spirit, a USB micro-B or type-C female socket can be mounted to face outside of the case.
With all these, the Pi-KVM can be tidily accomodated alongside the motherboard it puppeteers.