Introduction
I would like to showcase an internet-accessible, hardened homelab some time in 2026. Before I forget, I need to document how to let people log into my Proxmox nodes with their Google accounts as auditors. This post assumes that network access has been provided one way or another.
Ingredients
- A domain name (managed by CloudflareDNS)
- PVE 9.1: Just-In-Time login target
- Cloudflared (for exposing Authentik’s ACME client)
- Authentik: OpenID login broker
- Google Cloud - Google Auth Platform Client
- A Google account
- Chatbot of your liking
Pre-Requisites
Proxmox VE with HTTPS
For authentication to work, services being exposed should have secured subdomains. This short blog by Ikiesow covers most of the process. Create API key from Cloudflare dashboard to be used by Proxmox VE under Datacenter/ACME for DNS-01 or HTTP-01 challanges.
Cloudflared Tunnel into LAN
Add a new cloudflared tunnel under Dashboard/Zero Trust/Networks/Connectors. Thereon, you can expose CIDR through that tunnel given that your client devices have WARP installed.
Having installed a tunnel, 3 free reedirects can be set up at Dashboard/Domains/your domain name/Rules/Page Rules for the free tier. These can be used for ACME HTTP-01 challanges if desired.
User management is beyond this post’s scope but One Time Password emails for logging in is fairly easy to set up.
Authentik instance with HTTPS
Authentik is deployed within docker compose. ACME is configured through webui at System/Certificates. A page rule is setup as mentioned above for simple HTTP-01 challange.
compose.yml can be found at the end of this post.
|
|
Note that this exposes host device to the web.
Steps
Authentik Source
-
Log into Google Cloud Platform, and create a new web application authentication under your project. This will give Client ID and Client Key. These will be used by Authentik to confirm a user via federation and retrieve their e-mail address from the provider (Google in this case).
-
Create a new source at Directory/Federation and Social Login with credentials generated at the step above:
- Provider Type: Google
- User matching mode: Link to a user with identical email address
- Callback URL:
https://idm.bug.tr:8443/source/oauth/callback/google/
Authentik Provider
- Create a new mapping at Customization/Property Mappings for setting the same group for all future users:
- Scope name:
groups - Expression:
return {"groups": ["auditers"]}
- Create a new Authentik OAuth2/OpenID Provider with following data:
- Protocol Settings:
- Client ID and Client Key are auto-generated.
- Strict Redirect URIs:
https://pve1.bug.tr:8006/api2/json/access/openid/auth-codehttps://pve1.bug.tr:8006
- Signing key (use default)
- Encryption key (leave empty as per Kelly Mansua’s notes)
- Under __Advanced Protocol Settings:
- Scopes: put newly created provider scope into selected scopes.
- Subject mode: set to
Based on the User's Emailas per Authentik/ProxmoxVE documentation
- Create a new Authentik Application with following data:
- Slug: ‘pve1’ (arbitrary, yet relevant)
- Provider: select provider created above
Proxmox Pool and Role
-
Create a new pool
Auditat Datacenter/Permissions/Pools. -
Create a new role
PoolAuditorwith all the.Auditpermissions: [ Sys.Audit, VM.Audit, SDN.Audit, VM.GuestAgent.Audit, Pool.Audit, Datastore.Audit, Mapping.Audit ] -
Create new OpenID Connect Server Realm
authentikat Datacenter/Realms with:
- Issuer URL:
https://idm.bug.tr/application/o/pve1/, notice thatpve1is the slug above. - Client ID and Client Key credentials from provider creation
- Scopes:
openid email profile groups, notice thatgroupsis scope name of property mapping above. - Default: yes
- Autocreate Users: yes
- Username Claim:
email - Autocreate Groups: no
- Groups Claim:
groupsjust like scopes - Overwrite Groups:: yes
-
Create a new group
auditors-authentik. Naming is of the form<GroupName>-<RealmName>, where realm is defined on Proxmox VE and group is defined on property mapping above. -
Give permission
PoolAuditorto groupauditors-authentikto path/pool/Auditunder Datacenter/Permissions. -
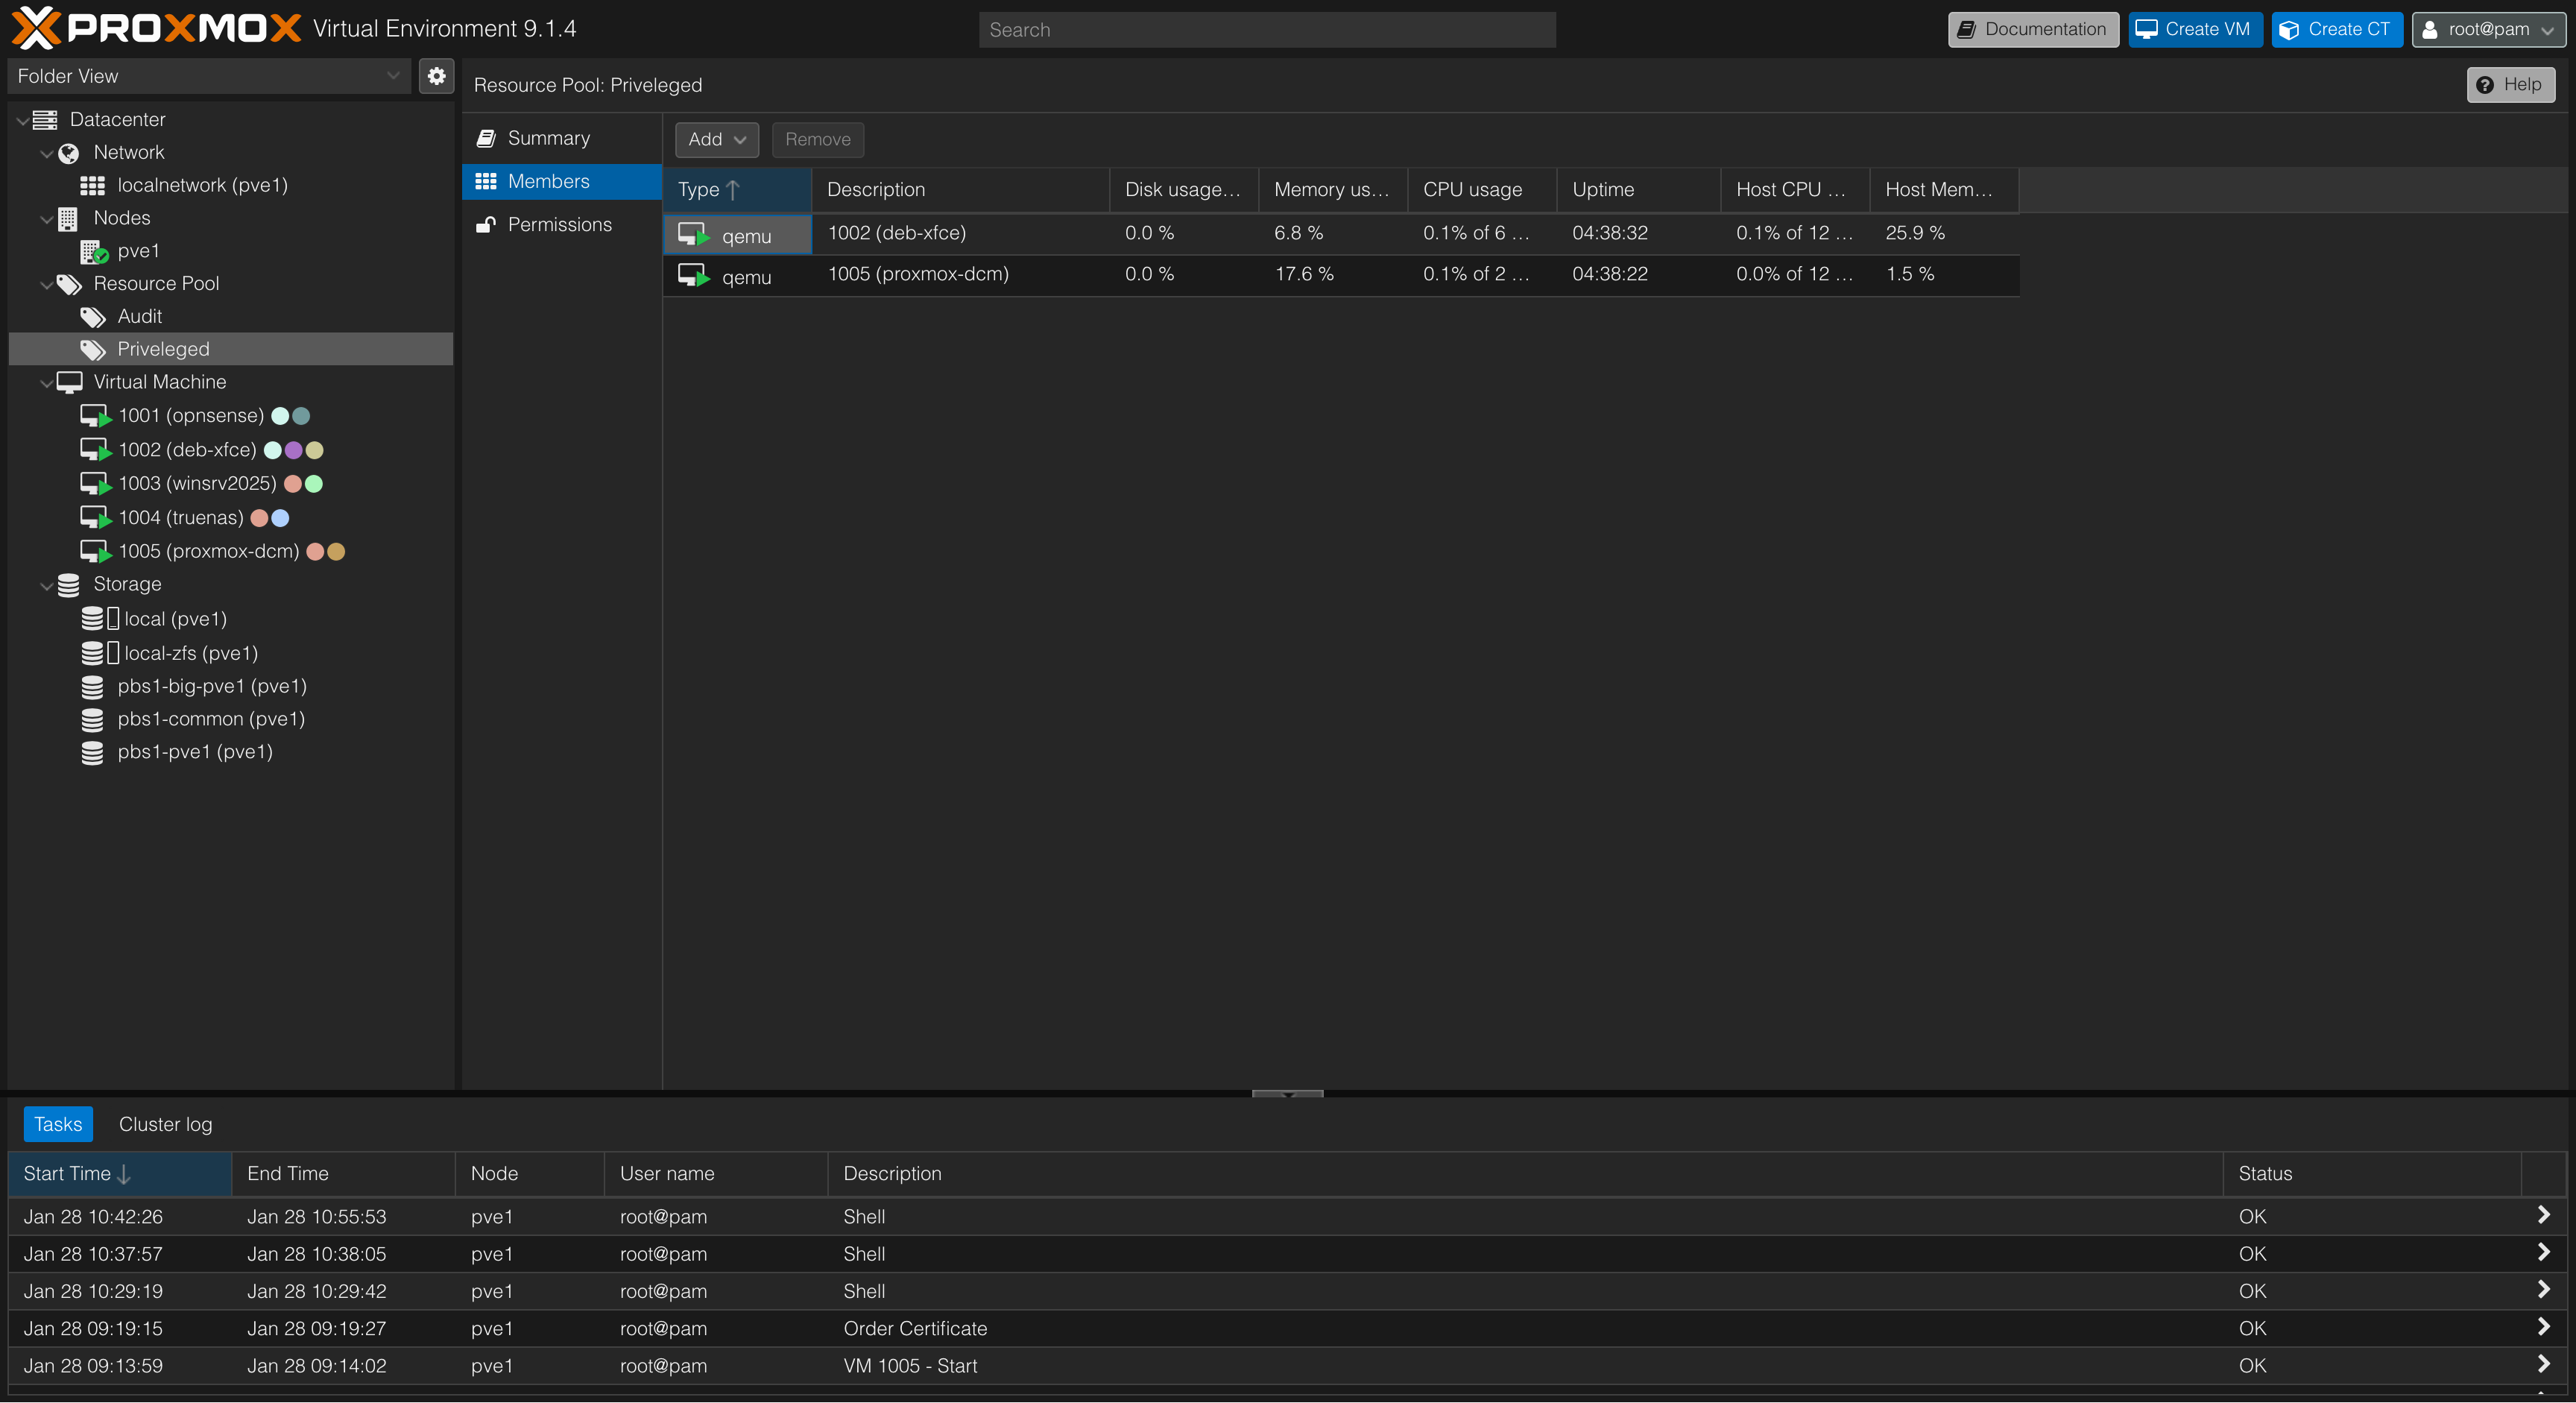
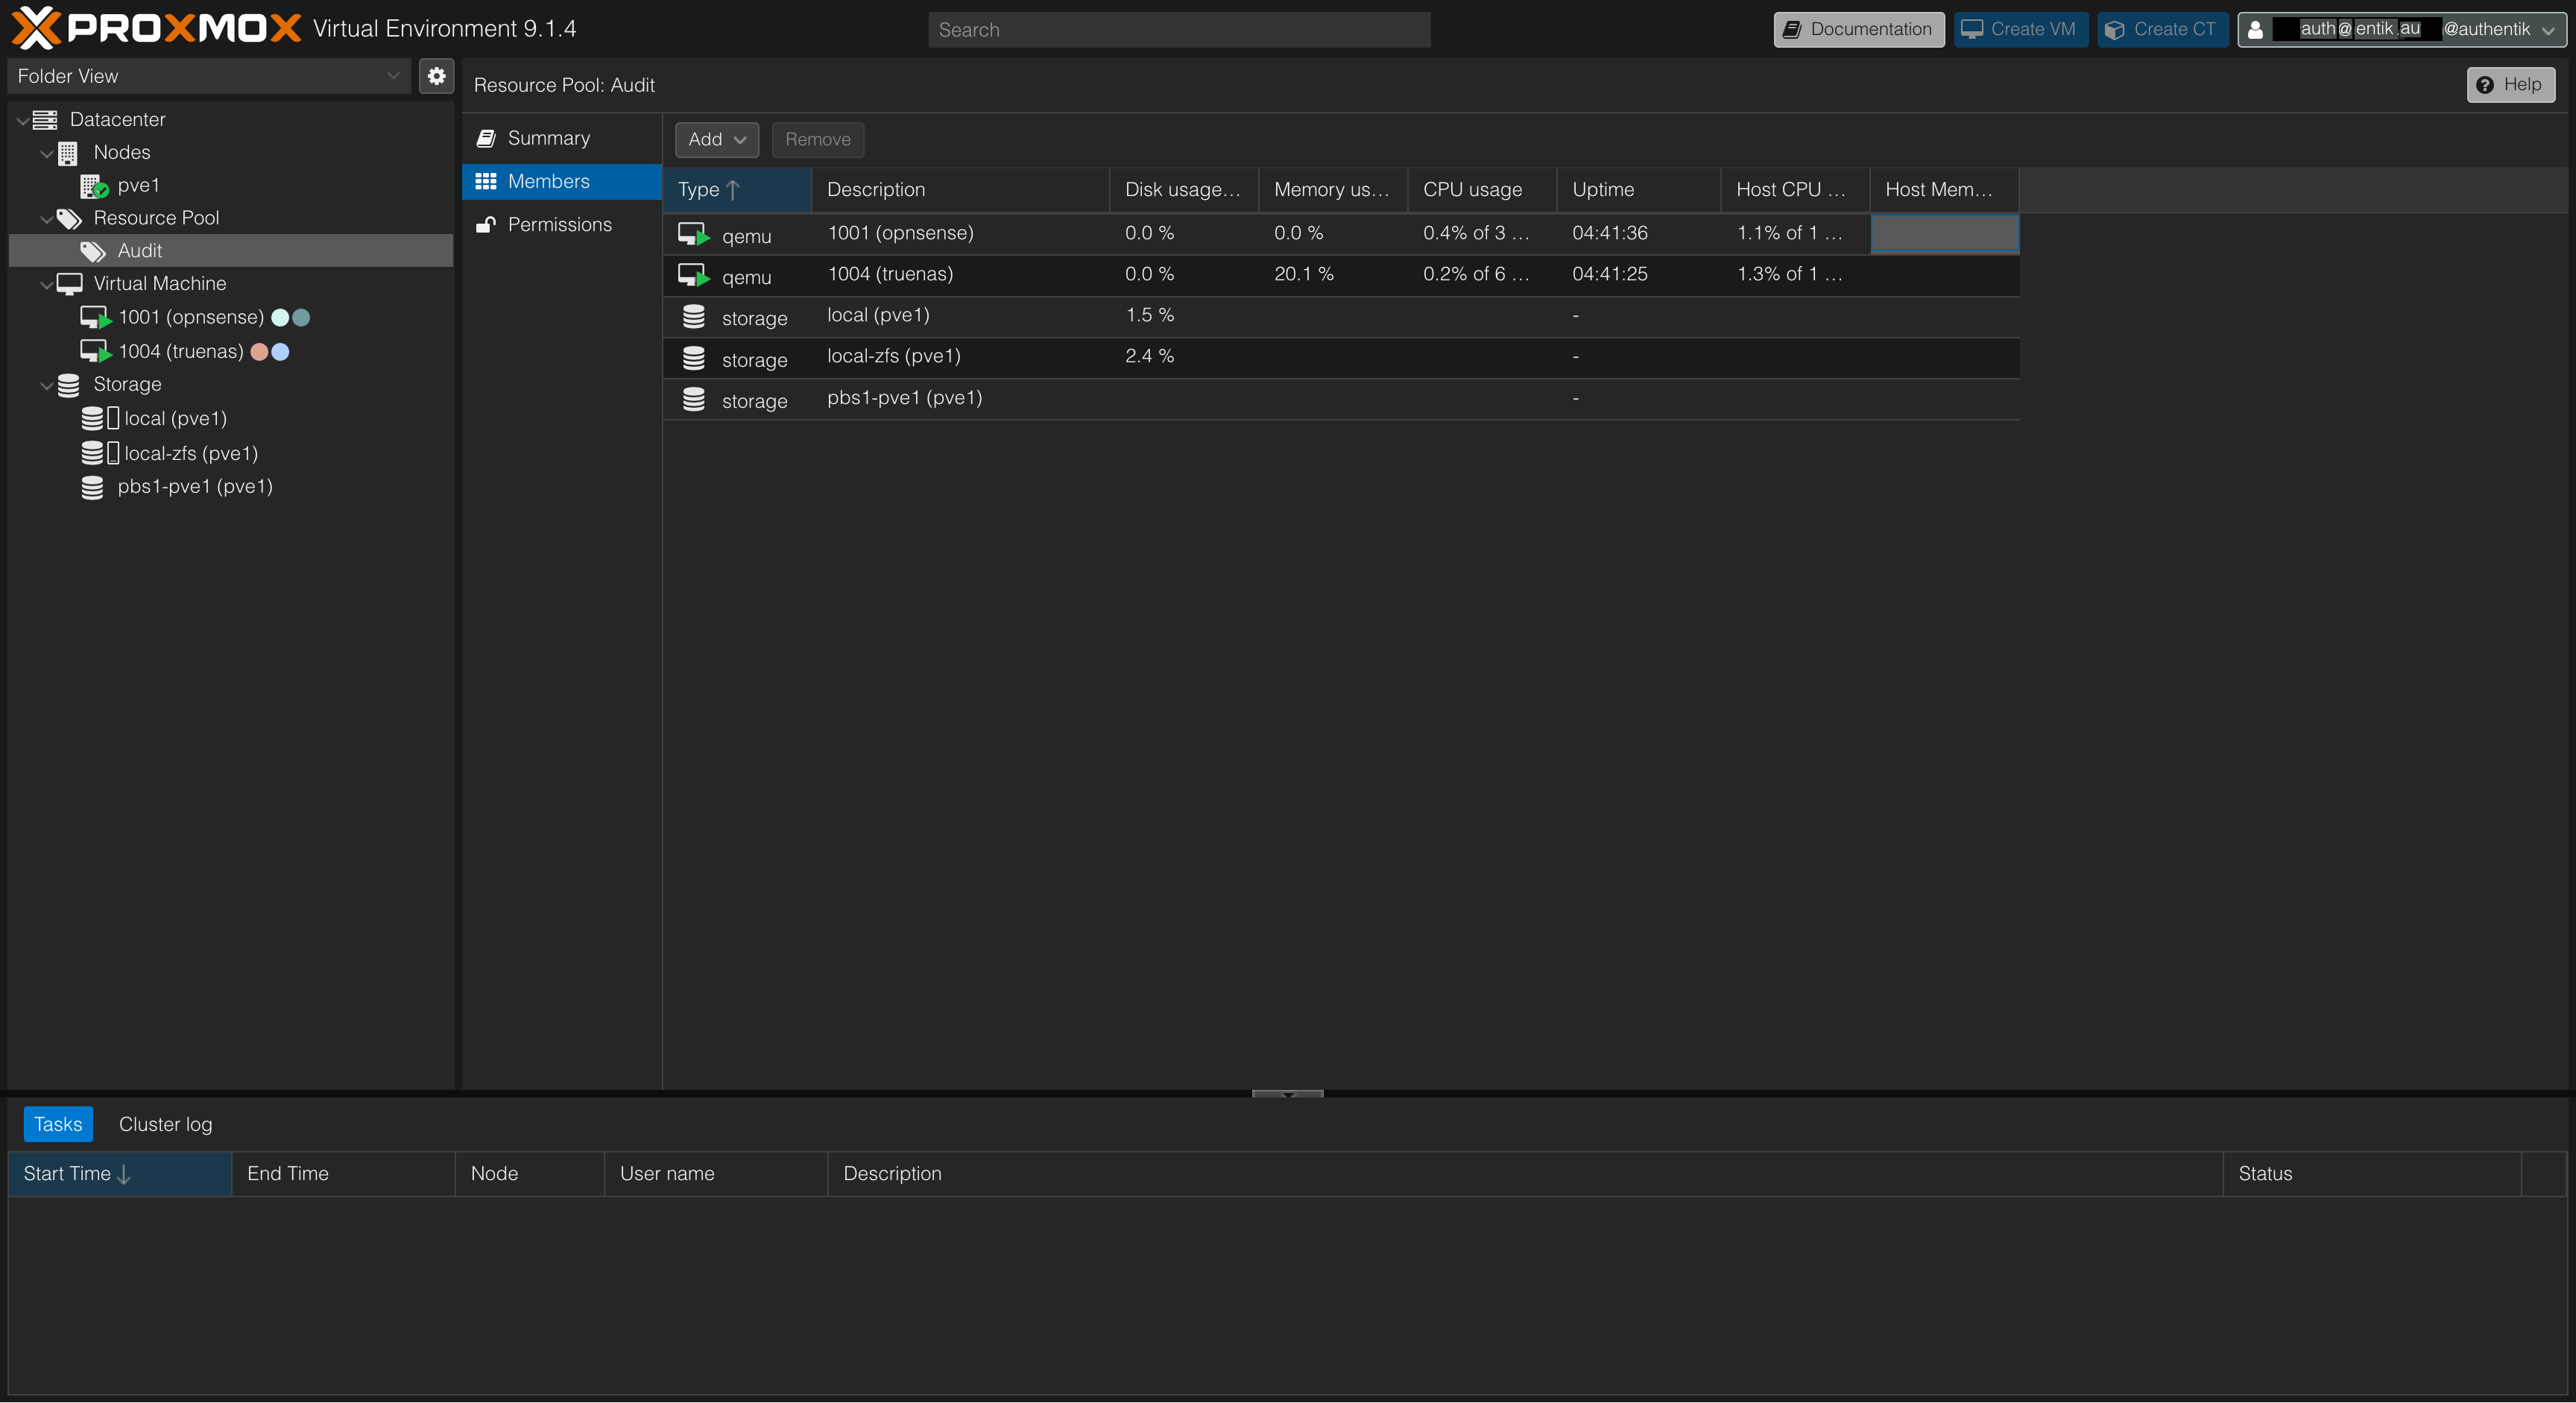
Add members to the pool at Resource Pool/Audit/Members/Edit to allow certain VMs and storages to be audited.
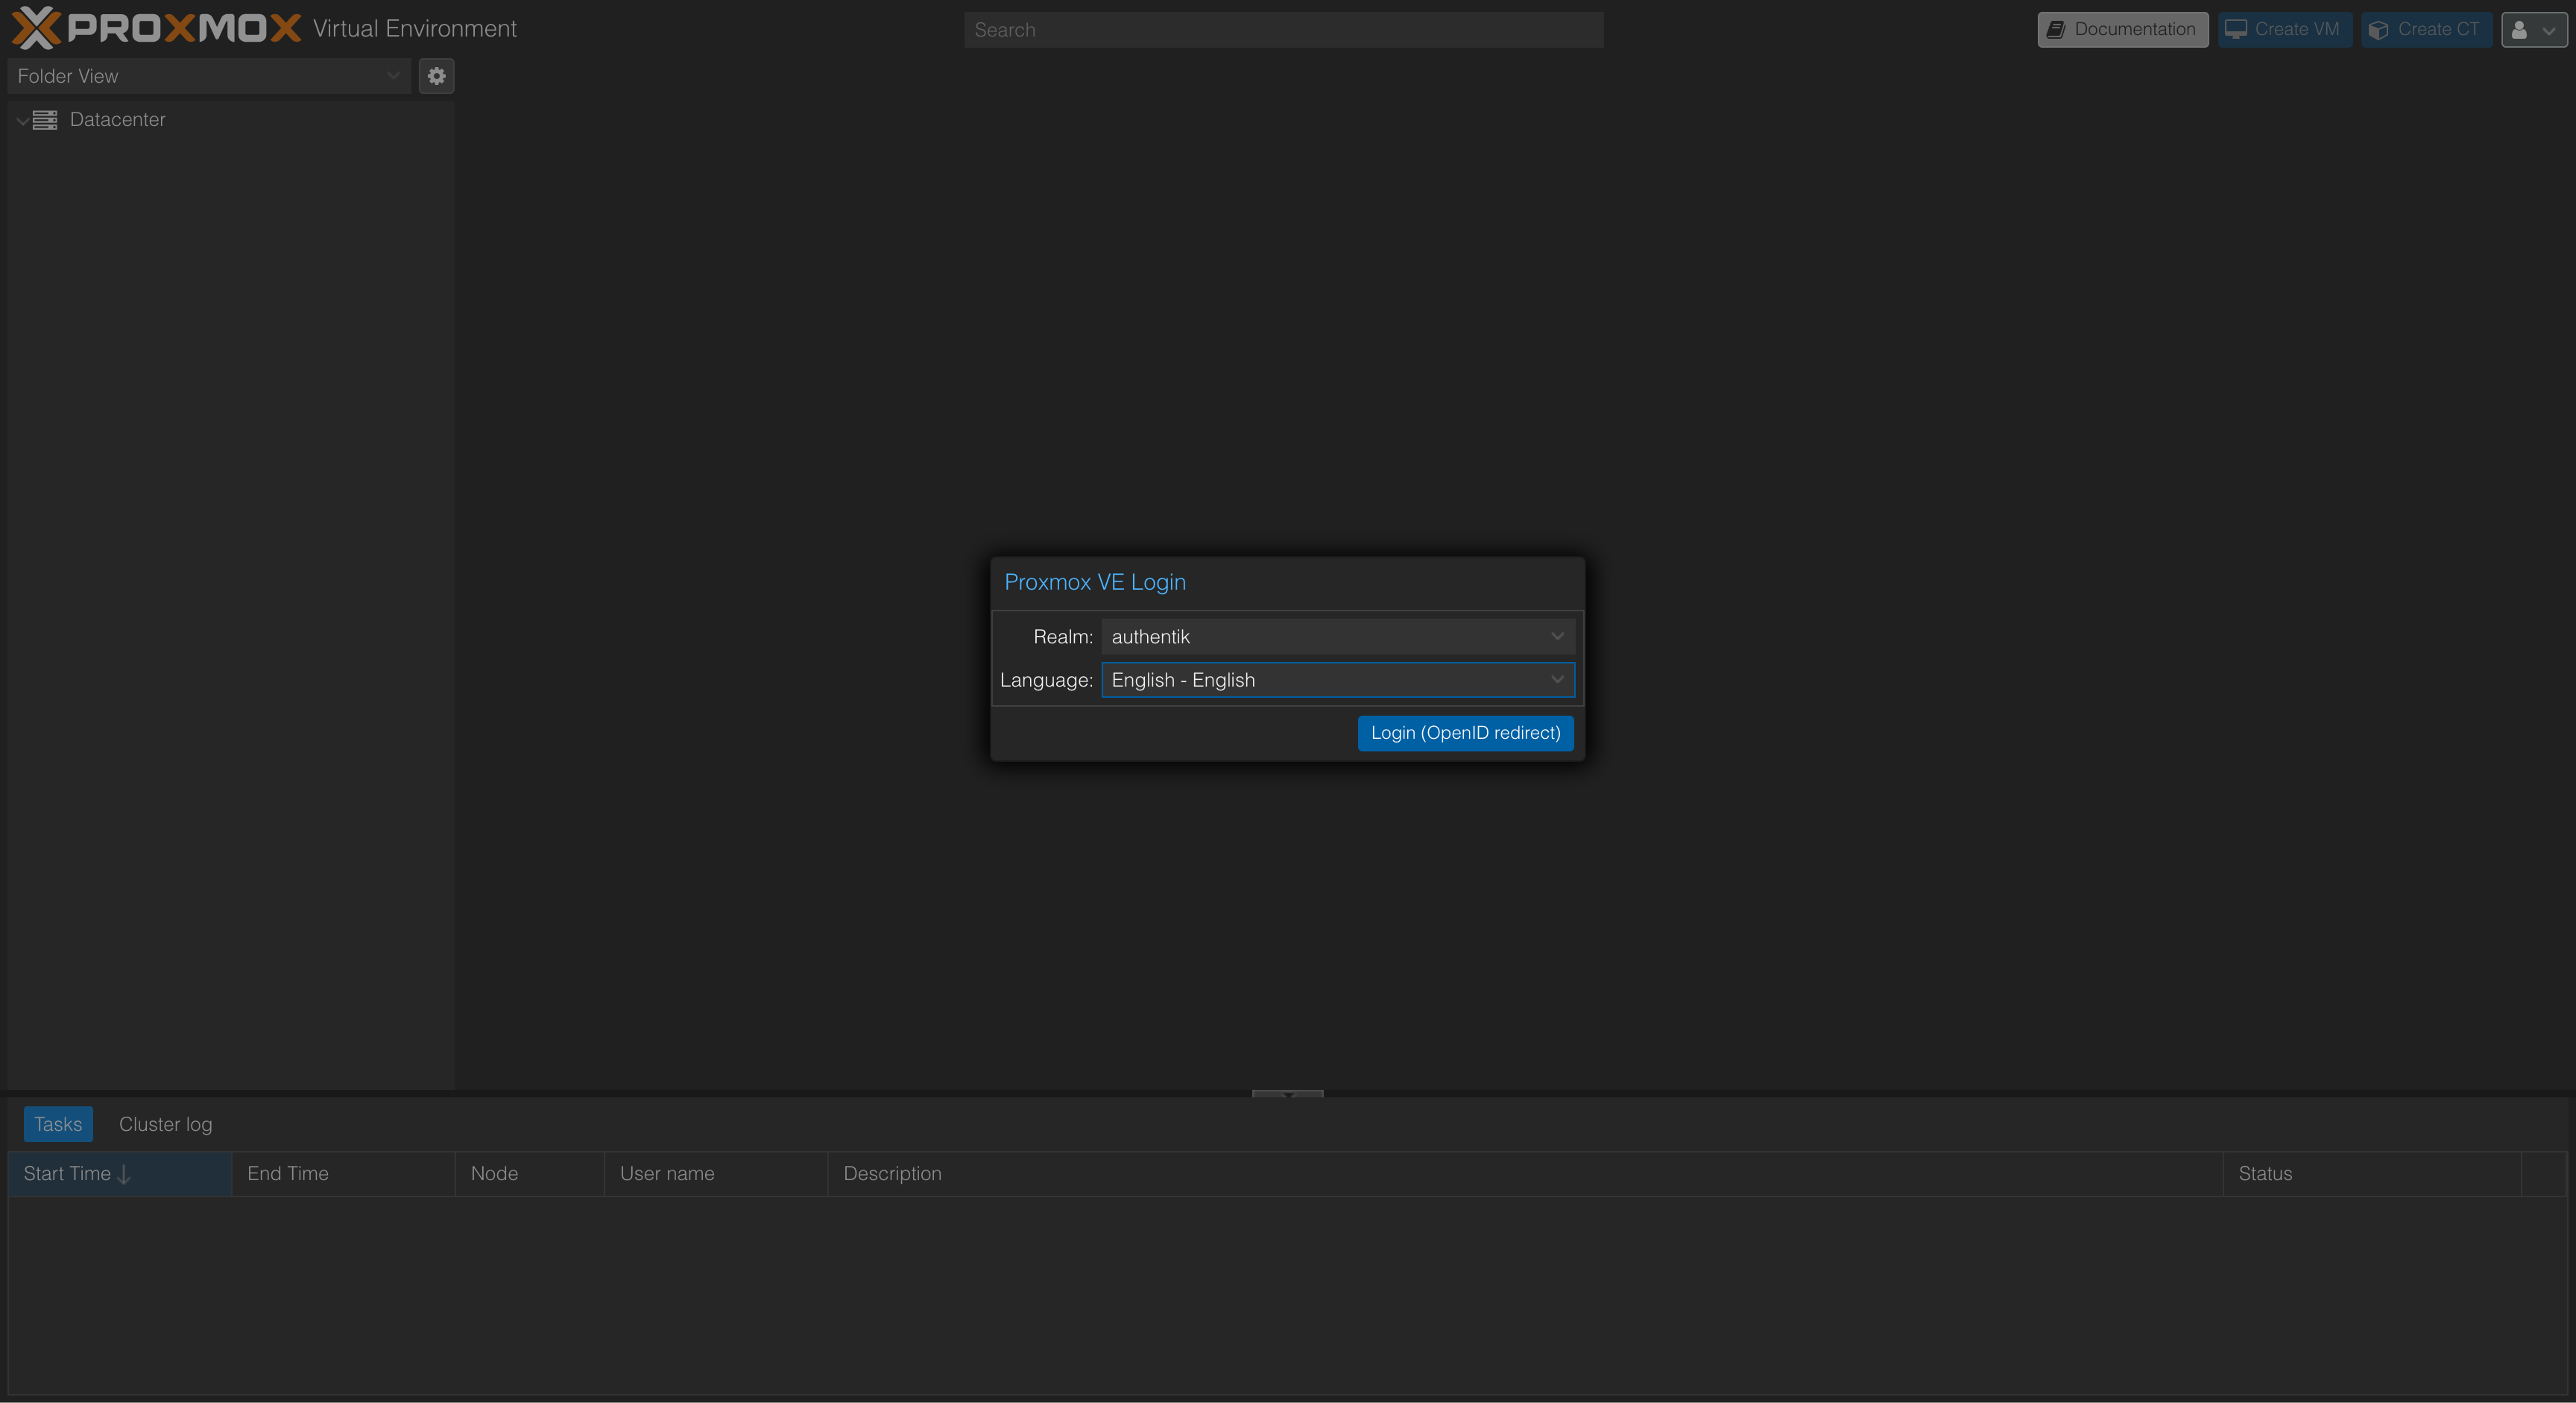
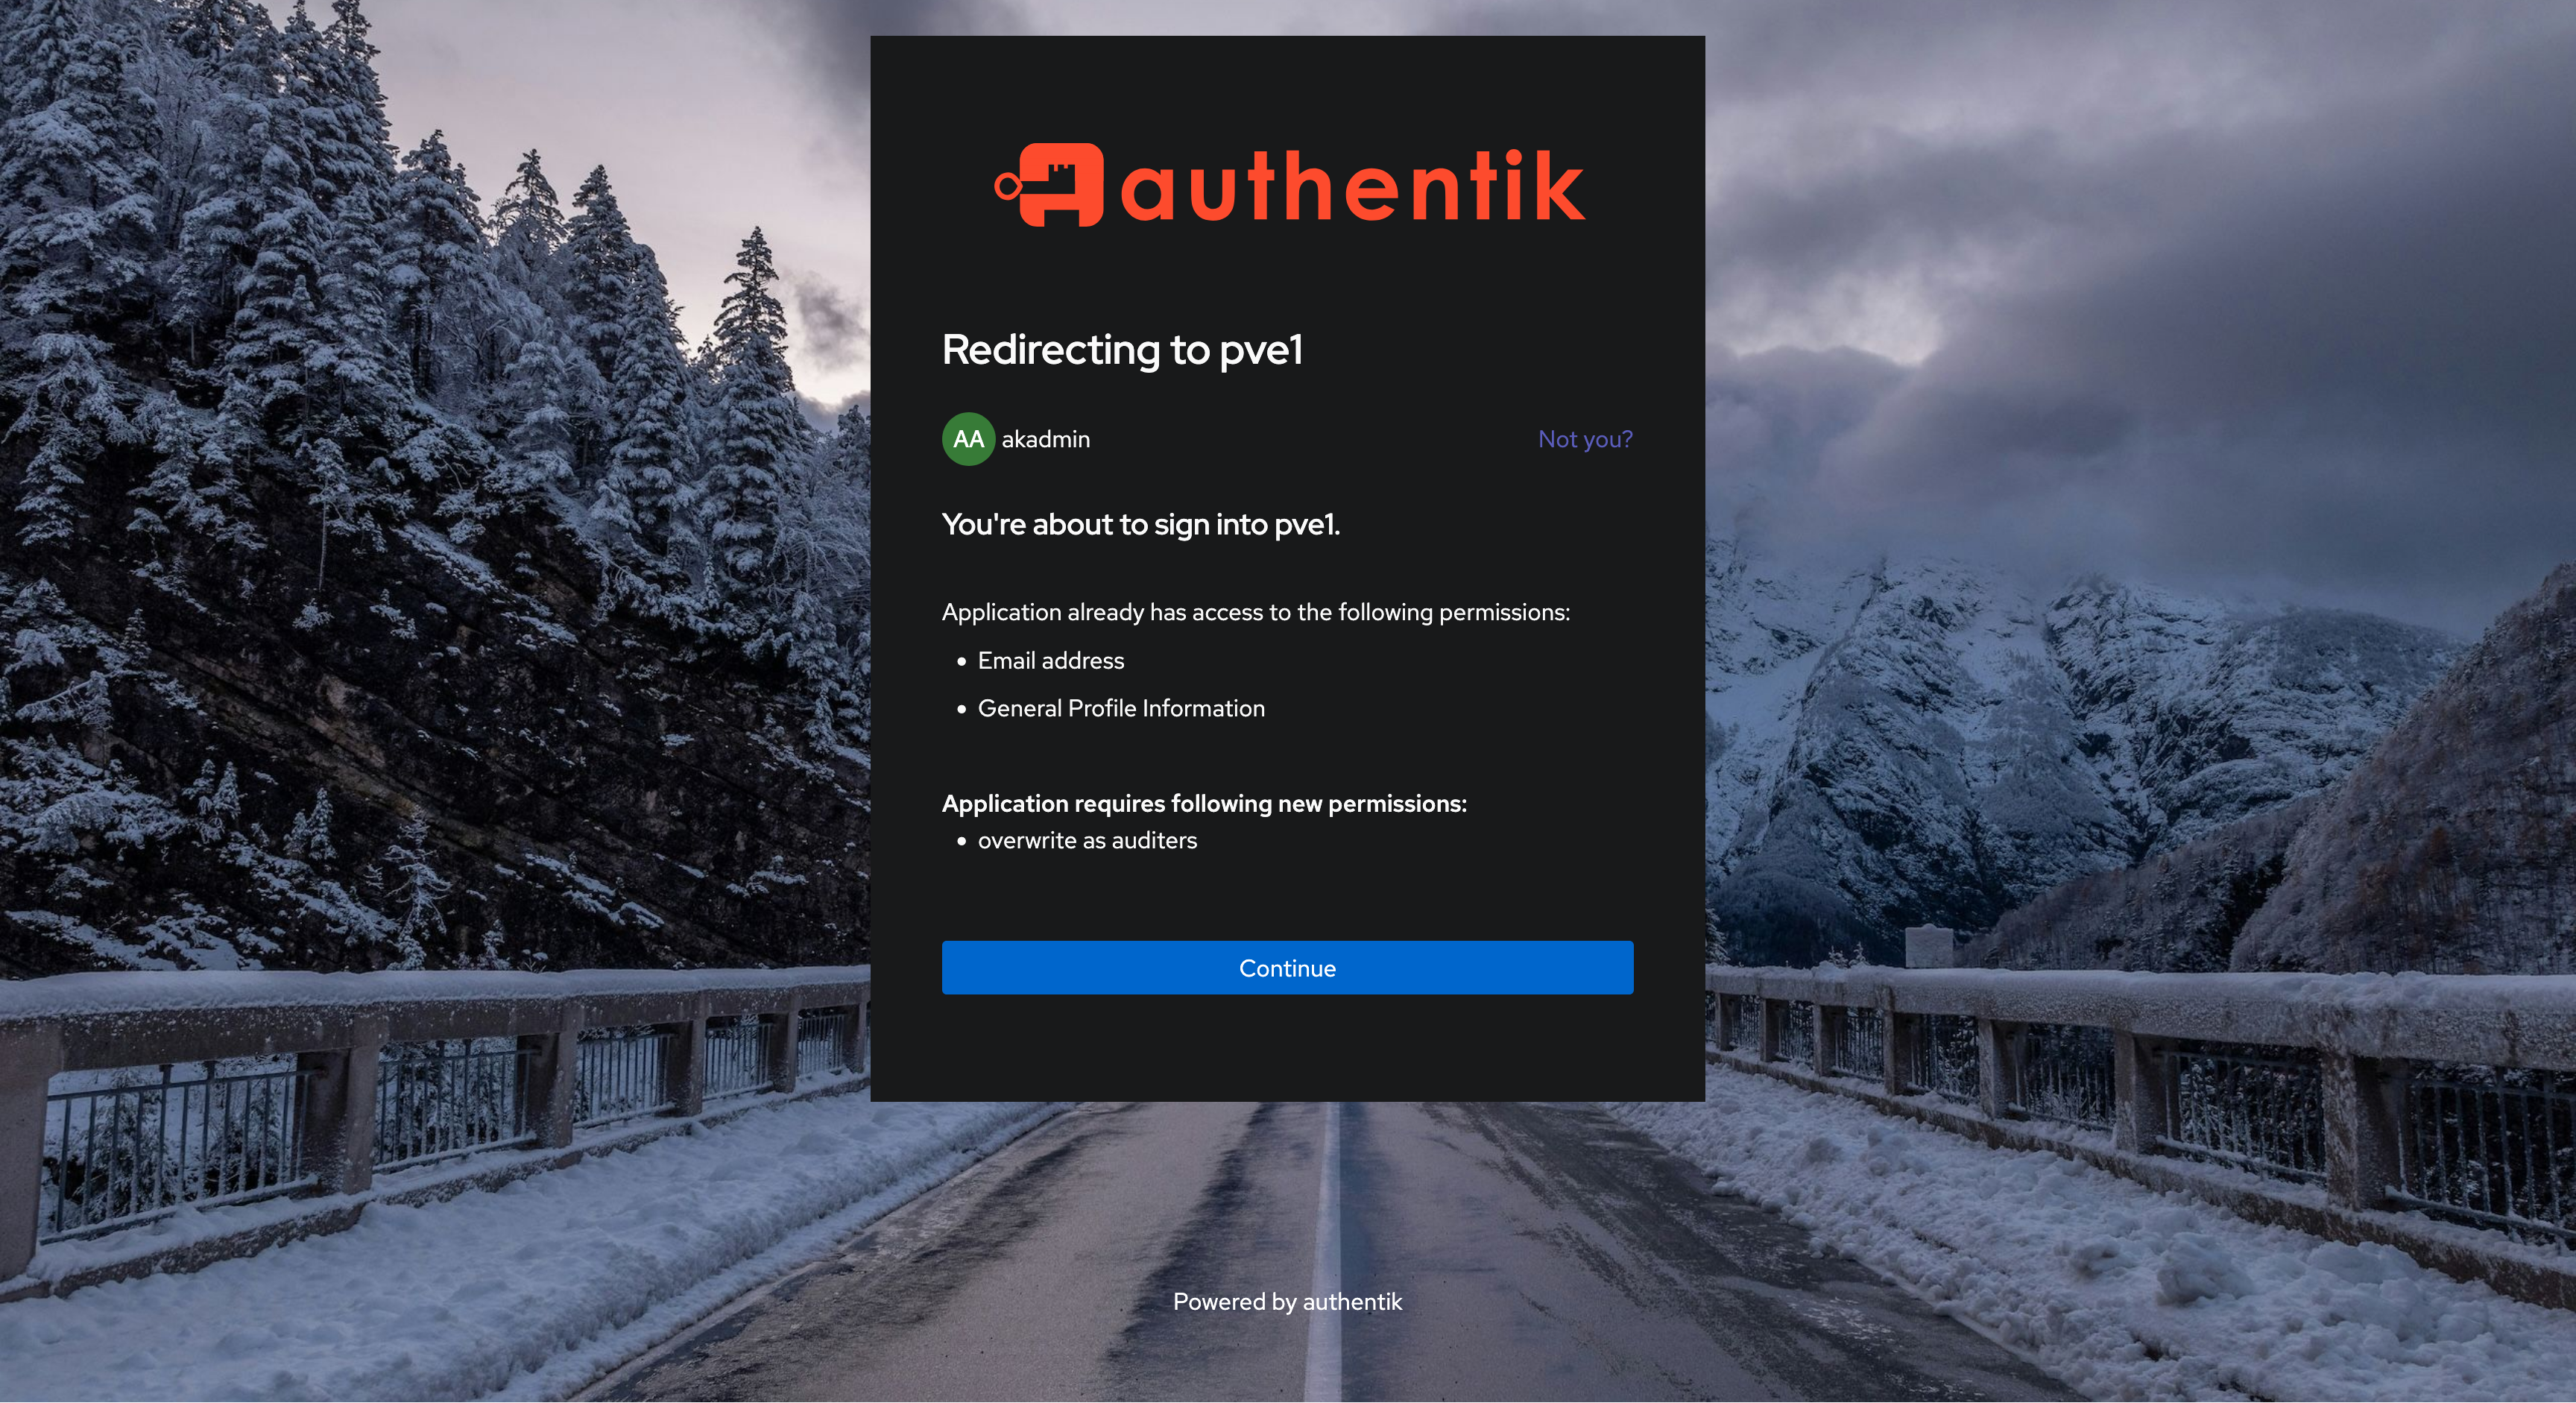
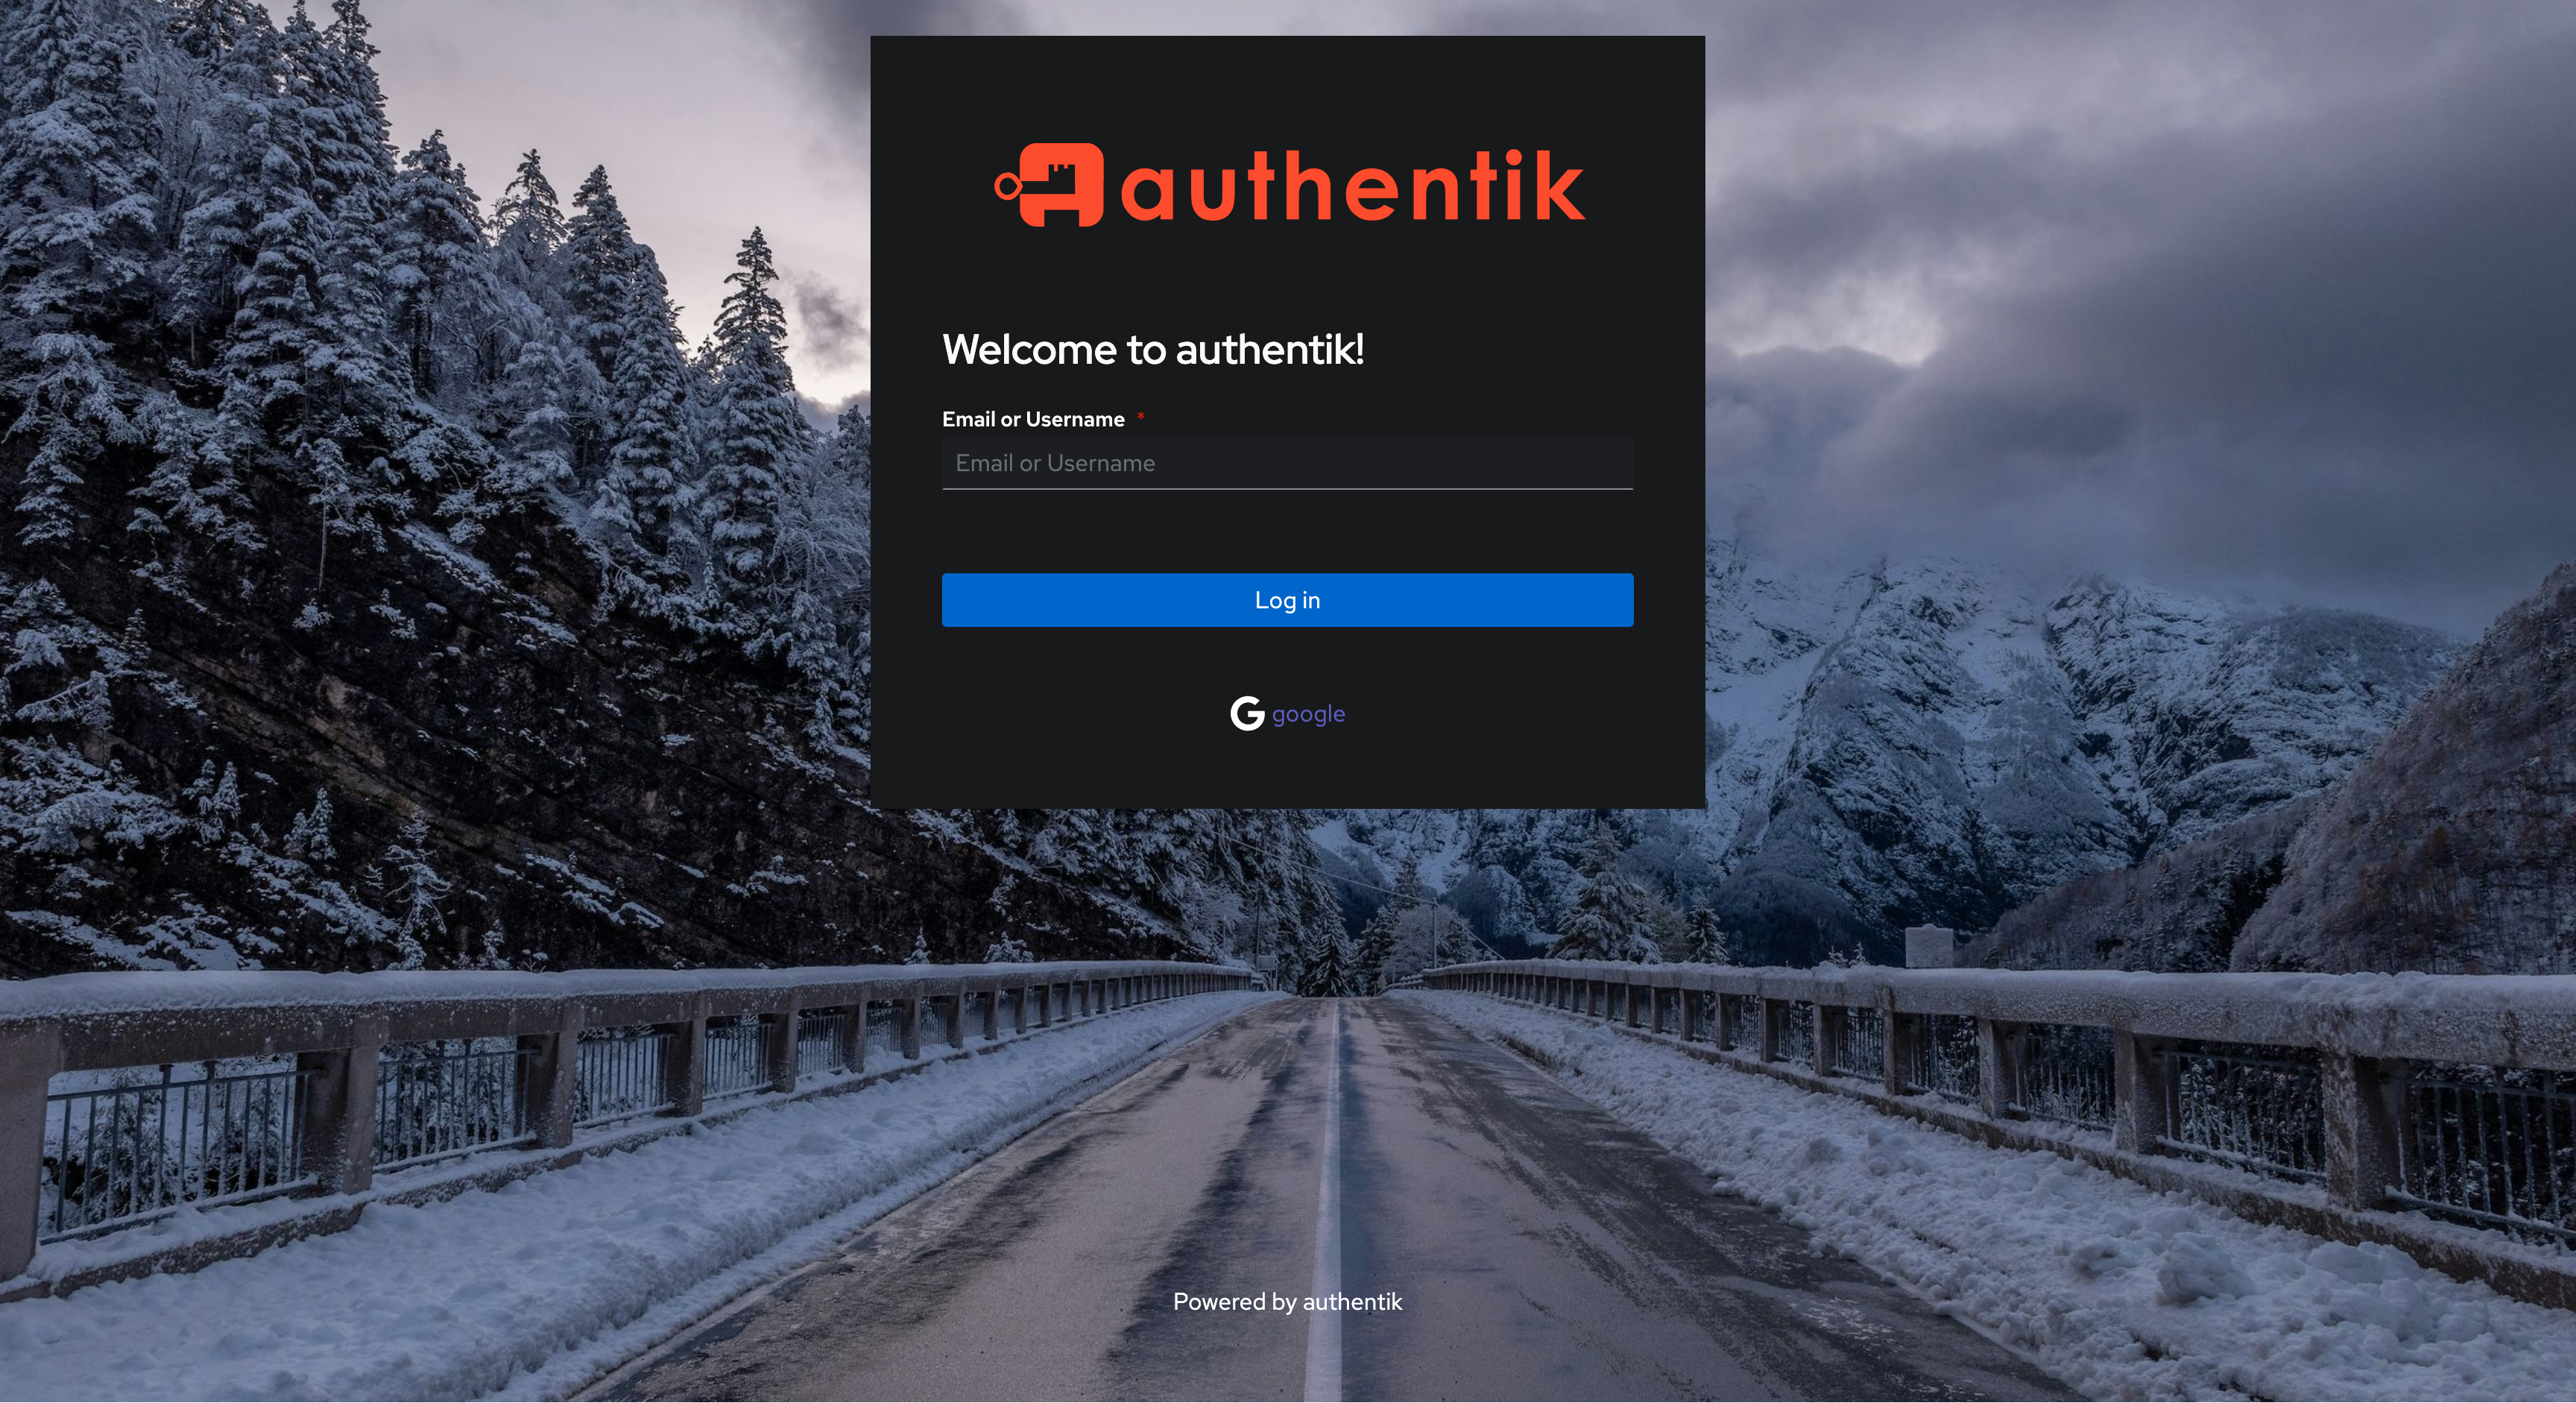
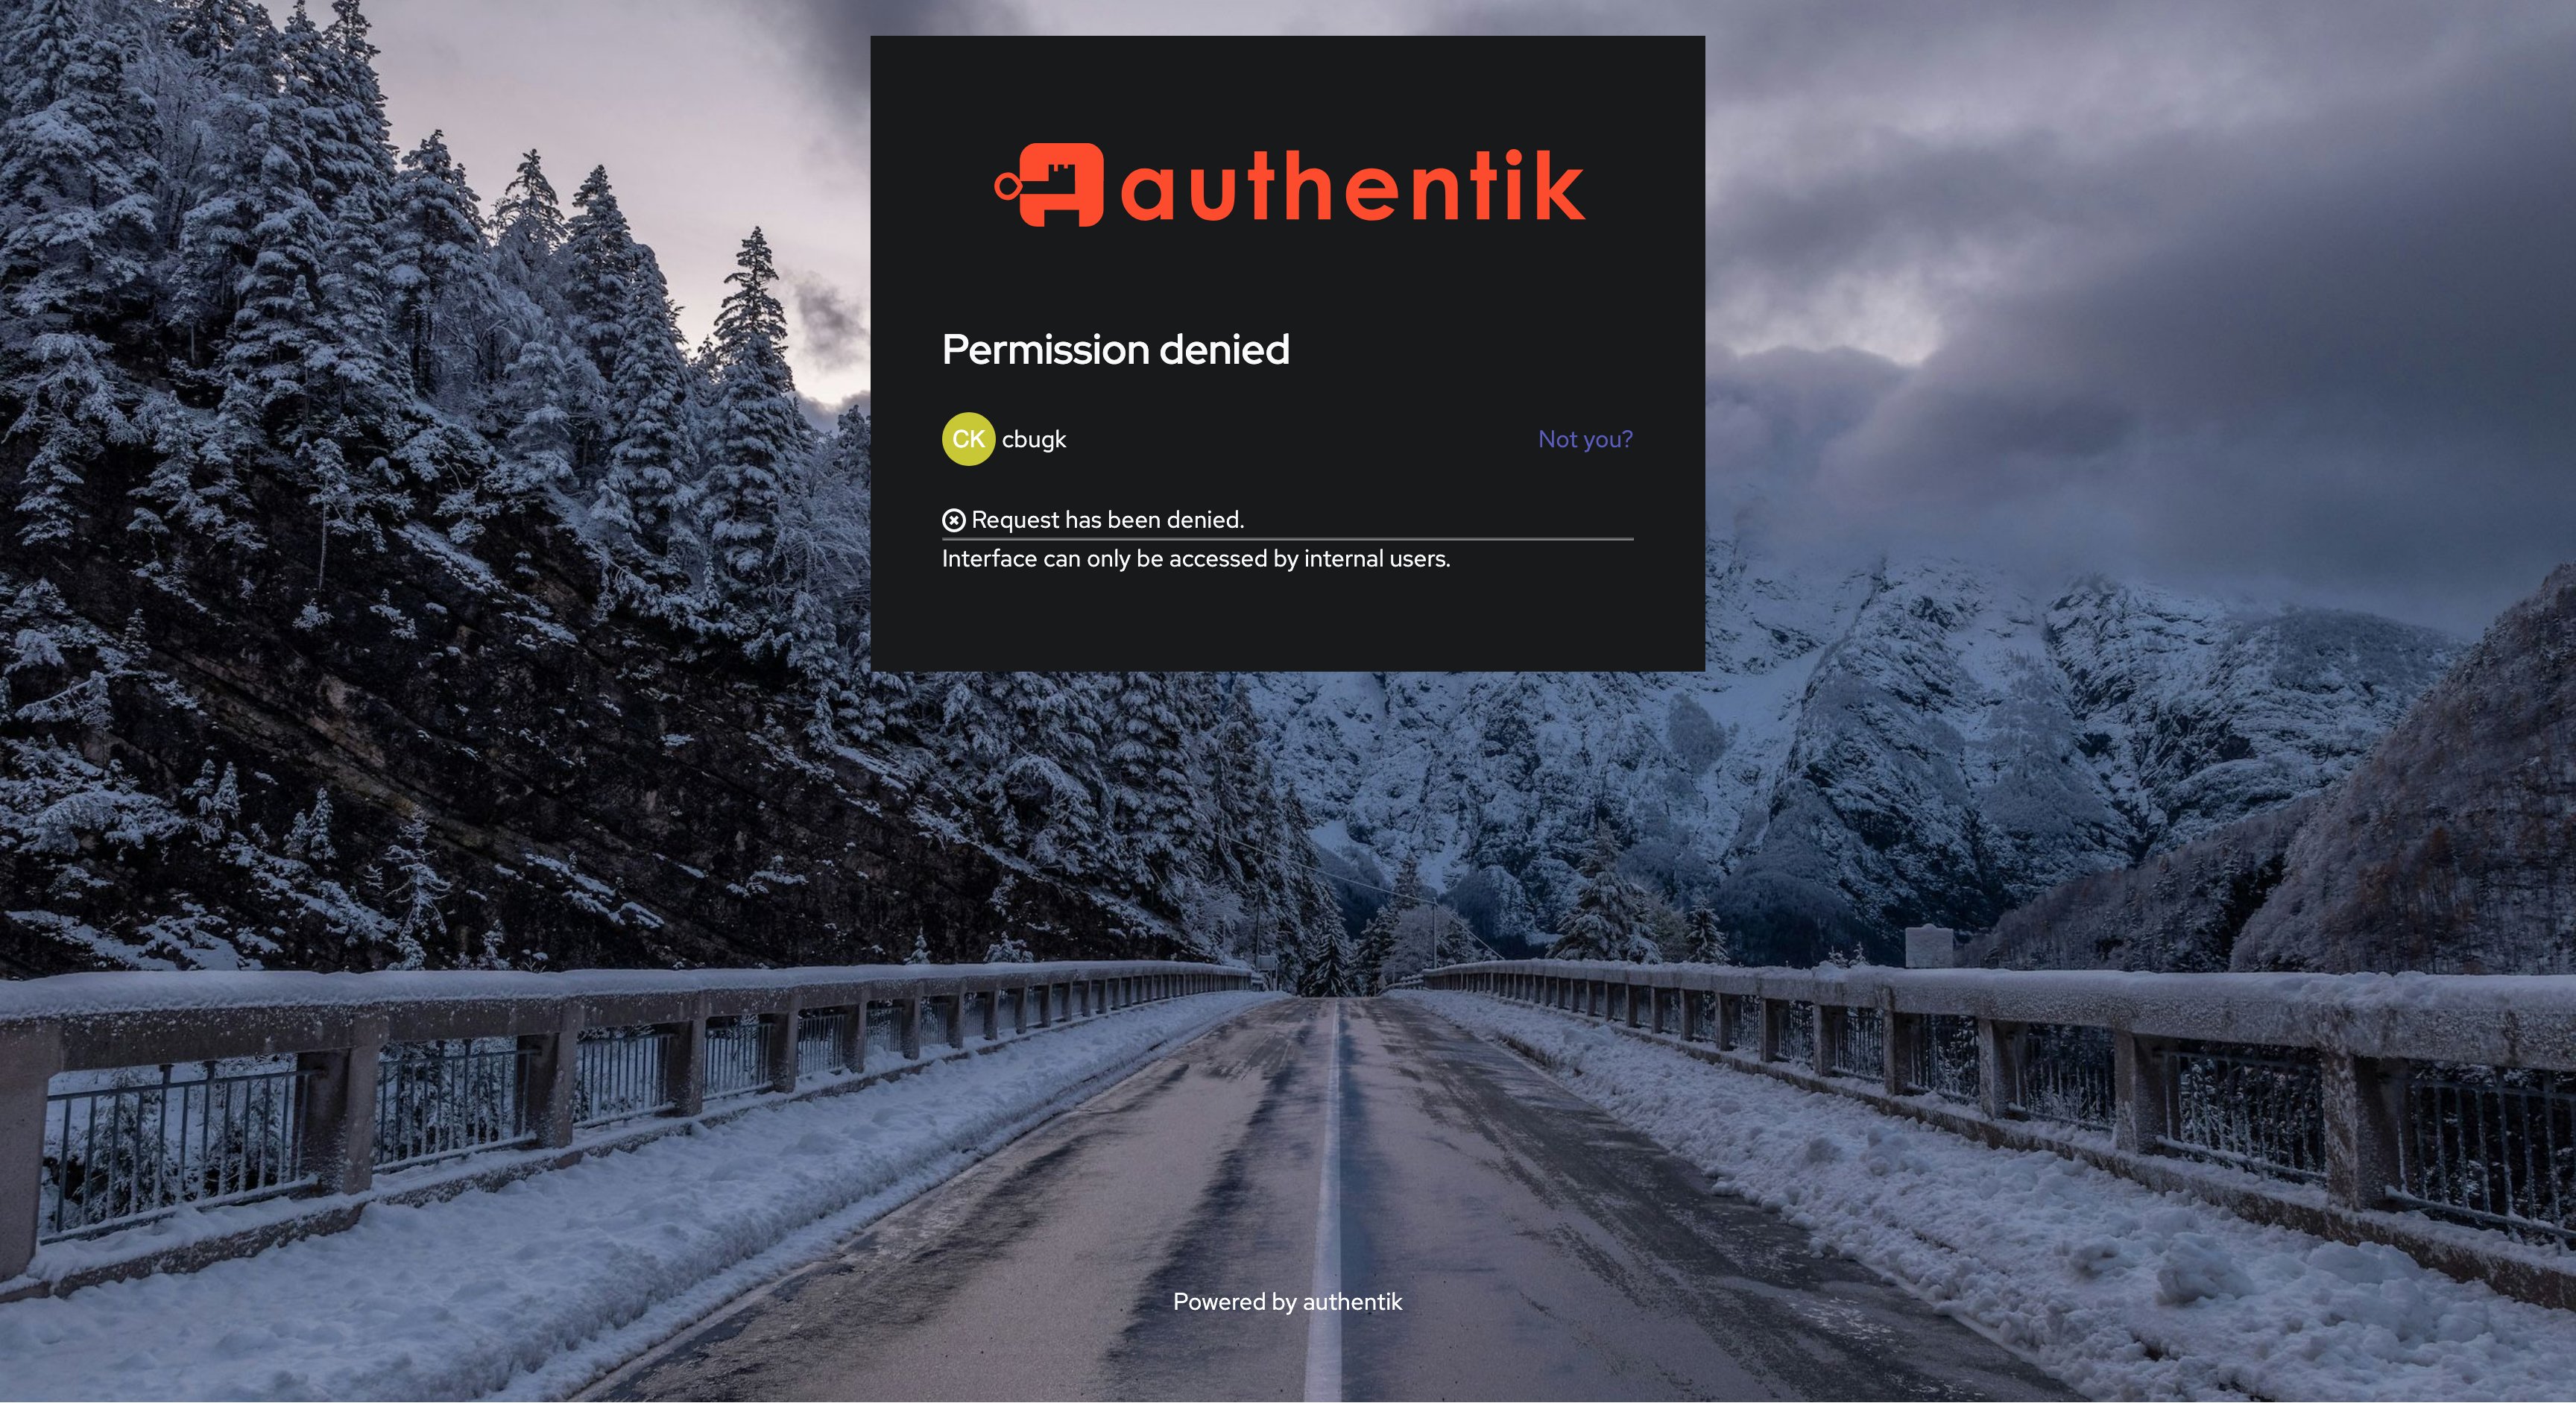
If all goes well, Proxmox login screen should redirect you to Authentik and there on to Google account selection. This specific setup requires changing Google accounts by oneself prior to logging in with another account (between photos 4 and 5 below).
- Privileged resource pool visible by root accout.
- Login page after logout (switched Realm)
- Authentik’s admin account, switching account with “Not you?” button. Mind that internal accounts, as long as they have email addresses set, work as well.
- Click on Google, then select a logged-in account there.
- This will ask you of a username and then error out as shown. No problem head back to PVE. Also username is arbitrary information at this point.
- Logged in as a Just-In-Time / On-The-Fly user with automatically assigned group. Voilà!
Honorable Mentions
-
This DevTo article by Miklos Halasz has gotton me on my feet. There he uses LLDAP and Keycloak. I have not yet concluded on how to integrate LDAP neatly, If it werent for next honorary mention, I could settle for his suggestion.
-
I have come across recent video on kanidm by SUSE after hearing about it from Gemini. I tried utilizing it, and it is promising. However, lack of a WebUI and Authentik having better support by Gemini has eliminated that application for this late-night experiment. Still, as a 4-year-old project it has some jaw-dropping encryption support, 2025 demo is a must watch!
Long Awaited Compose YAML
|
|
Bibliography
- Configure ACME via Cloudflare DNS in Proxmox by Ikiesow
- Using Authentik for Proxmox PVE 8 user and group mapping by Kelly Mansua
- Authentik: Proxmox VE Integration
- A Big Live Demo of Kanidm - William Brown (Everything Open 2025)
- Proxmox Certificate Management Docs
- How to configure OpenID authentication in Proxmox VE by Miklos Halasz